Say Goodbye to Reverse Proxy and Hello to Cloudflare Tunnels
Get setup with Cloudflared and Tunnel with Access restriction in 7 simple steps. ☁️


There comes a time when those who self host on their own hardware need to make decisions on which solutions need to be self hosted on your own hardware and which should be handled by someone or something else. There will always be an ongoing debate around this but that is what makes this community so great.
But the question that most self hosting enthusiasts ask themselves is "who can I trust?" While you might self host your own files and data, what about security? And this is by no means saying Reverse Proxy is not a secure solution but more of a way to offer another solution that takes away a potential point of failure. But is it worth the potential risk in trust? I think it depends on who that question is asked to. Do you trust Cloudflare? Do you trust your own ISP? Do you trust your own hardware to stay online every single day? There's plenty of potential risk factors when self hosting on your own hardware.
I have been using Nginx Proxy Manager for the better part of 4 years. It's self hosted in a Docker container on my Proxmox host. It's light weight, easy to use and just always works. When I add a new proxy host, I can very easily press a couple buttons and attach a certificate to it through Let's Encrypt all through the Nginx Proxy Manager Dashboard. This is what I use as my traffic router so when you visit a website with a domain that I host on my network, the network knows where to send you. Nginx Proxy Manager let's you host websites on the same IP address under different ports. Ports act like identifiers for each application or website. These ports are routed internally rather than externally and Nginx Proxy Manager makes this possible so you do not have to open more ports on your router. It fools your router into thinking it's using port 80 or 443 which are the only ports needed open for Nginx Proxy manager to work externally.
How does this Nginx Proxy Manager Compare to Cloudflare Tunnels?
In all honestly, Nginx Proxy Manager is much different than Cloudflare Tunnels. Cloudflare Tunnel daemon creates an encrypted tunnel between your origin web server and Cloudflare’s nearest data center, all without opening any public inbound ports.
After locking down all origin server ports and protocols using your firewall, any requests on HTTP/S ports are dropped, including volumetric DDoS attacks. Data breach attempts — such as snooping of data in transit or brute force login attacks — are blocked entirely. Nginx Proxy Manager does not do this on it's own. It only does the traffic routing part.
Why would you need Cloudflare Tunnels?
Tunnel allows you to quickly deploy infrastructure in a Zero Trust environment, so all requests to your resources first pass through Cloudflare’s security filters.
When Tunnel is combined with Cloudflare Access, users are authenticated by major identity providers (like Gsuite and Okta) without the help of a VPN. My favorite is the simple one time pin verified by allowed email addresses. It's simple and emails arrive almost instantly. So for me the biggest advantage for using Cloudflare Tunnels is the option to add authentication.
Another big reason is if you have dynamic IP address. It can be really difficult to self host anything if your IP address is always changing. Especially for those who have very short leases. Tunnels puts in the work and reroutes all of that data for you. So if your IP were to change, Cloudflare Tunnel will notice and automatically adapt.

Can this be done with self hosted alternatives?
The short answer is yes. You can use Fail2ban for mitigating DDoS and you can also use authentication apps such as Authelia or Authentik. There's other features Cloudflare offers such as edge caching... I doubt you would setup your own cache server... but I wouldn't put it past you!
If you do choose to go the self hosted route, you're obligated to setup at least 2 more applications for security.
Setup Cloudflared with Tunnel and Access
Phew! You made it through the barrage of text about what all this stuff is. Cool! Now it's time to try it out.
Let's run a quick example setup using Cloudflare Tunnel with access using a one time pin and allowed email address. This is assuming you already have a domain setup in Cloudflare and have swapped out the DNS servers for Cloudflare DNS servers. Keep in mind, this is all FREE.
Step 1
Sign into Cloudflare and click over to Cloudflare Zero Trust.
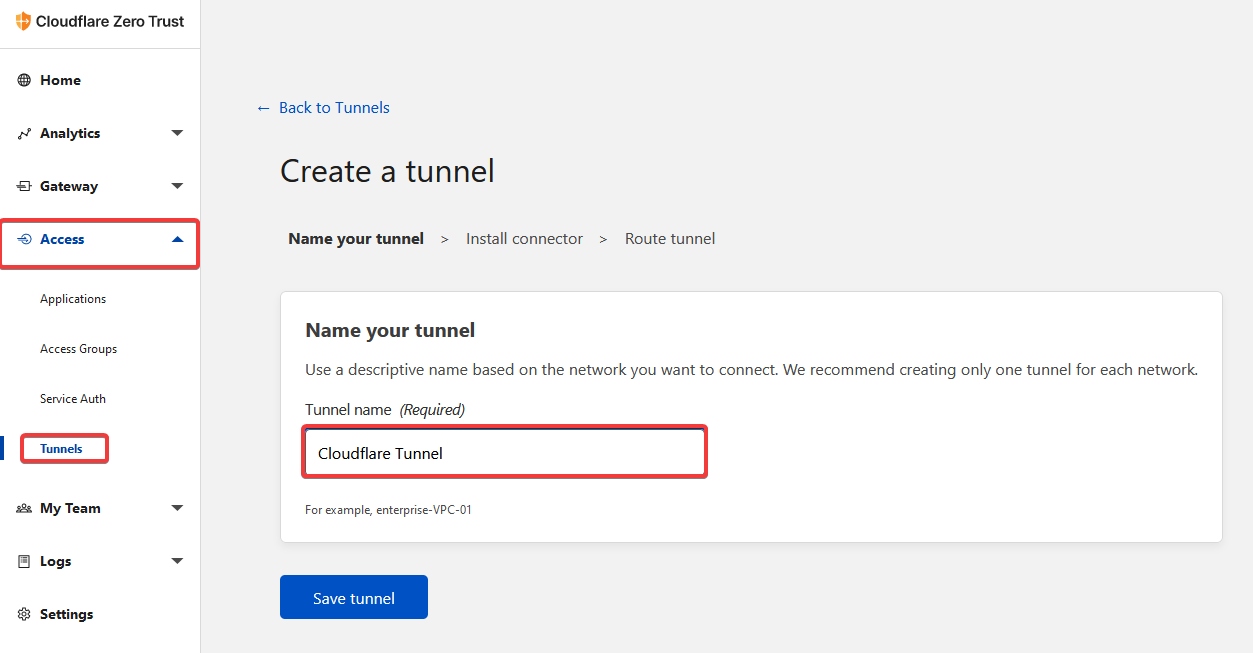
Step 2
Clcik on Access > Tunnels and give your tunnel a name. Click "Save tunnel"
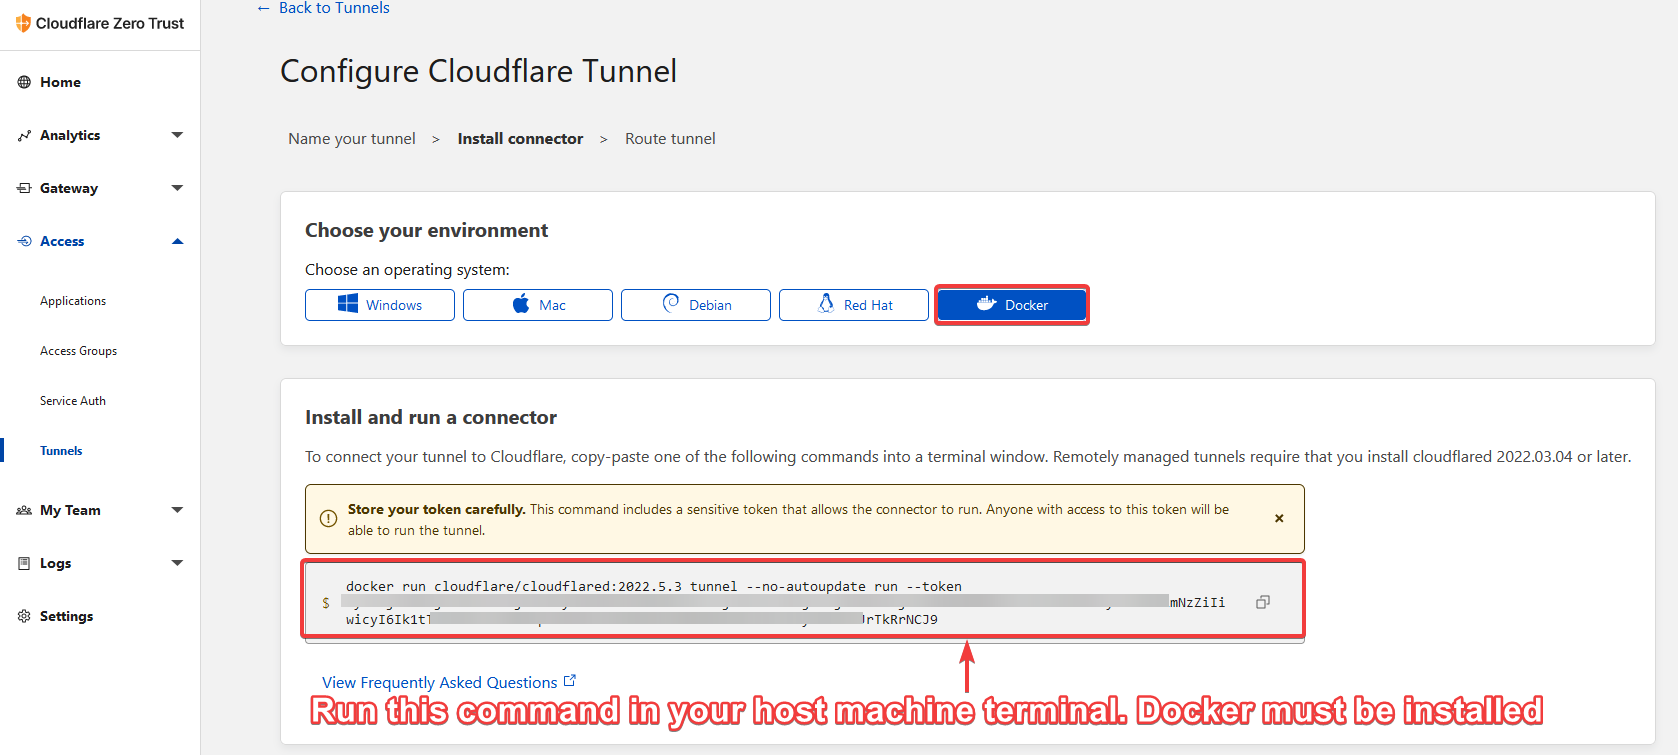
Step 3
Install the Cloudflared connector on your host machine where your docker apps live. Or the website where you want the tunnel to direct traffic. I chose to use the Docker image so I clicked on the Docker button. Grab the command and run it in your host machine terminal. Docker must be installed first.
Step 4
Add a Public Hostname by filling out the form. This should be familiar to those using Nginx Proxy Manager when adding a new proxy host. It's similar here. We assign the IP and port where the app lives on our host to a domain or sub domain within Cloudflare DNS. Then click "Save hostname."
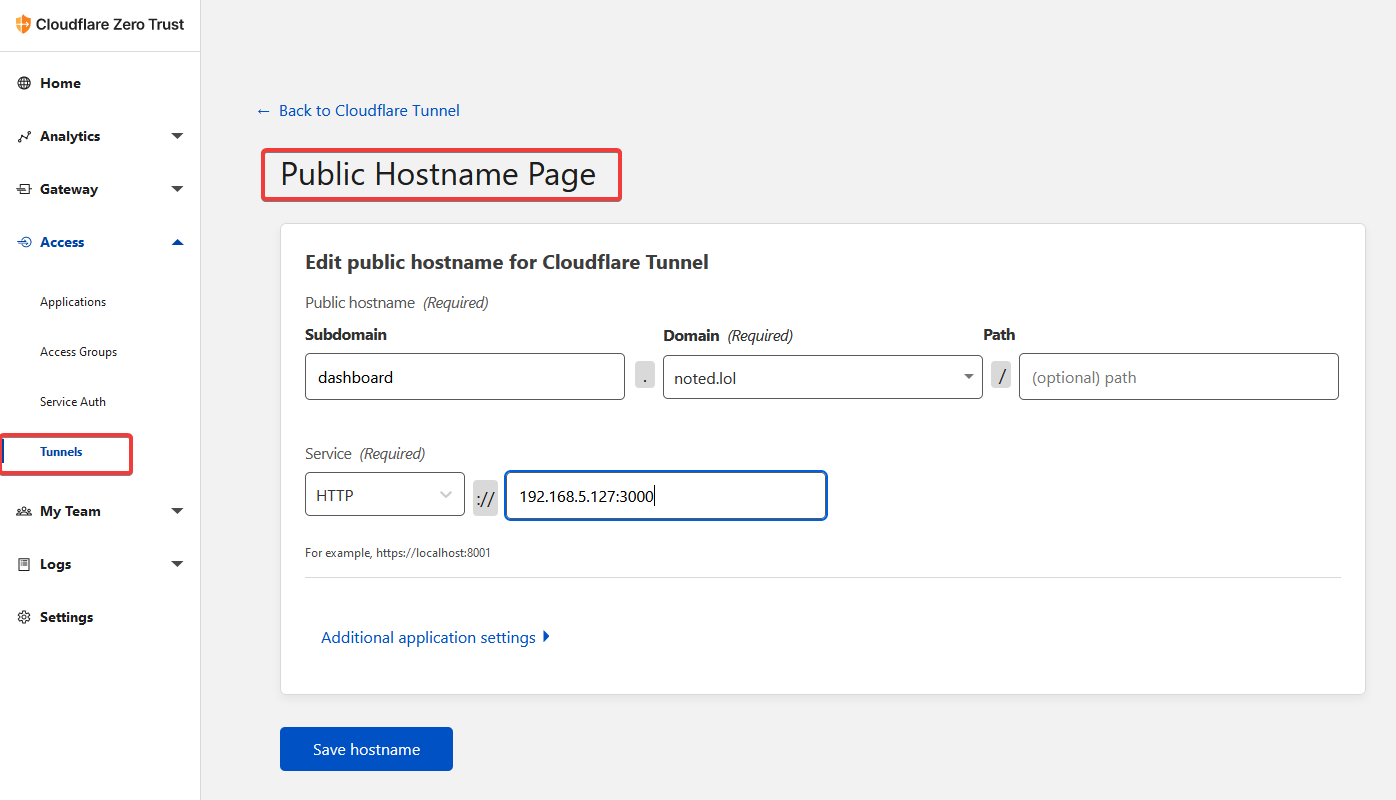
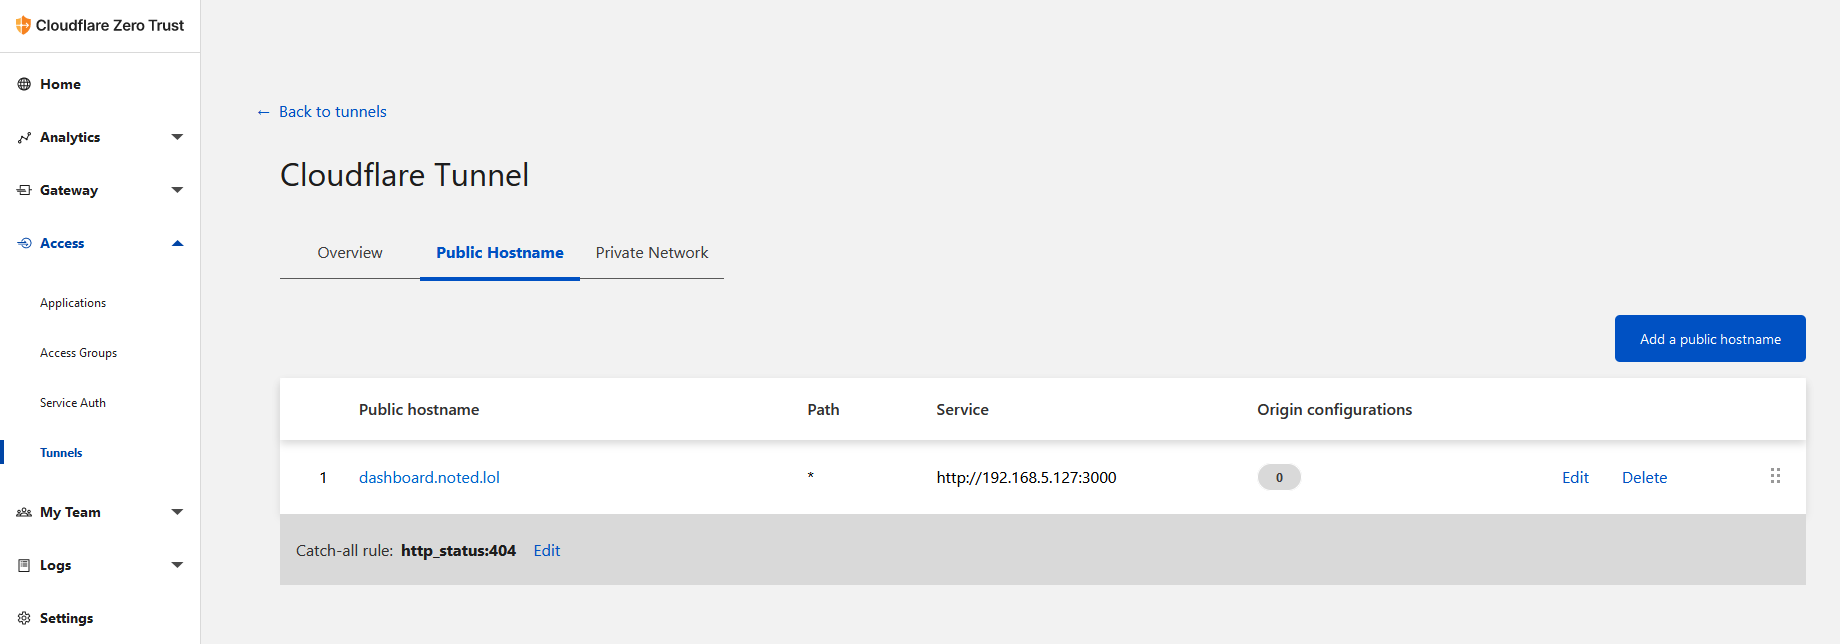
Now you should be able to access the app or website on that domain. You can see all of your domains in the Public Hostname Page. Cloudflare will assign SSL certificates to domains that do not already have one associated with it.
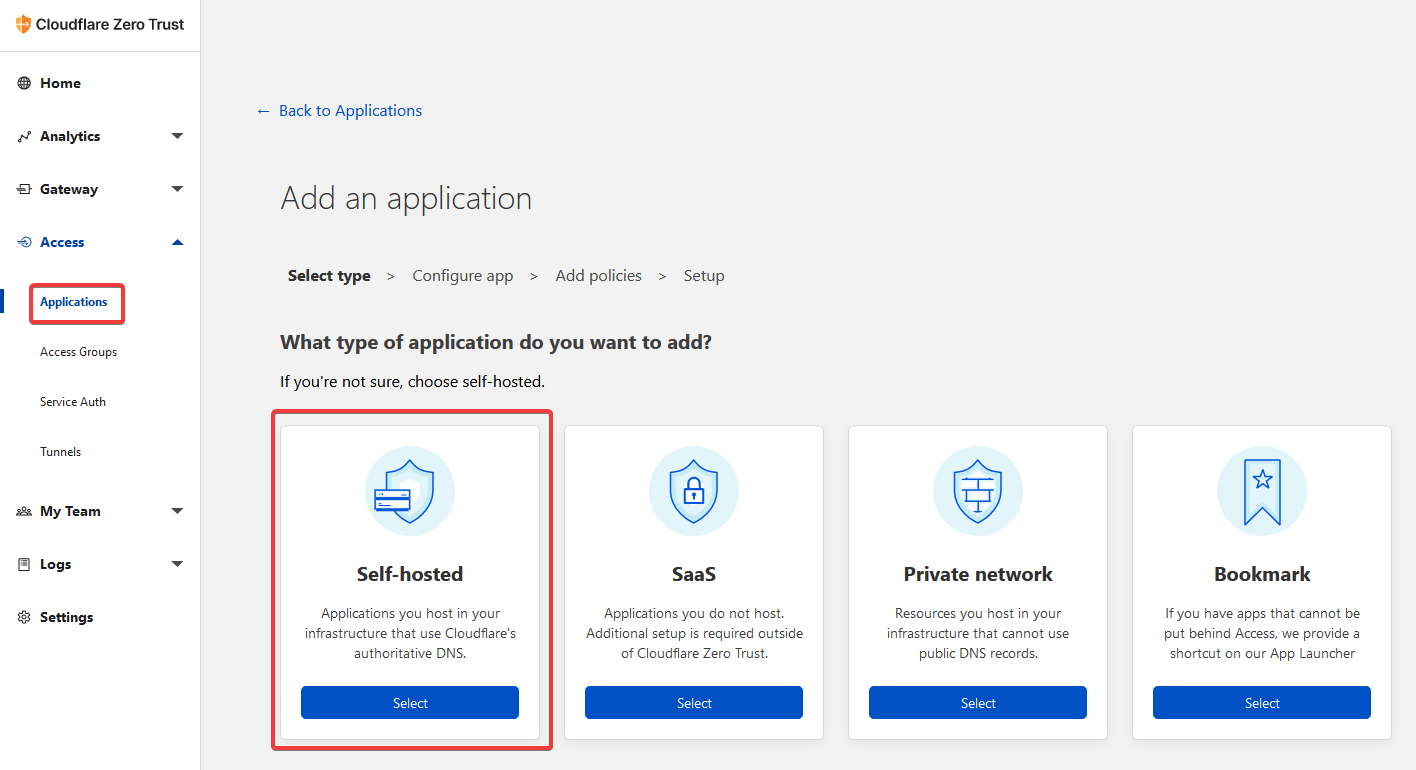
As it sits, there is no authentication so we can add that by clicking on Applications under Access. Now click Self hosted.
Step 5
Fill in the application form. Give it a name and be sure to use the same domain you used when setting up the tunnel. Then click next at the top right.
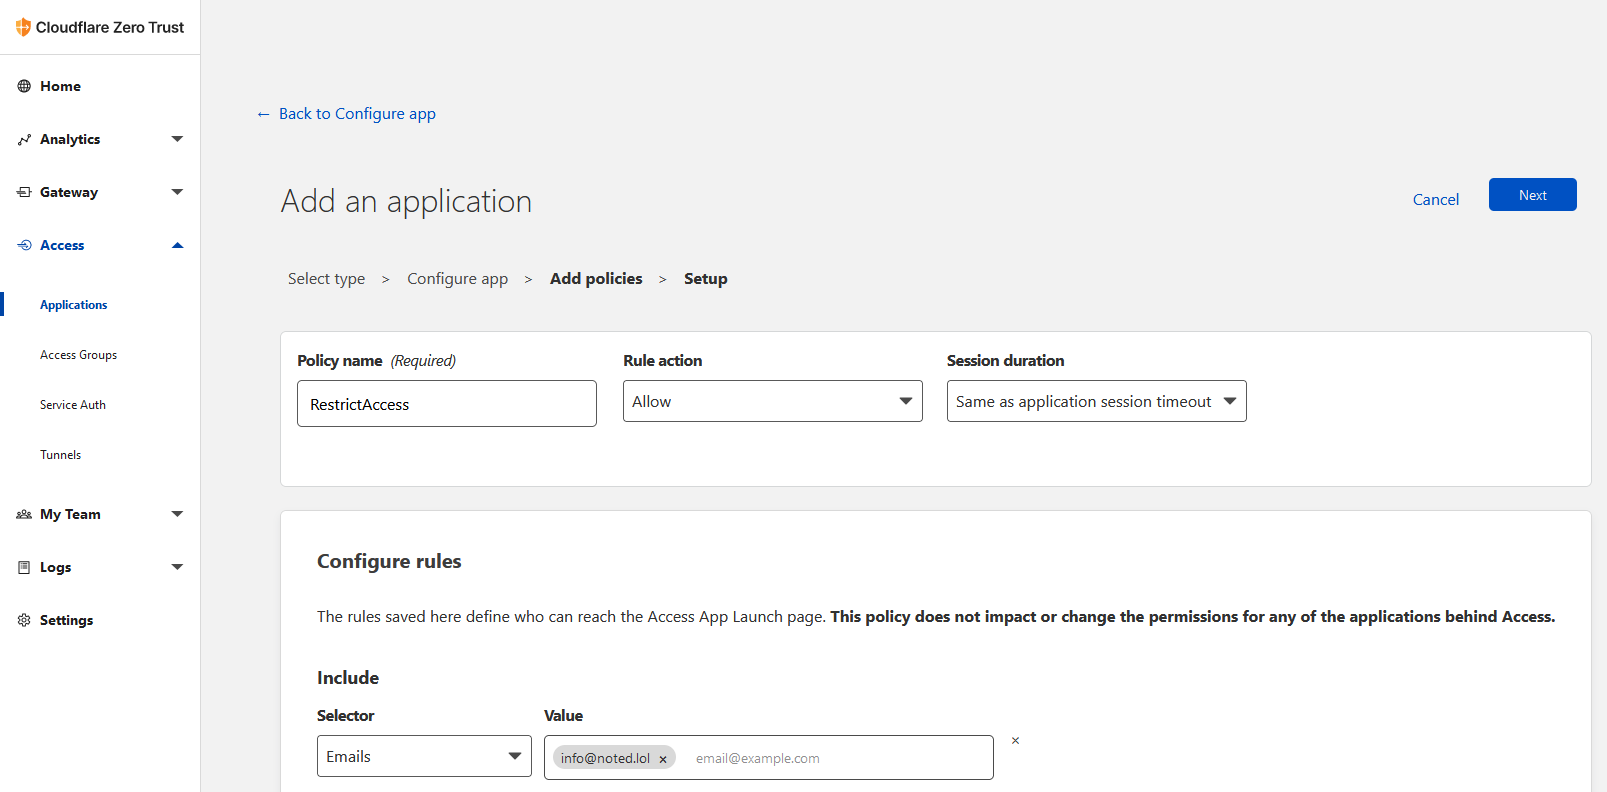
Step 6
Add the access policy by giving it a name, role action and session duration. Under "Configure rules" choose Emails and your selector and add your email into the value field. Click the next button.
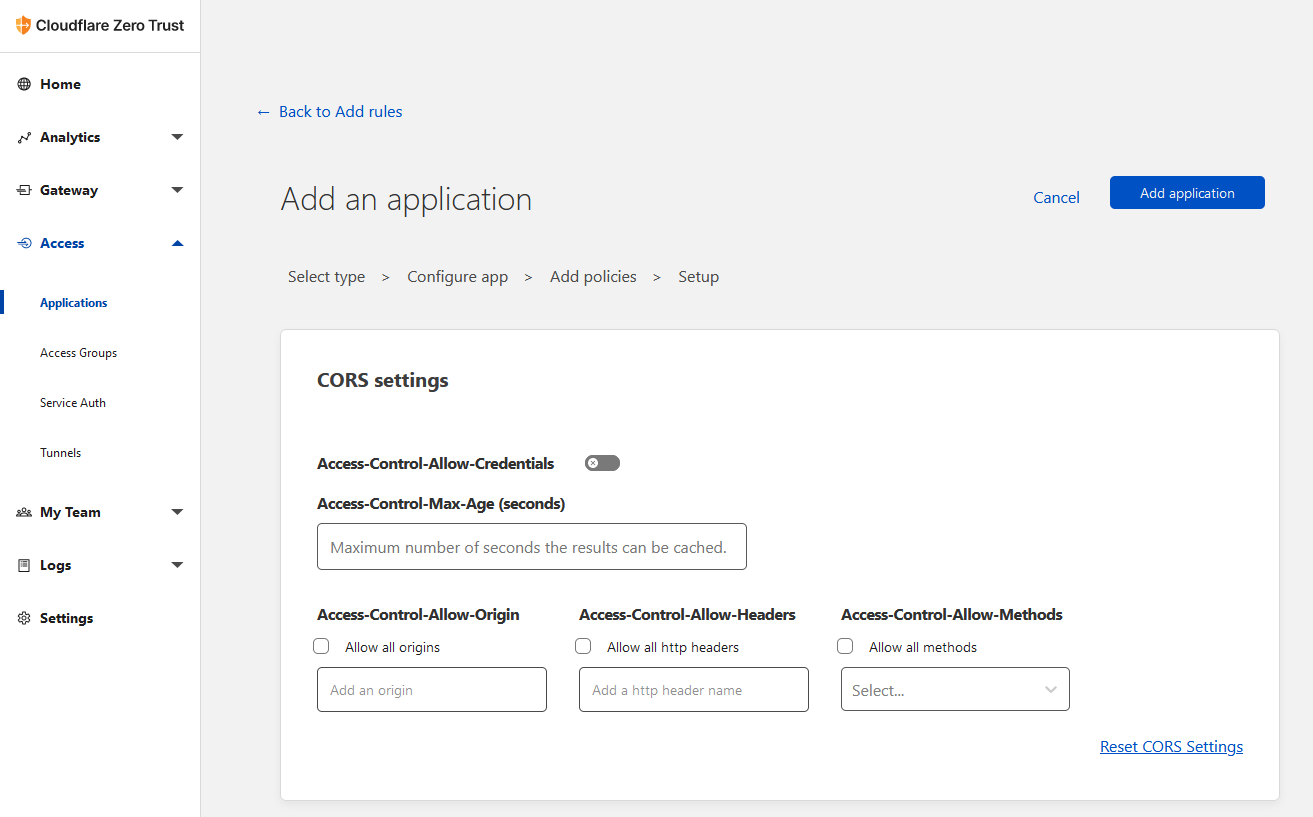
Step 7
Add the application and you are done! You do not have to add or change anything on this page. Just click the "Add application" button.
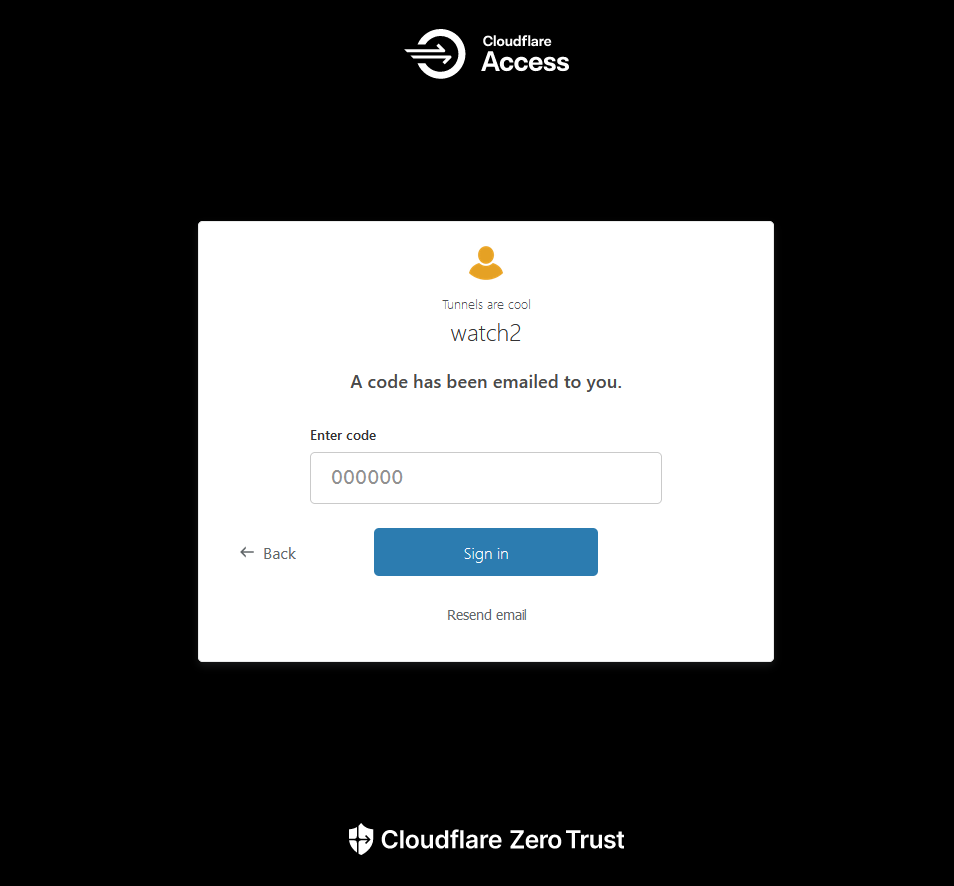
Now when you go to that domain name you should be presented with a Cloudflare access email form. Enter your email and you will be sent the one time pin!

You can go in and modify a few things to customize the look of the page if you want to but it's not required for it to work. That's something you might be interested in if you use this in a business setting to brand it to your needs.
Final Notes and Thoughts
I'm not here to sell you on Cloudflare's services. In fact, all of the Cloudflare services I use are entirely free. However, if you are looking to start hosting more websites and exposing more services to the internet, Cloudflare is a good option for ensuring safe and secure access to your server or host. Take this as a grain of salt, try it out and see for yourself if it is something you can use.
Cloudflare Tunnel is relatively simple to setup. With the Cloudflared docker image, it makes things even easier. If your home IP changes, Cloudflare will notice and roll right along with it and nothing will need to be changed. Where as before, we had to change the IP in our A record manually if something like that happened.
I enjoy self hosting whatever I can. When it comes to security, I prefer to leave it to experts such as Cloudflare who are world renowned for superior services and I found that out the hard way while self hosting Noted. I am still using Nginx Proxy Manager for some apps and services though. Perhaps some day when I learn more about security and the self hosted options available, I may change my mind. The choice is yours.