Commento - A Self Hosted Comment System for Websites That Just Works
Commento is a bloat free, self hosted commenting system for your blog or website with a focus on user privacy.

When self hosting a blog or website, one of the biggest concerns is how your readers can interact with your content. This is a vital aspect to having open communication with your readers.
A commenting system that works well and respects privacy of the users. Noted is all about that respect and you may recall that when we shared our notes on the self hosted Umami analytics platform.
When doing days of research, a handful of options were found and tested but some didn't work or just didn't allow anonymous comments and have the options I was looking for. That is until I found Commento!
What is Commento?
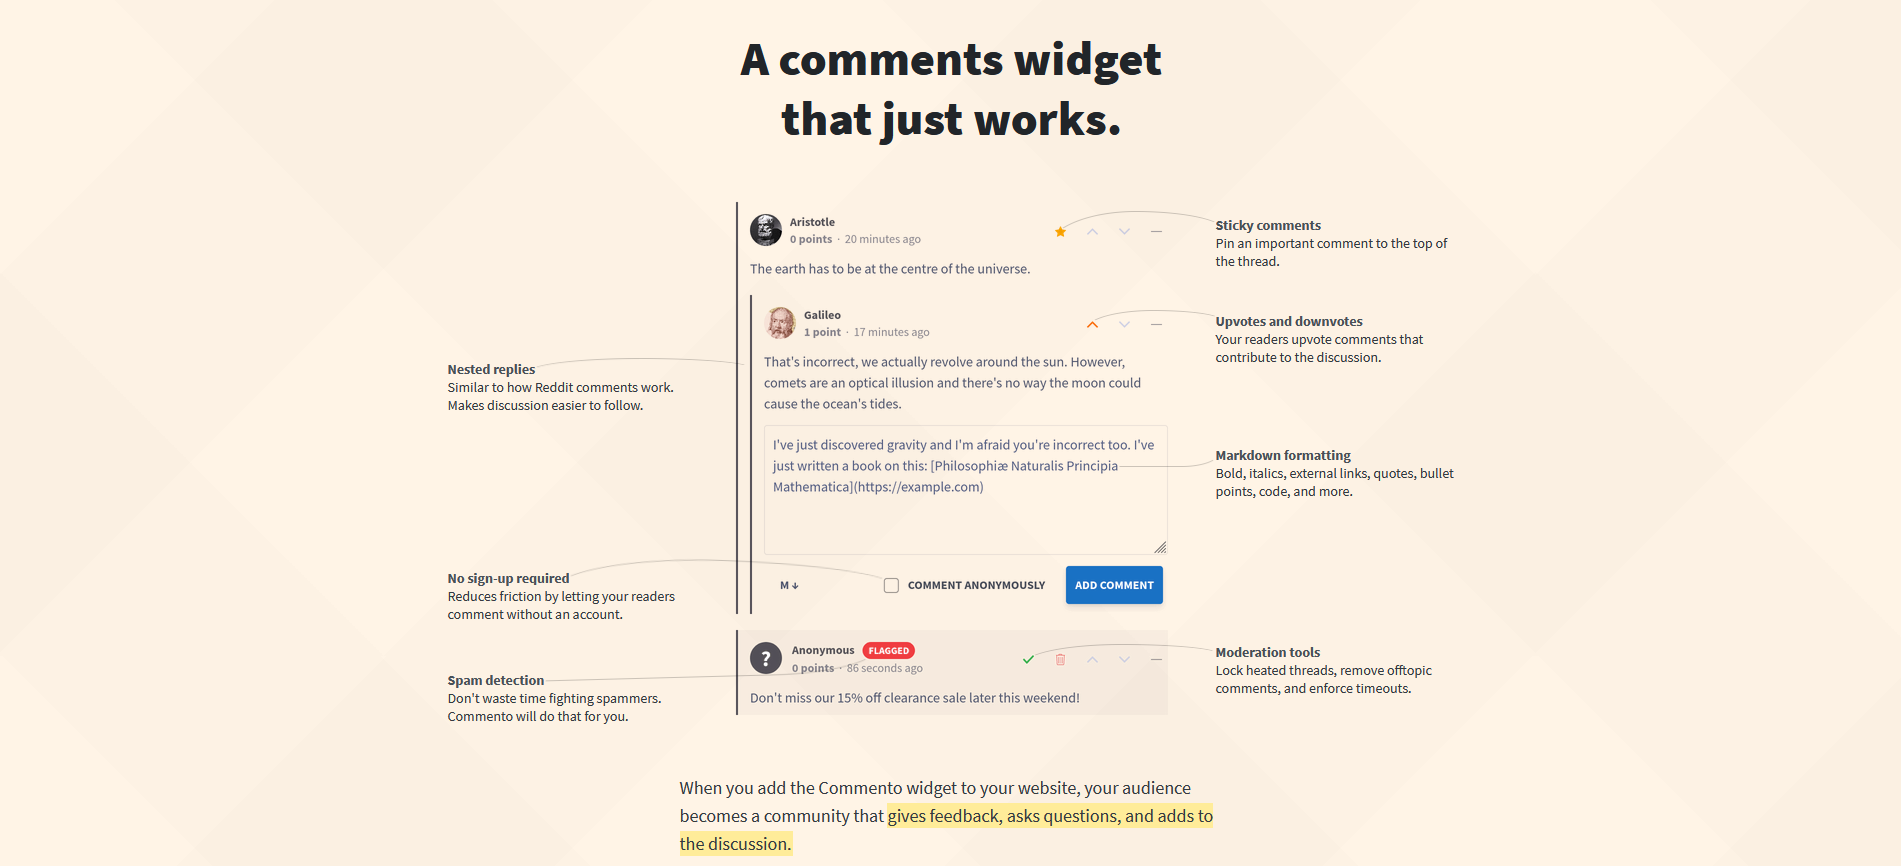
Commento is a platform that you can embed in your website to allow your readers to add comments and engage with your content. It's reasonably fast, lightweight and supports the following.
- Markdown
- Import from Disqus
- Voting
- Automated spam detection
- Moderation tools
- Sticky comments
- Thread locking
- OAuth login
- Single Sign-On
- E-mail notifications
While Commento is free software and can be self hosted, in order to keep the service sustainable, the Commento hosted cloud version is not offered free of cost. However, today I want to discuss the self hosted option of Commento which is free for you.
Installing Commento with Docker Compose
I chose to use Docker Compose because for me, it is easier to redeploy a comainter if something goes wrong.
version: '3'

services:
  server:
    image: caroga/commentoplusplus:v1.8.6
    ports:
      - 8080:8080
    environment:
      COMMENTO_ORIGIN: https://commento.website.lol
      COMMENTO_PORT: 8080
      COMMENTO_POSTGRES: postgres://postgres:postgres@db:5432/commento?sslmode=disable
      COMMENTO_SMTP_HOST: smtp.mailgun.org
      COMMENTO_SMTP_PORT: 587
      COMMENTO_SMTP_USERNAME: mailgun.smtp.user
      COMMENTO_SMTP_PASSWORD: mailgun-password
      COMMENTO_SMTP_FROM_ADDRESS: [email protected]
    depends_on:
      - db
  db:
    image: postgres:12.5-alpine
    environment:
      POSTGRES_DB: commento
      POSTGRES_USER: postgres
      POSTGRES_PASSWORD: postgres
    volumes:
      - commento_data_volume:/var/lib/postgresql/data

volumes:
  commento_data_volume:
I used a fork of Commento called Commento++ because the original repo has not been updated for almost 2 years. Plus Commento++ gives you control of your comments in the dashboard unlike the original.
It is very important to note that I used Postgres 12.5 because the latest Postgres image did not want to talk to Commento for some reason. It took a lot of digging to find the solution to this problem and hopefully this will save you the time and headache I had to deal with. But once I used version 12, the container spun right up without any issues.
You can use another form of SMTP if you wish. I chose Mailgun because it's simple to setup and works out of the box. It's the only SMTP provider I have tested and used with Commento and it works perfect.
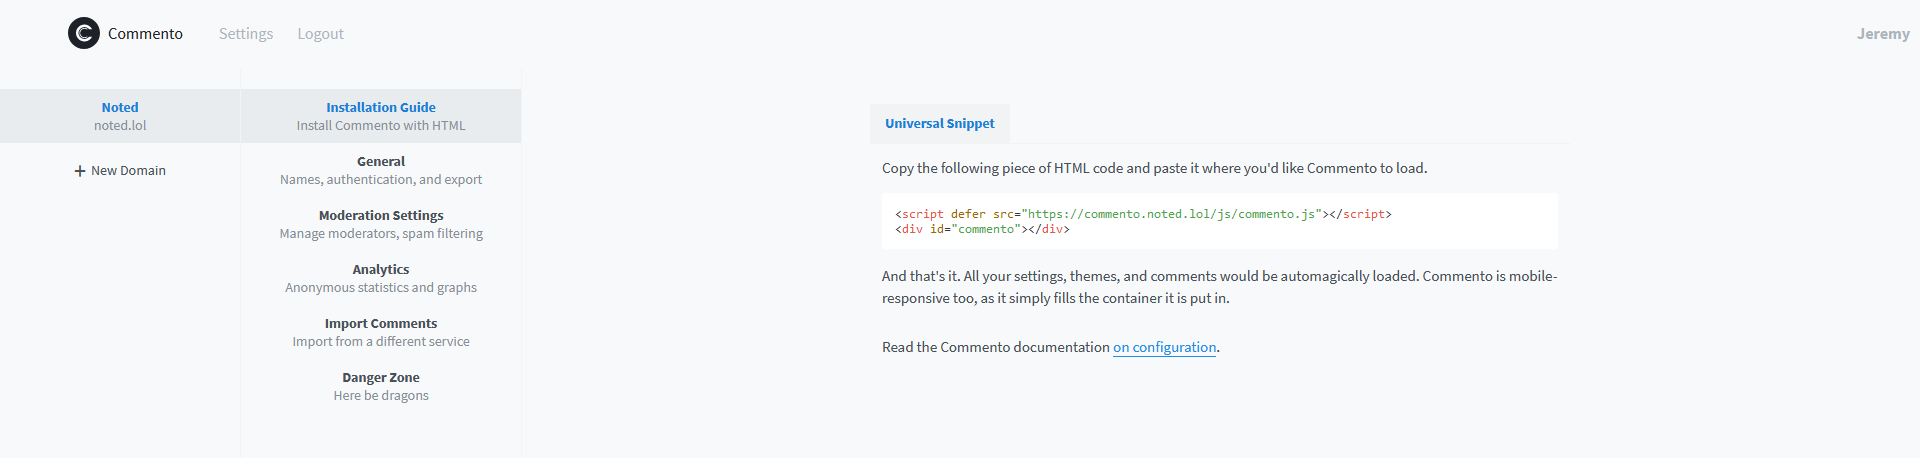
Once the Commento Docker container is setup, you can head over to your Commento dashboard using the domain you chose in the COMMENTO_ORIGIN value. Sign up and add your domain.

Now click on the domain you added on the left side and then click "Installation Guide". This will give you the universal snippet you can paste into your website. Each domain you add will only allow you to embed the snippet within that website. This keeps anyone from just snagging your snippet off your site and using it anywhere they please.
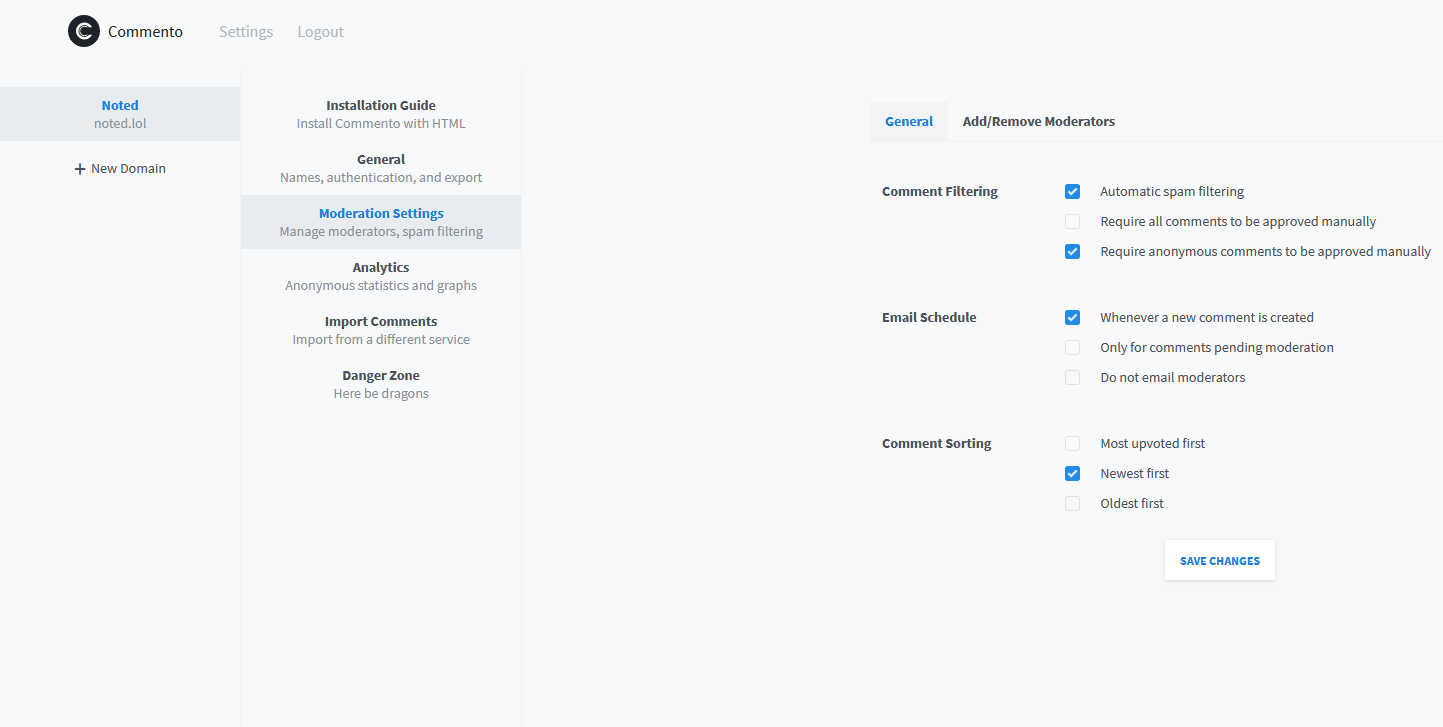
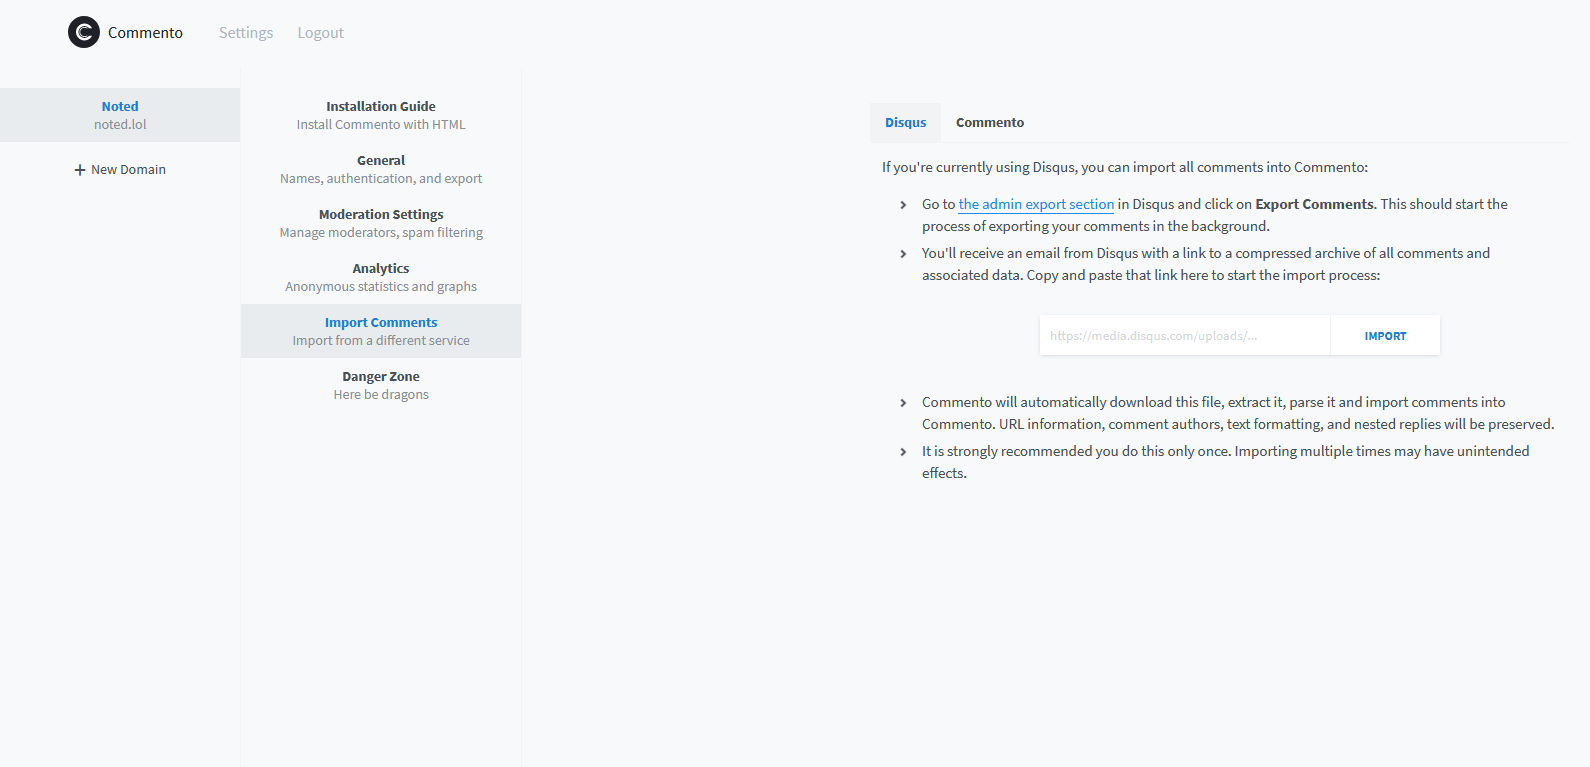
From here, you can adjust email settings, add moderators, moderate comments, view analytics and even import comments from Disqus or another Commento instance.
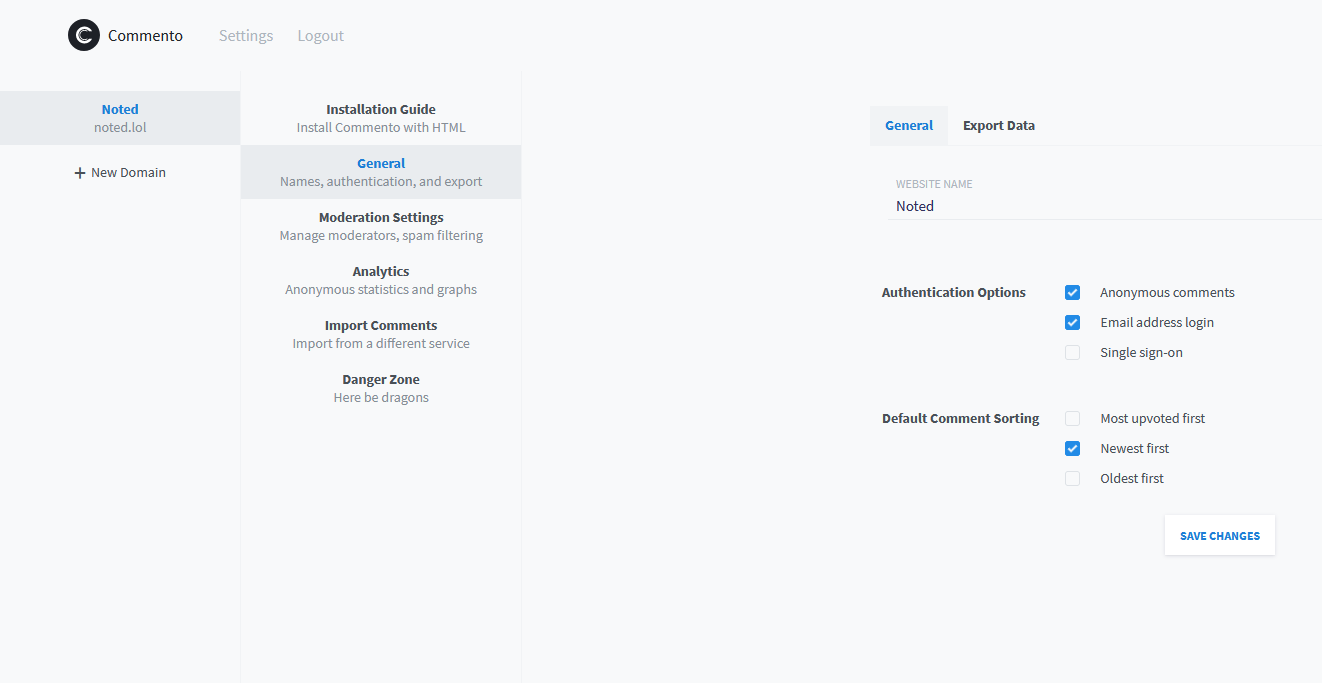
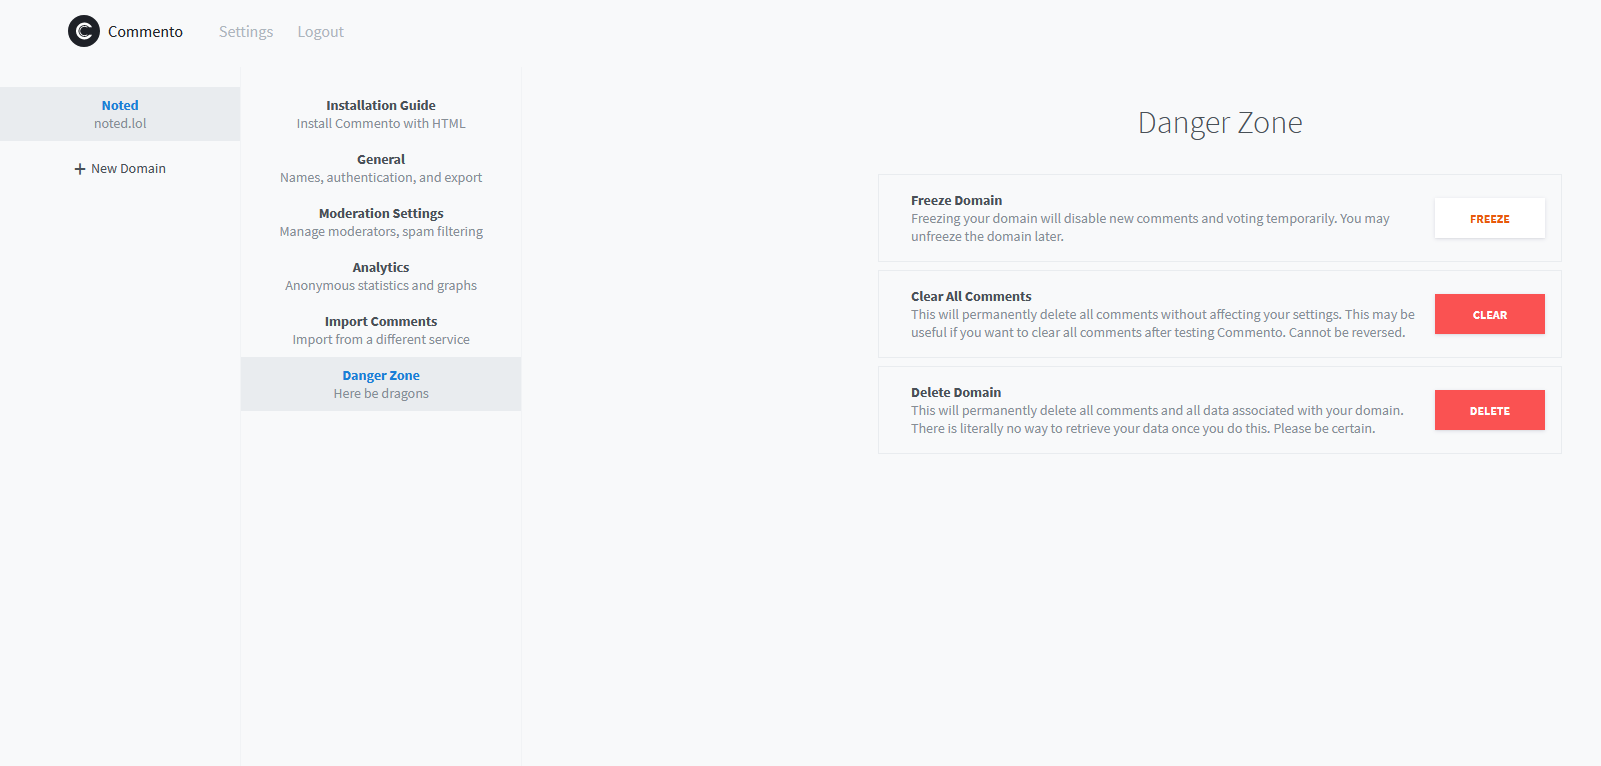
You can export an archive of the domain data (which includes all comments and commenters) in the JSON format. To initiate and queue an archive request, click the export button under the general tab. You will receive an email containing the archive once it's ready. Note that this requires a valid SMTP to be setup in order to receive the email.
Final Notes and Thoughts
Commento has been a great solution so far for Noted. We were not paid or endorsed to make this review and I want you all to know, if that were ever the case, you would know right off the bat at the beginning of the article.
Don't take my word for it! Leave a comment below and try it out for yourself. You can tick the "comment anonymously" box to comment... well to comment anonymously and not have to register. No locations or IP addresses are logged and you can see the code yourself on the Commento github page. And this is also for those who are reading this using an RSS reader... you can't see the comments on RSS readers but I encourage you to swing by and do so if you like the content!
If you found Commento useful, stop by their Github repo and give it a star.