

Ghost blogging software is incredible and completely customizable. However, when it comes to contact forms, you're on your own. There are a couple plugins and 3rd party contact form websites you can use, but I am all about open source and self hosting! So let's check out NocoDB and build a contact form!

What is NocoDB?
NocoDB is an open source #NoCode platform that turns any database into a smart spreadsheet.
We can create a table then attach a form to it to make entries into that table. It may seem complicated but really, it's pretty simple.
Install NocoDB with Docker Compose
version: '3.9'
services:
    nocodb:
        image: 'nocodb/nocodb:latest'
        ports:
            - '8044:8080'
        volumes:
            - '/docker/nocodb:/usr/app/data/'
I use Portainer to deploy stacks. It makes it super easy. Just change the volume location and ports if you have to. This image uses a SQLite database so no further configuration is required for that aspect.
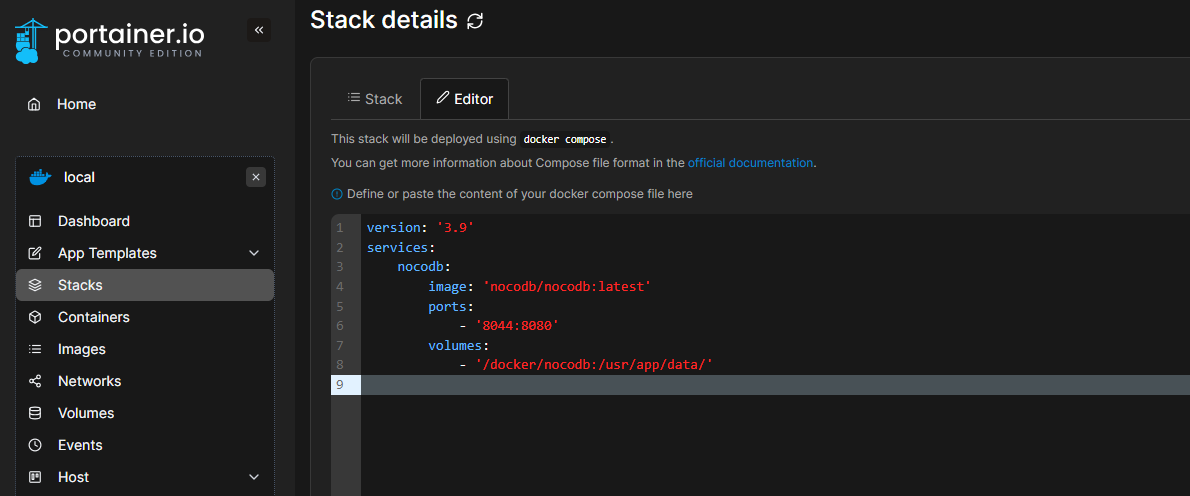
You can find more Docker Compose examples on the NocoDB Github repo here.
 nocodb
Once you run the Docker image and create the container, you can navigate to the app on the host IP and port you used in the compose stack.
Sign Up and Log In
Now you will have to create a user by entering your E-mail and password.
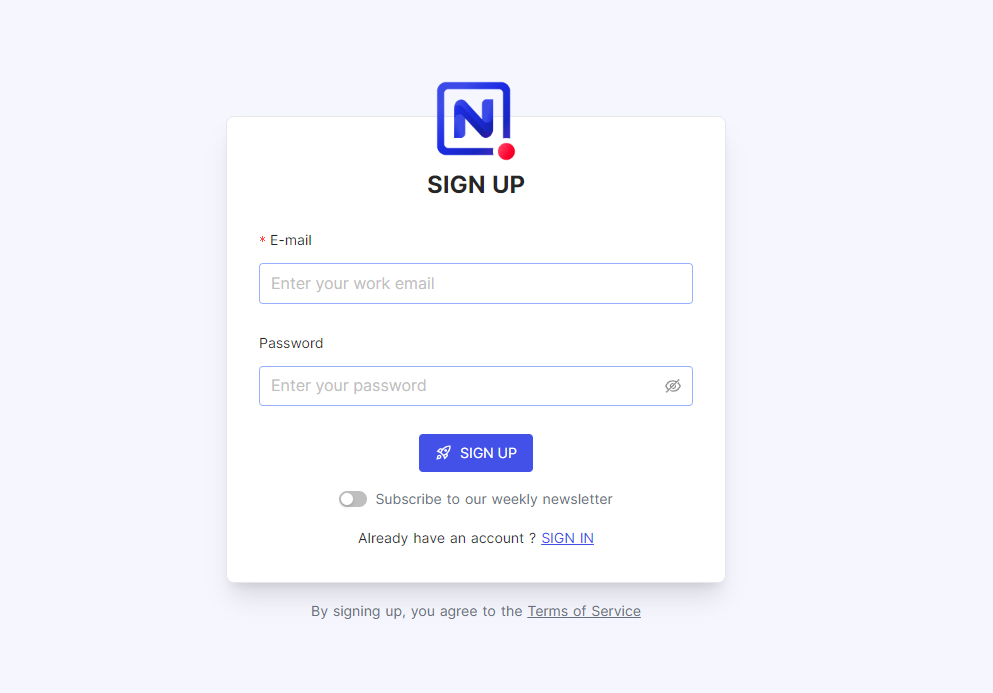
When you click "Sign Up" it will take you directly to a blank workspace that looks like this.
We will create a new project and select the "Create" option from the drop-down menu. After that, enter a project name such as "Contact Form" then press the create button.


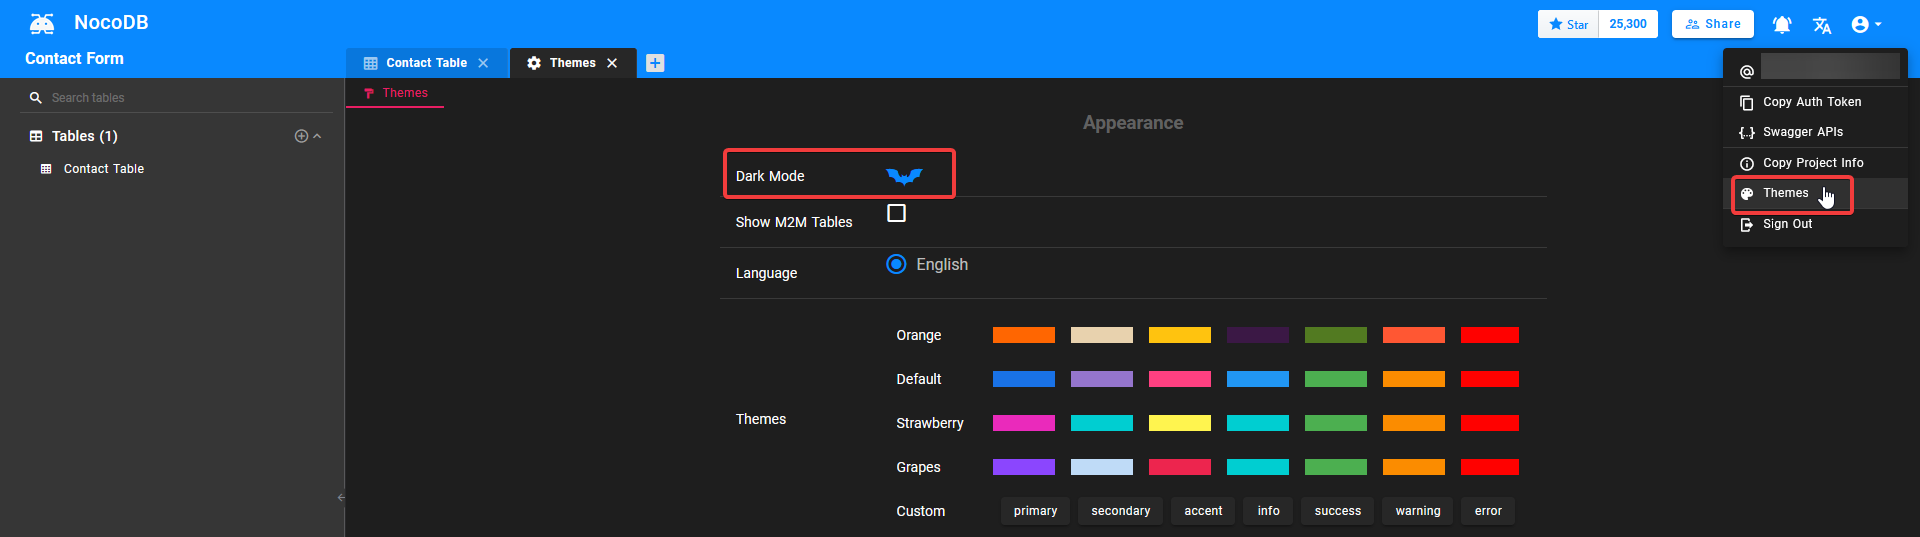
This will bring you into NocoDB dashboard under your new project. From here, in the upper right corner, hover over the profile icon to get to the themes settings. We are going to immediately change this to the dark theme! Click on the bat icon to set dark mode. Unfortunately the theme will not stay in dark mode for people viewing your form. Or I just haven't figured that out yet.
Create a Table in NocoDB
Create a new table in NocoDB by clicking the plus icon next to Tables on the left side pane. Give it a name and click submit. I called mine "Contact Table".


Add Columns to the Table
The table needs to be setup with columns that will correspond with the form. Each column is a form field entry. You will understand this later. It will automatically create one column and one row. I deleted the row by right clicking on it. I will rename the column that was created automatically to "Name" then add another column called E-Mail with the column type "Email" and finally one more called "Inquiry" with the column type "LongText". After this is complete, the form is done and your work will automatically be saved.
Attach a Form to the NocoDB Table
This is the part where we create the form that will allow us to enter data into the table we just created. On the right side you will see where it says "Form". Click it and create a new form.

I renamed mine to "Contact Form" to easier distinguish which is which.
Edit the Contact Form
Under "Views" on the right side, click the form you just created. Here we will drag and drop the fields onto the form. These fields are all part of the table we created. Now you know why we had to make each column with the appropriate field names. Makes sense right?
When you are finished dragging the fields onto the form, click submit to save and close the form.
Get a Share Link to your NocoDB Form
Getting the public link to the form is a little tricky. It took me a while to find where to get the link and they moved it after the last update too. But you have me to tell you how.

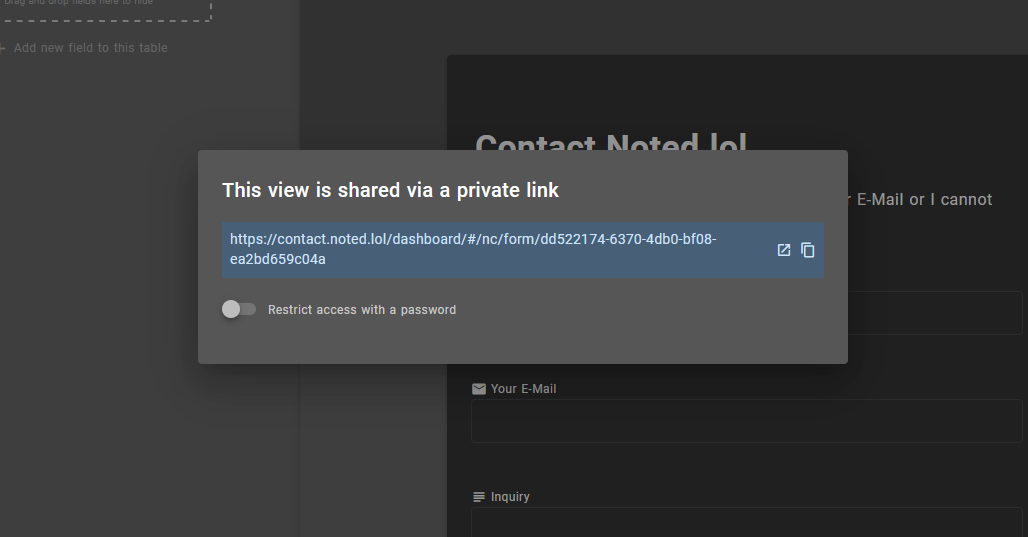
Click the form to open it like we did when we added the fields to it. You should see the "Share View" button at the top of the pane. This will give you the unique link to the form that you can place on websites and other places online.
Test out the NocoDB Form
Open the shared link and fill out the form. Once finished, submit the form then go back to the table in NocoDB. The data should all be there. You've successfully setup your first form in NocoDB!
Get Discord Alerts from NocoDB Form Entries
Finally, we can setup Discord notifications to let us know when the form has a new entry. What good is a contact form if it doesn't notify the person it's sent to?

Open Discord on your desktop and right click on the channel you want the notifications to be sent to. Select Server Settings then Integrations. Create a new Webhook and copy the link.
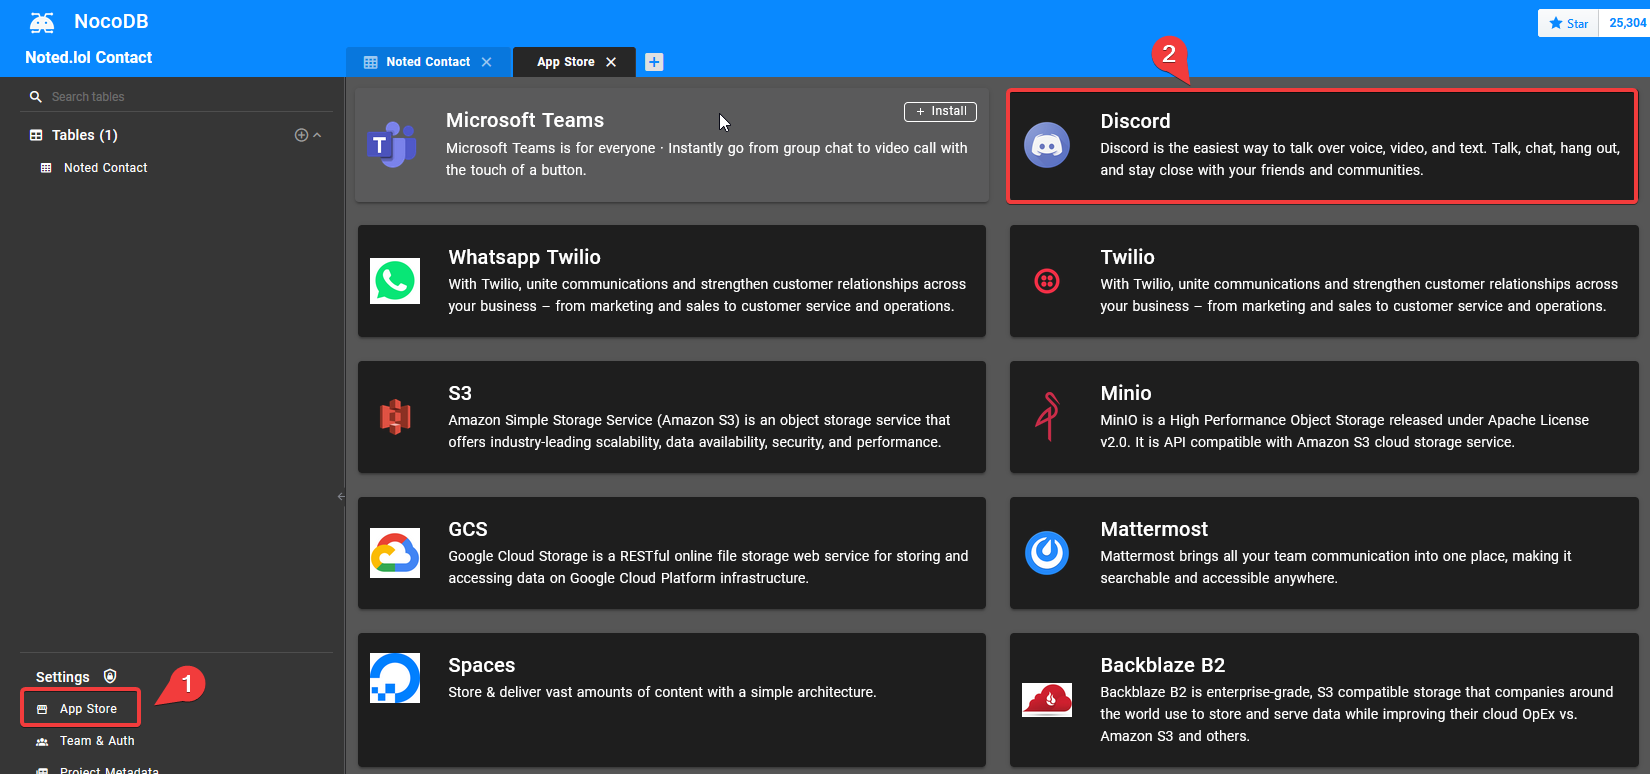
In NocoDB click App Store then find the Discord app. Hover over the app and click "Edit".
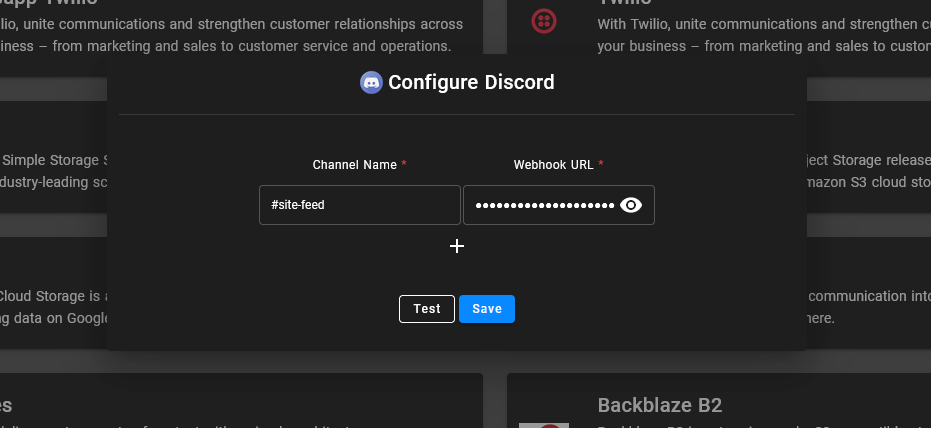
Add the channel name then paste the Discord Webhook URL into the box. The test wont work so don't try it. Click save. We are not done yet!
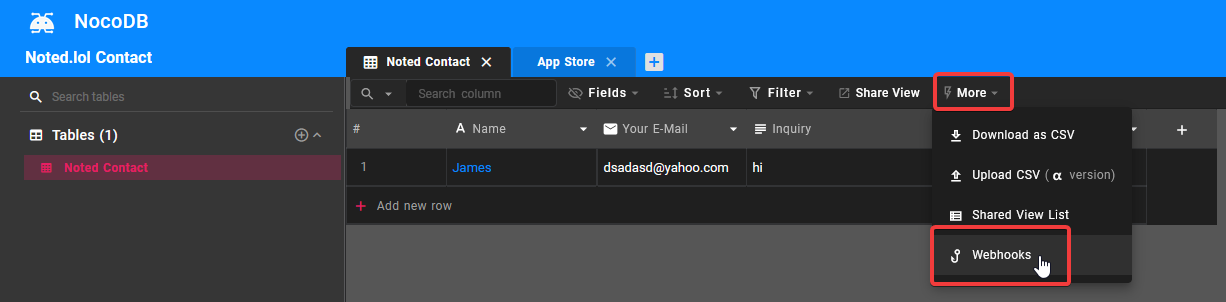
Move back over to the table we created in the NocoDB dashboard. At the top click more then click Webhooks. Add a new Webhook and fill out the details. Make sure you tick the enable radio icon on the left side before saving and closing. It's important that you choose the right Discord channel name or it will not work.
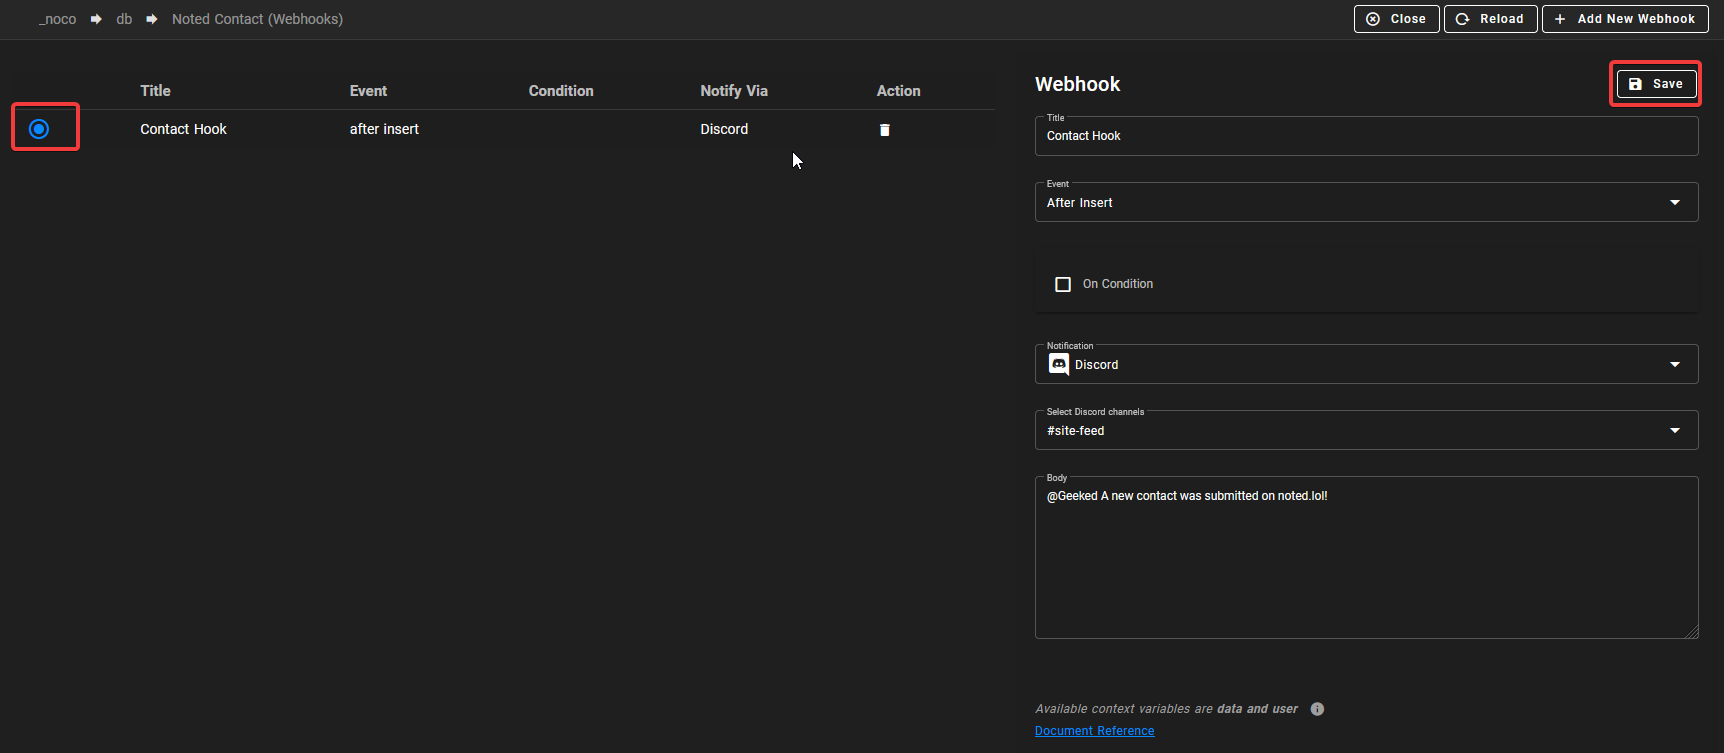
I added a tag for my name in the body just to make sure I get notified by push notification. You can put whatever you want there but that is the text that will be sent to you by Discord when a submission has been made on your NocoDB form.
Test the NocoDB form with Discord
Final Notes and Thoughts
NocoDB is a very powerful tool. While this might look like a lot written down, doing it first hand doesn't take long. NocoDB Webhooks are very picky and the testing system seems bugged. Everything has to be perfect for it to work but that's not to be said for the tables and forms. It really is an amazing software that can be used for so much more. And contact forms are not even a standard use case scenario.


Discussion