

Docker is a popular containerization tool that enables developers to build and run applications in a consistent, portable, and scalable environment. Docker images are the basic building blocks of the Docker ecosystem, and they can be used to create containers that run applications. In this guide, I will walk you through the process of creating a simple website and containerizing it using Docker.
Install Docker
Before you begin, make sure you have Docker installed on your system. You can download and install Docker from the official website: https://docs.docker.com/get-docker/
sudo apt update
sudo apt upgrade
sudo curl -sSL https://get.docker.com | sh

sudo systemctl start docker
sudo systemctl enable docker
Step 1: Set Up Your Project
- Create a Project Directory: Start by creating a directory for your project. This is where you'll store your website's files and Docker-related configuration.
- Create Website Files: In your project directory, create a simple HTML file named
index.htmlwith some content. For example:
<!DOCTYPE html>
<html>
<head>
<title>My Dockerized Website</title>
</head>
<body>
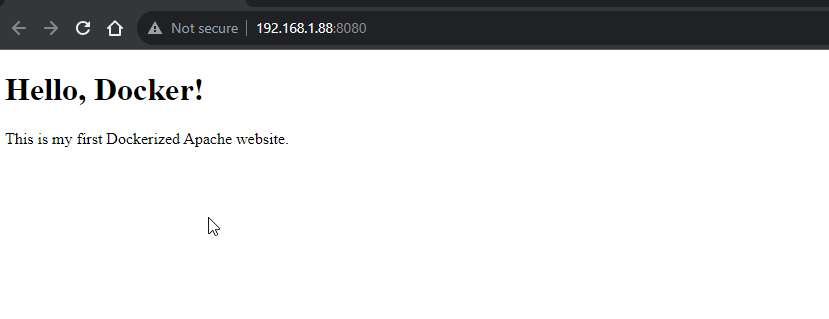
<h1>Hello, Docker!</h1>
<p>This is my first Dockerized Apache website.</p>
</body>
</html>Step 2: Create a Dockerfile
A Dockerfile is a text file that contains instructions to build a Docker image.
- Create Dockerfile: In your project directory, create a file named
Dockerfile(without any file extensions). - Edit Dockerfile: Open the
Dockerfilein a text editor and add the following lines:
# Use the official Apache image as the base image
FROM httpd:latest

# Copy your website files into the container's web root
COPY ./index.html /usr/local/apache2/htdocs/
Step 3: Build the Docker Image
- Open Terminal: Open a terminal or command prompt on your machine.
- Navigate to Project Directory: Use the
cdcommand to navigate to your project directory where theDockerfileis located. - Build the Image: Run the following command to build the Docker image. Replace
"my-docker-website"with your desired image name and tag:
docker build -t my-docker-website .Step 4: Test the Docker Image Locally
- Run the Container: After the image is built, you can run a container using the image with the following command:
docker run -d -p 8080:80 my-docker-websiteAccess the Website: Open a web browser and navigate to http://host.ip:8080 to see your Apache website running inside the Docker container.
Video Tutorial
Final Notes and Thoughts
That's it! You have successfully created a Docker image. Not too difficult huh? This is just a basic example, but the same principles apply to more complex Docker images and applications. This should be enough to get you started on learning more complex setups, dependencies, and configurations.


Discussion