

I wanted to build a small footprint NAS backup solution for my home network. I got to thinking and decided a small refurbished PC of some kind would be best. So it began. My hunt for a used Mini PC and I knew just where to look.
What makes Open Media Vault so powerful is the underrated GUI including the very well designed, built in rsync options. In my opinion, this makes Open Media Vault a diamond in the rough. While there are quite a few more NAS software options available, this one feature is the reason why I choose and use Open Media Vault.
I'll not be focusing on Open Media Vault as a whole but more-so on the Rsync functions to show you just how easy it is to setup this tool for file backups on pretty much any small PC. You can even do this on a Raspberry Pi!
I recently picked up 2 Datto S3x2 mini PCs on r/Homelabsales for $75 each. It has the following specs.
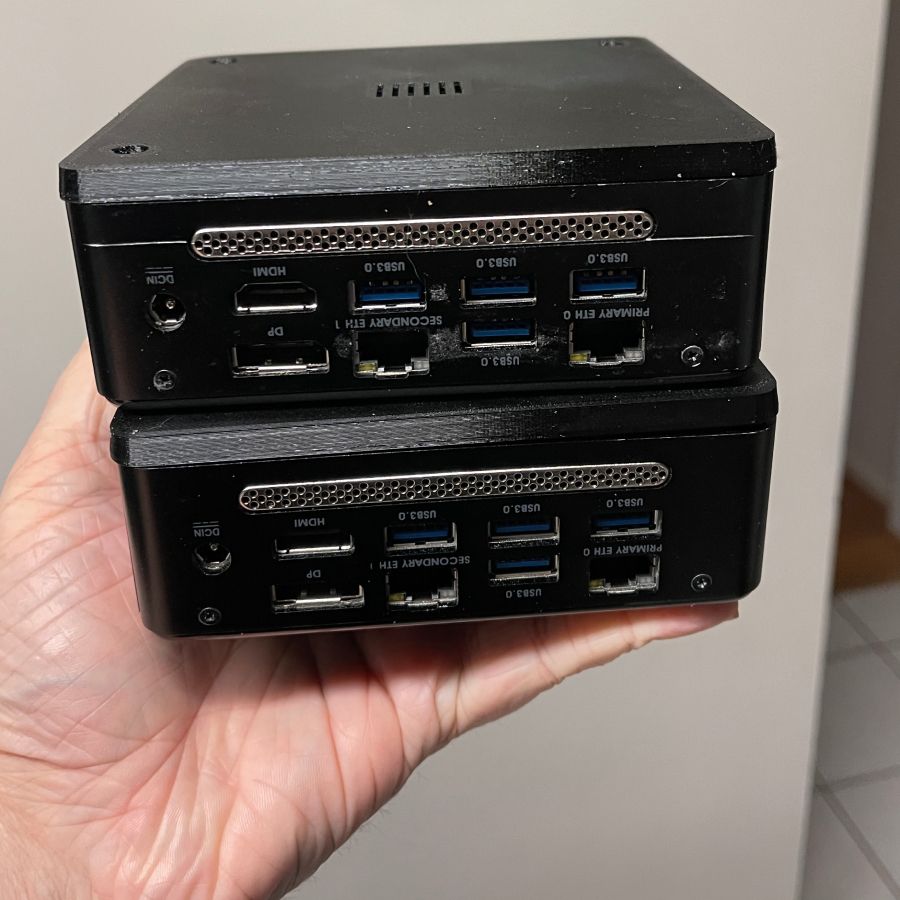
One of these I will use for this project and the other will be saved for a rainy day. 😍
- CPU: i3-7100U
- RAM: 8GB but 32gb Max
- NIC: Dual NIC RTL8111
- USB: 3.0 x6
Even at these specs, it's a bit overkill for what this project is and a RPi might suffice better.
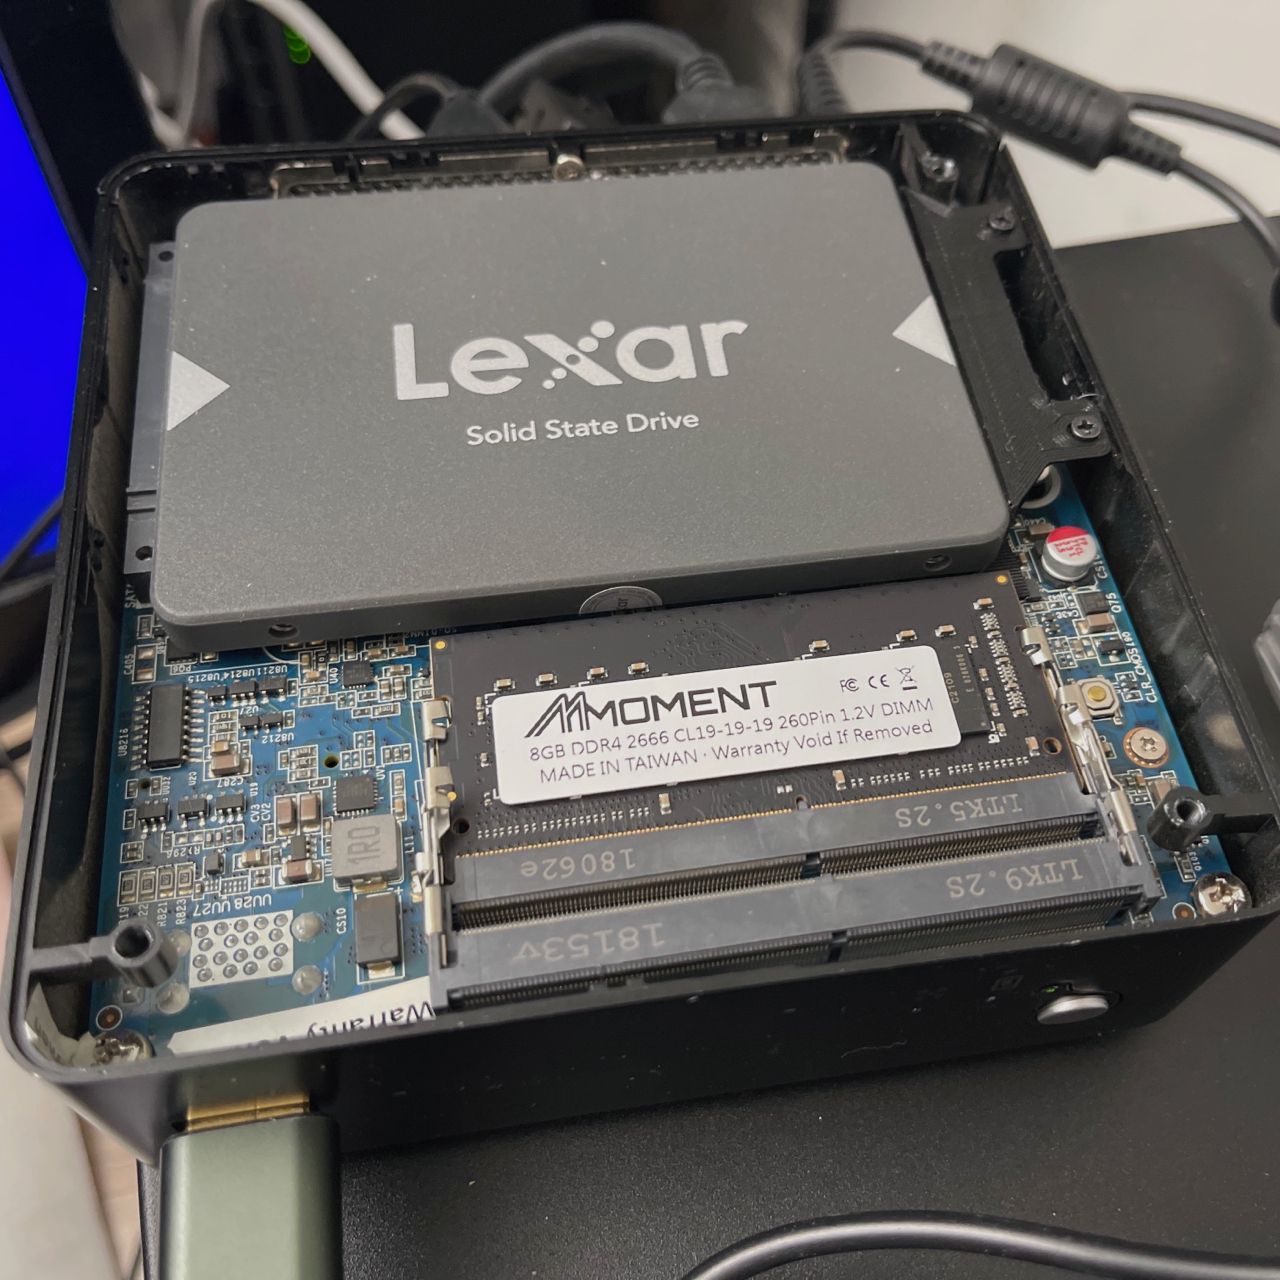
They didn't come with RAM or an SSD installed so I had to add it myself. I don't need much RAM or boot disk space so I used 8GB of RAM I had stored away and a cheap 250GB Lexar SSD as the OMV boot disk. The 250GB SSD is more than enough space for Open Media Vault to live on. In fact, I could have gotten away with half that but we like to play it safe. The whole installation uses less than 20GB of space and idles out at less than 1GB of RAM. If you plan to install Docker and run containers, I recommended more RAM. For the OMV 6 rsync backup NAS, you won't be needing Docker but that's not to say you wont want to install it yourself later.
Downloading Open Media Vault ISO File:
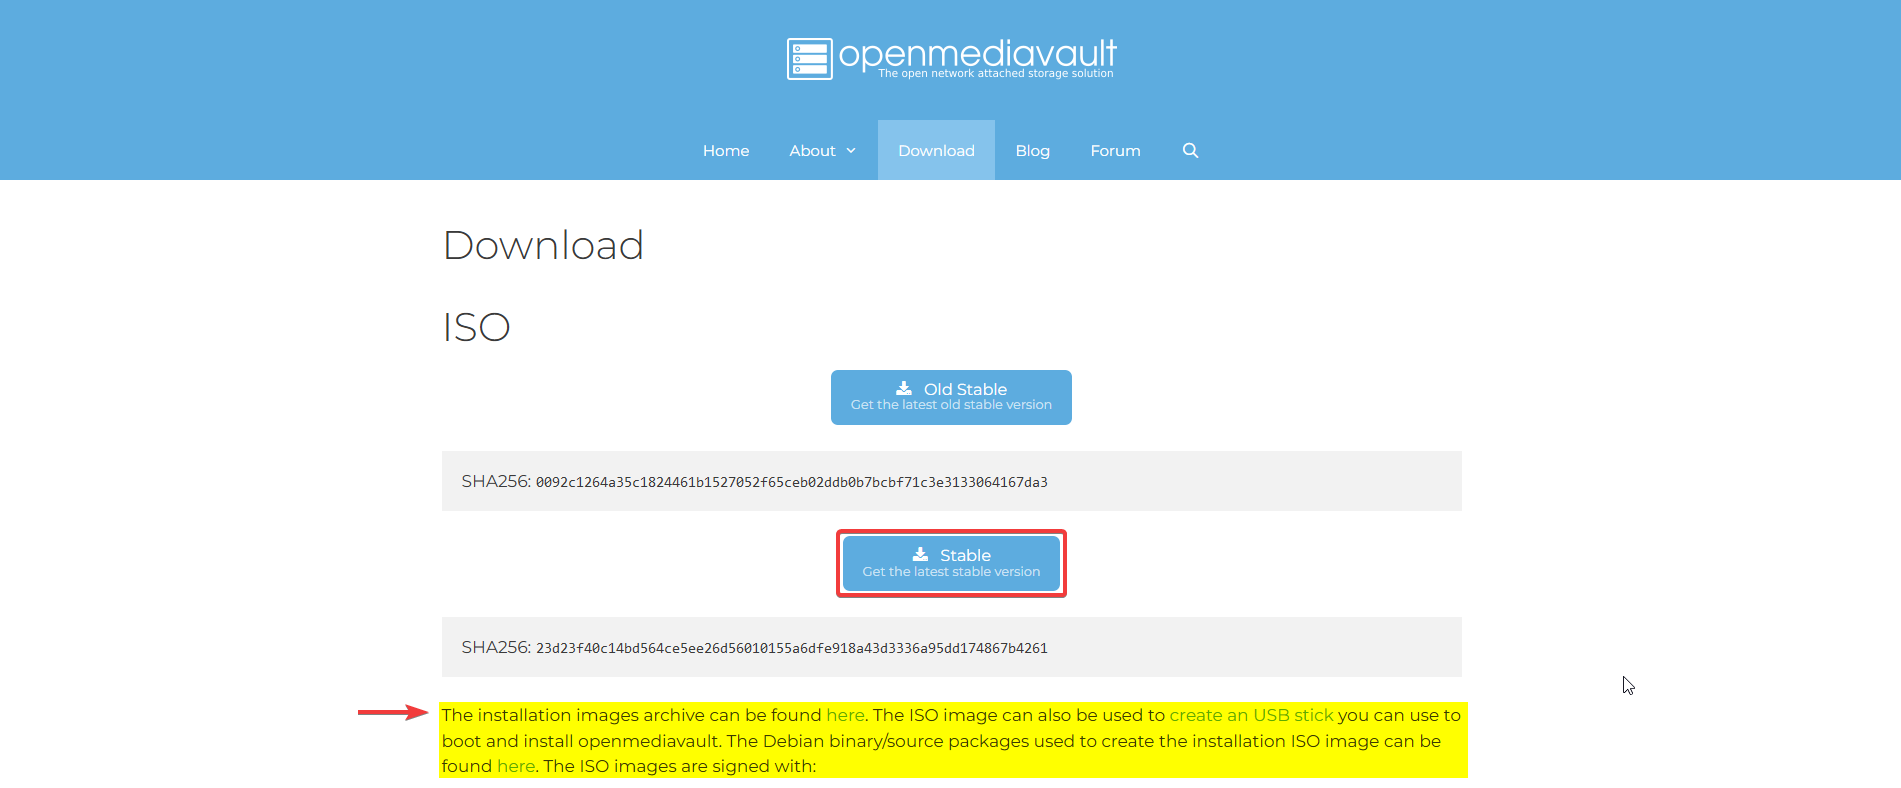
You can download the ISO file of Open Media Vault for free from the official website of Open Media Vault at https://www.openmediavault.org/download.html
Making a Bootable USB Thumb Drive of Open Media Vault:
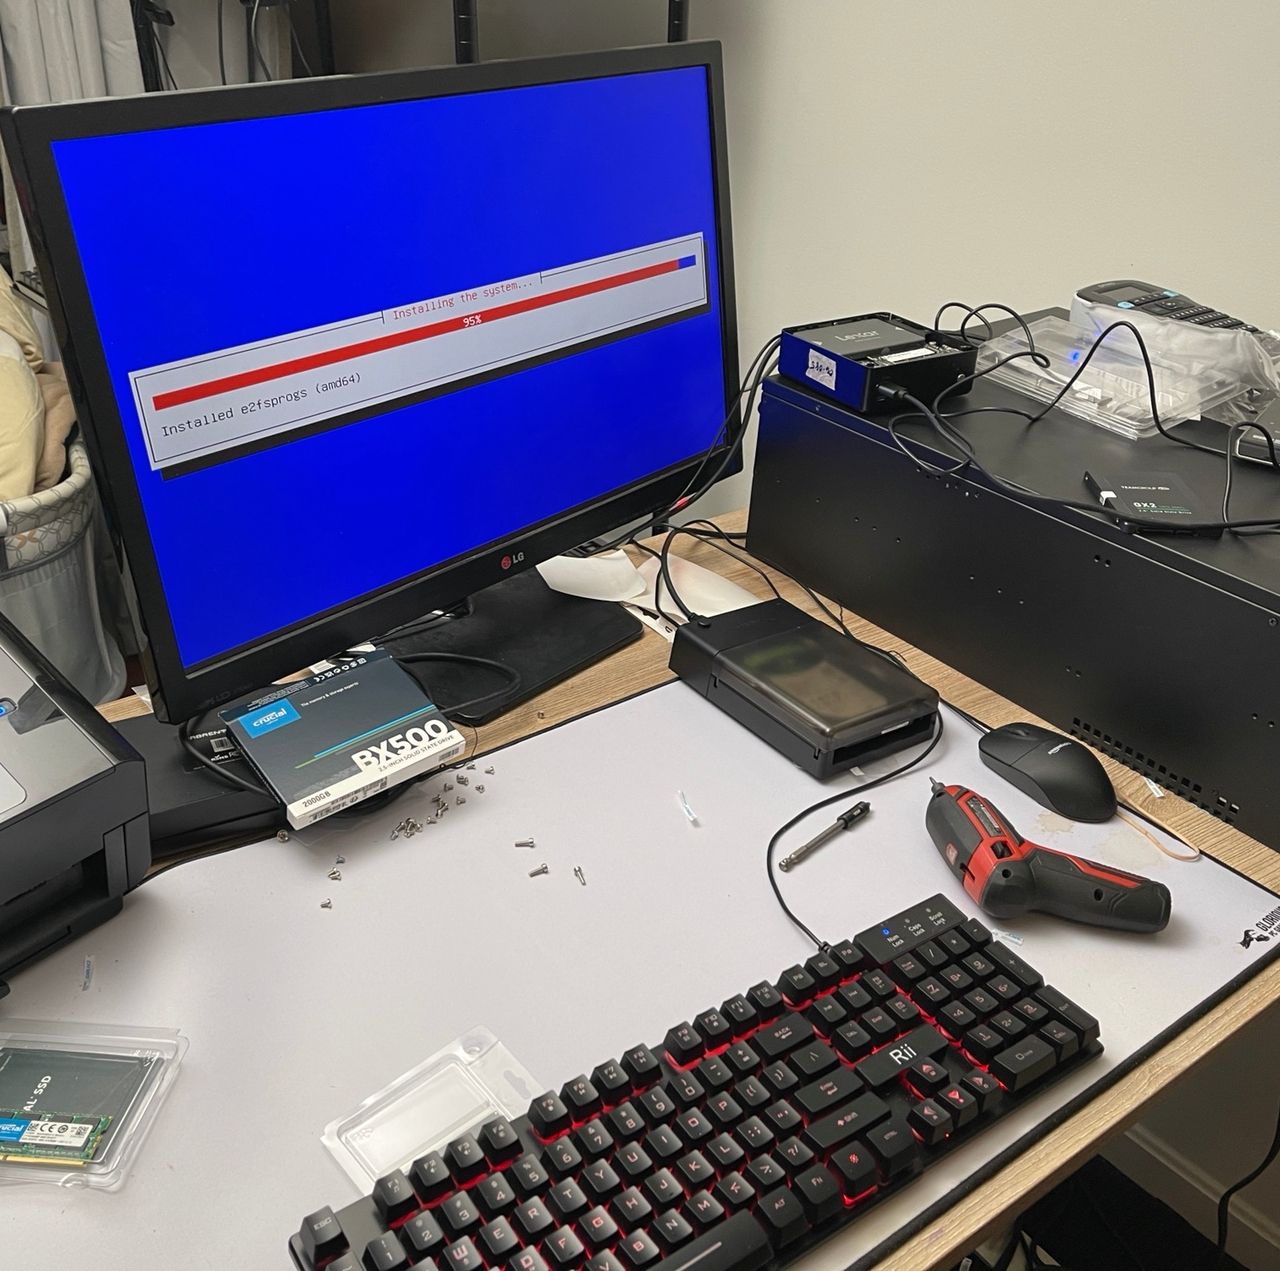
Now, you have to make either a bootable USB thumb drive of Open Media Vault from the ISO file or burn the ISO file in a CD/DVD in order to install Open Media Vault on your computer.
On Linux, you can easily make a bootable USB thumb drive of Open Media Vault with the following command:
sudo dd if=~/Downloads/openmediavault_6.0.24-amd64.iso of=/dev/sdb bs=1M
On Windows, you can use Rufus to make a USB bootable thumb drive. Rufus can be freely downloaded from the official website of Rufus at https://rufus.ie/ (not mobile friendly)
For more detailed installation instructions, please see the Open Media Vault docs here.
Once installed you can navigate to the OMV dashboard and run your updates.
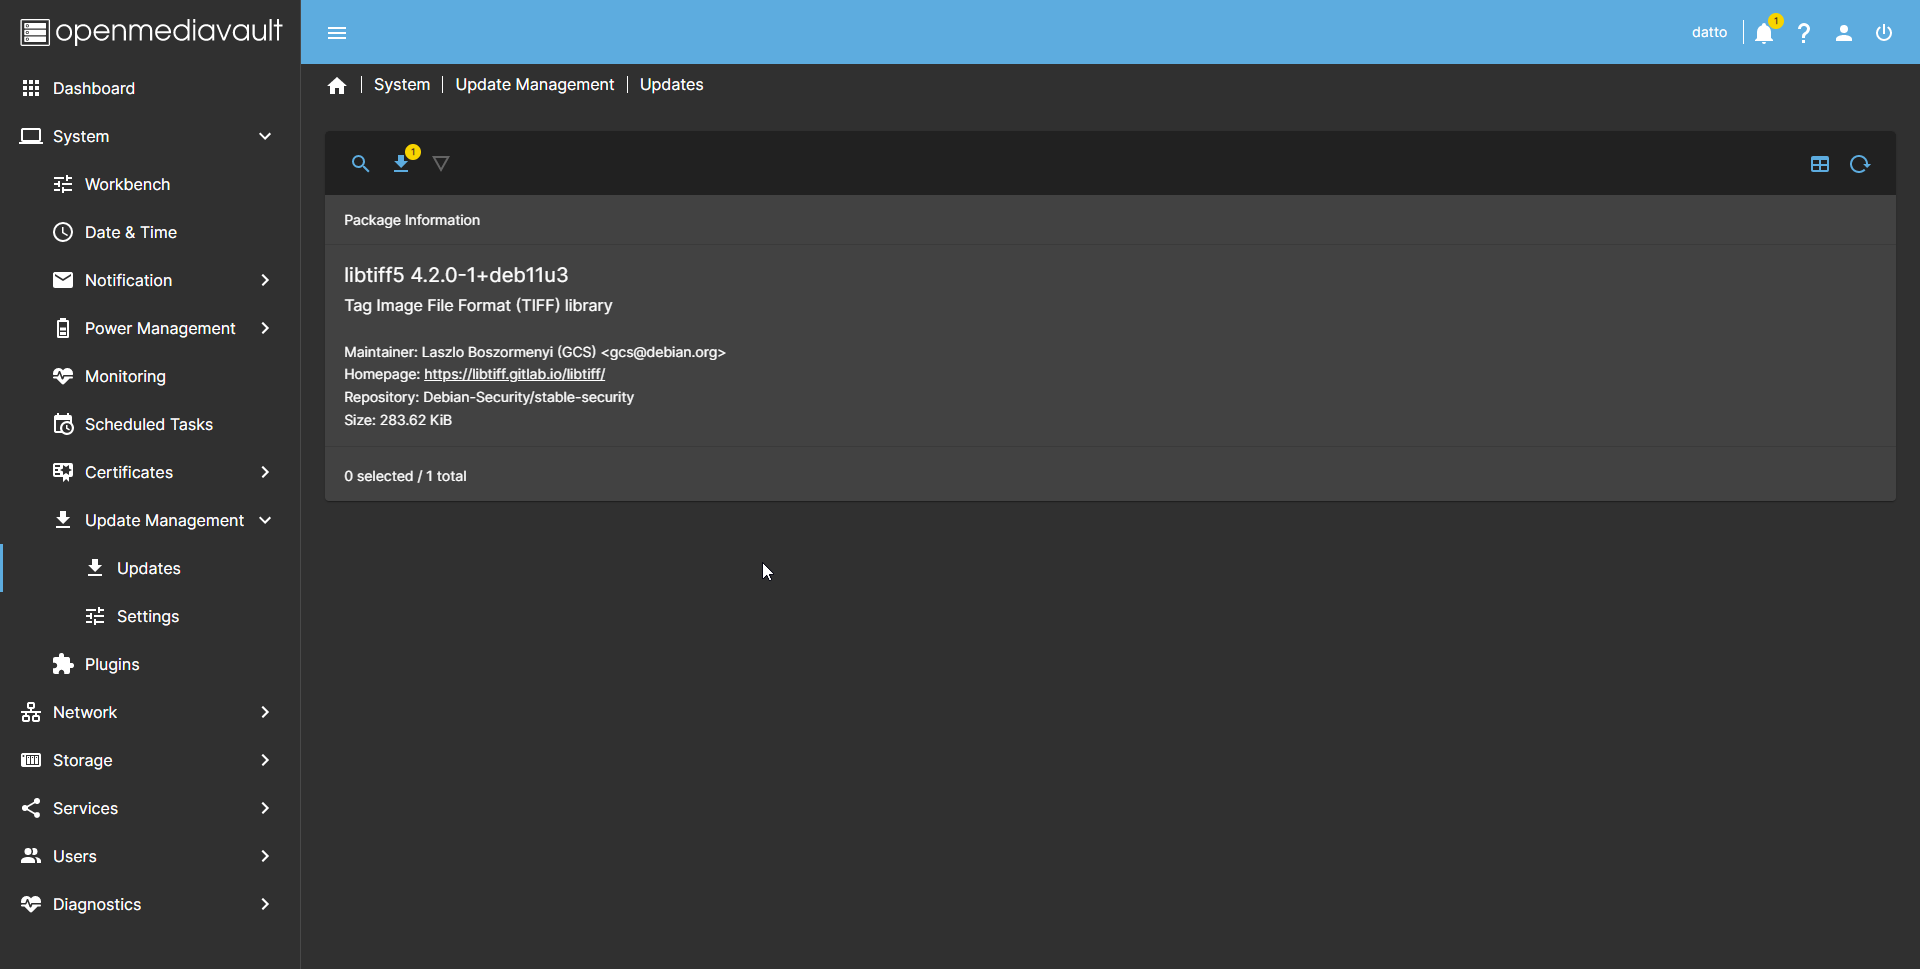
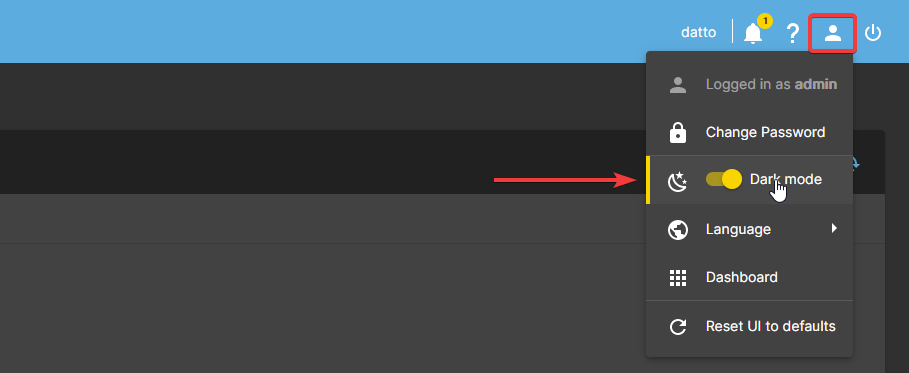
Want dark mode? Me too! Click the user icon in the upper right to get that activated! If you don't see the dark mode option, you need to update Open Media Vault first.
Setting up Storage and Shares in Open Media Vault 6
For hardware storage I am using this Sabrent external SSD enclosure with a 2TB SSD.
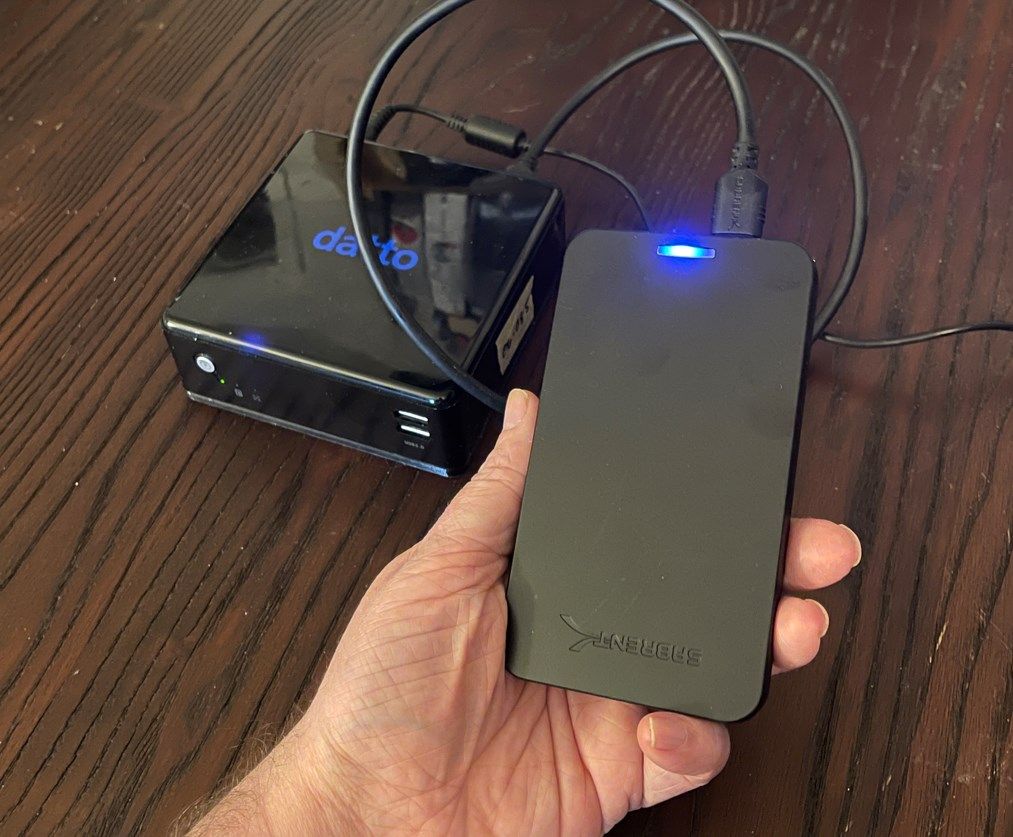
This gives me plenty of space just for backing up Docker data. Make sure your USB storage is plugged in. You should use a USB 3.0 port if possible for maximum speeds. Also, make sure if the USB enclosure you are using has a power button... turn it on! 😆
OMV will detect the storage as a new drive. Navigate to Storage > Disks
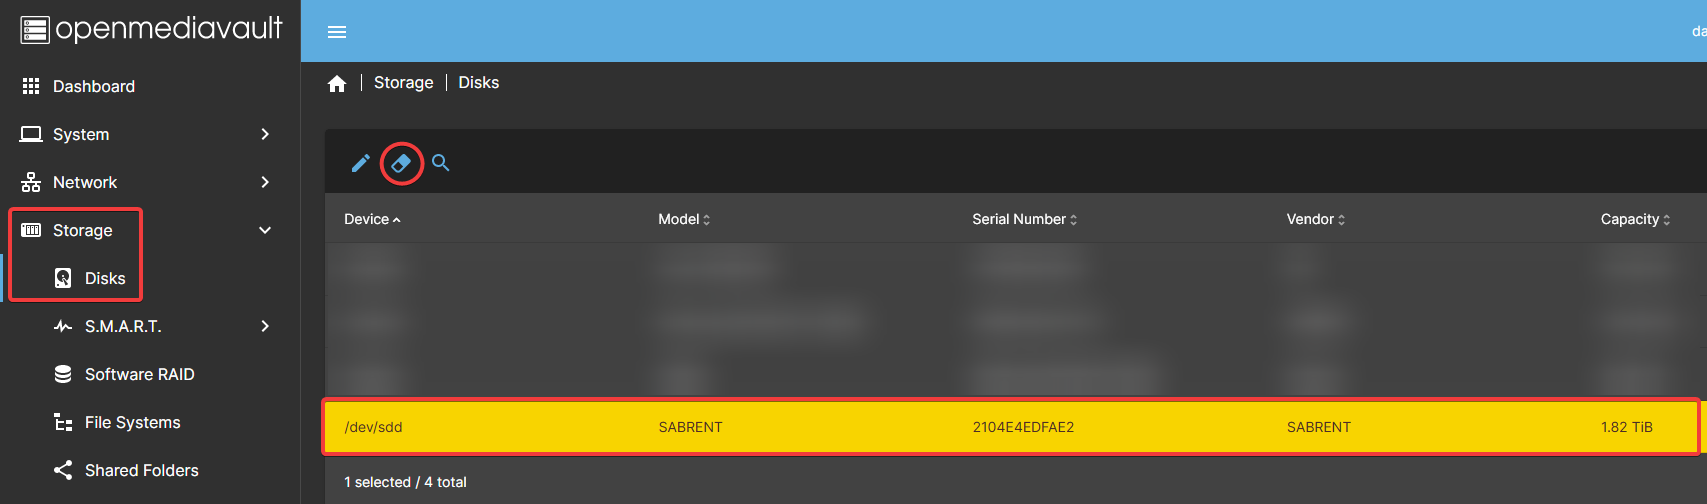
If the disk is not new, press the eraser icon I have circled in the image above. This will wipe the drive clean so you can mount it and use it as storage. Everything can be done from the GUI and that's the beauty of it.
Now we can add it as a new File System. Click File Systems > Create
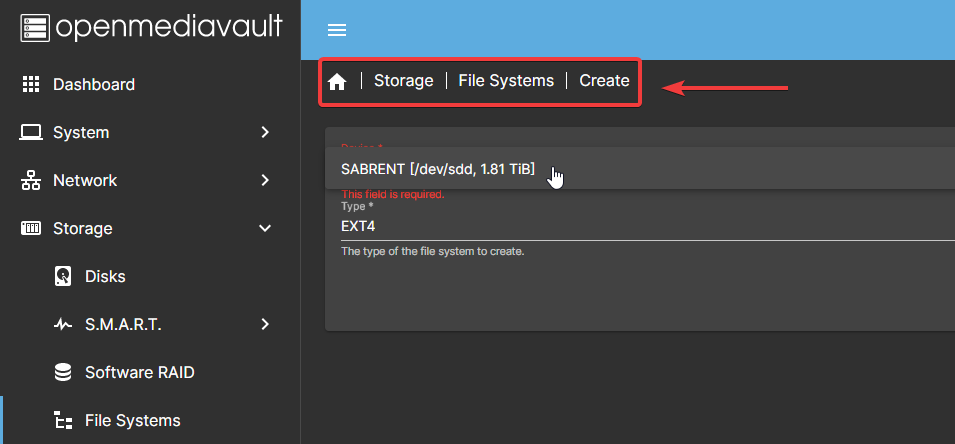
Select your new SSD from the drop-down menu and EXT4 as the type. Then click Save.
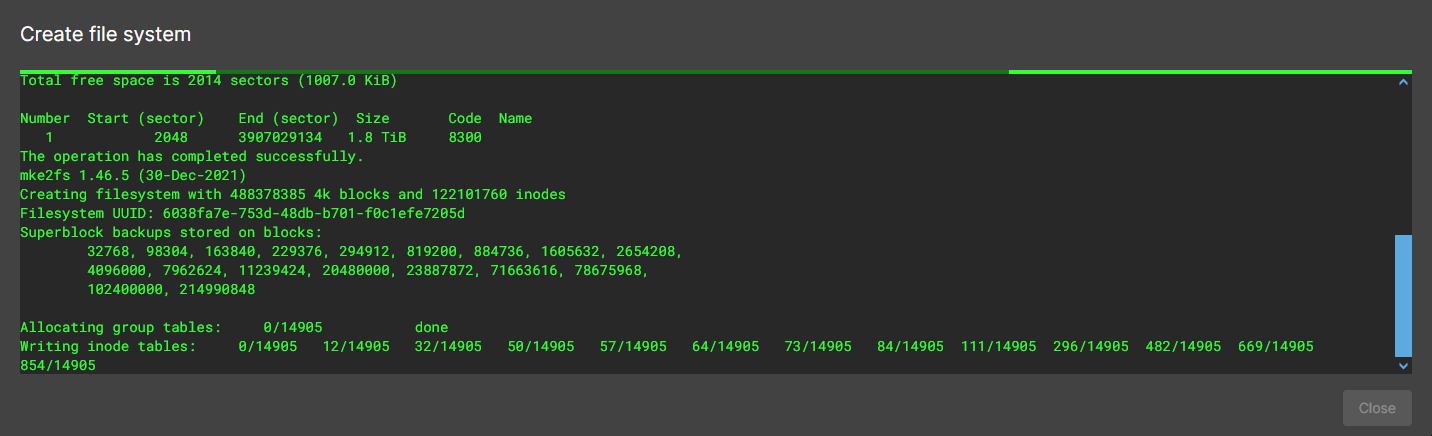
This will begin the allocation process. For a 2TB drive it should only take about 1 minute or less. For larger drives this can take much longer. When it finishes just click close.
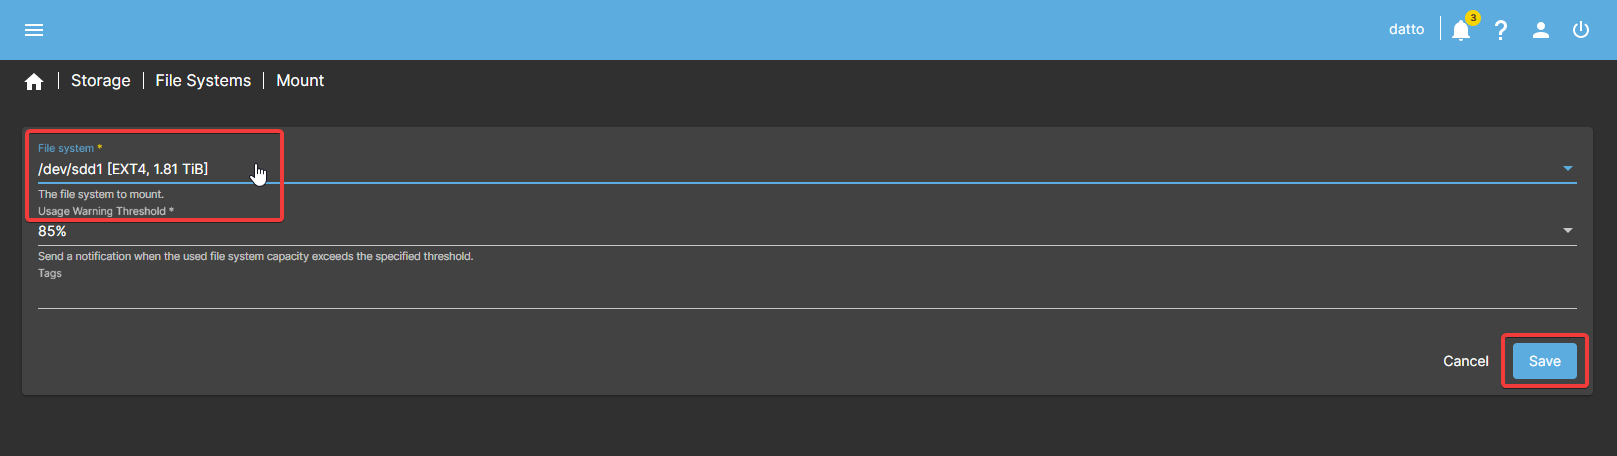
Now choose your file system from the drop-down menu again to mount it and click Save.
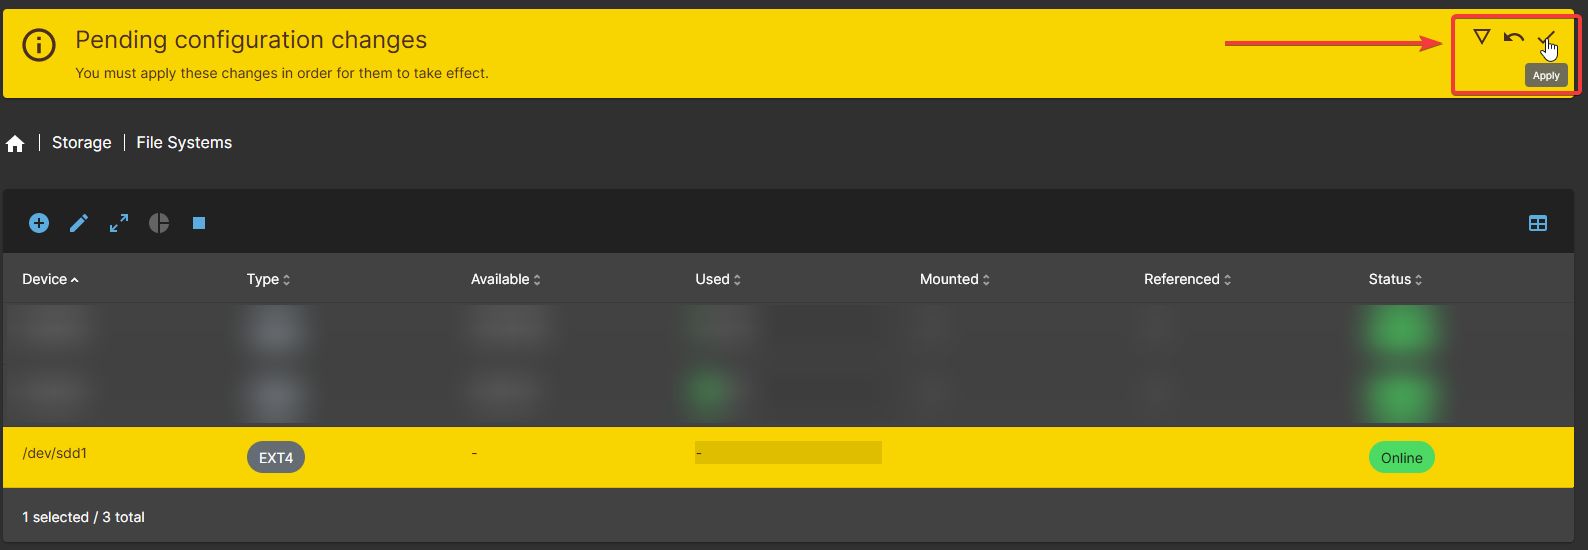
Apply the pending changes then confirm the changes being made when prompted. You will then see the available and used space on the file system you just added. 👍
From here we need to make shared folders on the file system we just created. I prefer creating new shares for each item I backup to keep things separated. Rsync can play dirty tricks sometimes and having multiple syncs on the same share can be catastrophic. Especially if you use the rsync "delete" option which we will cover later.
To setup the first shared folder:
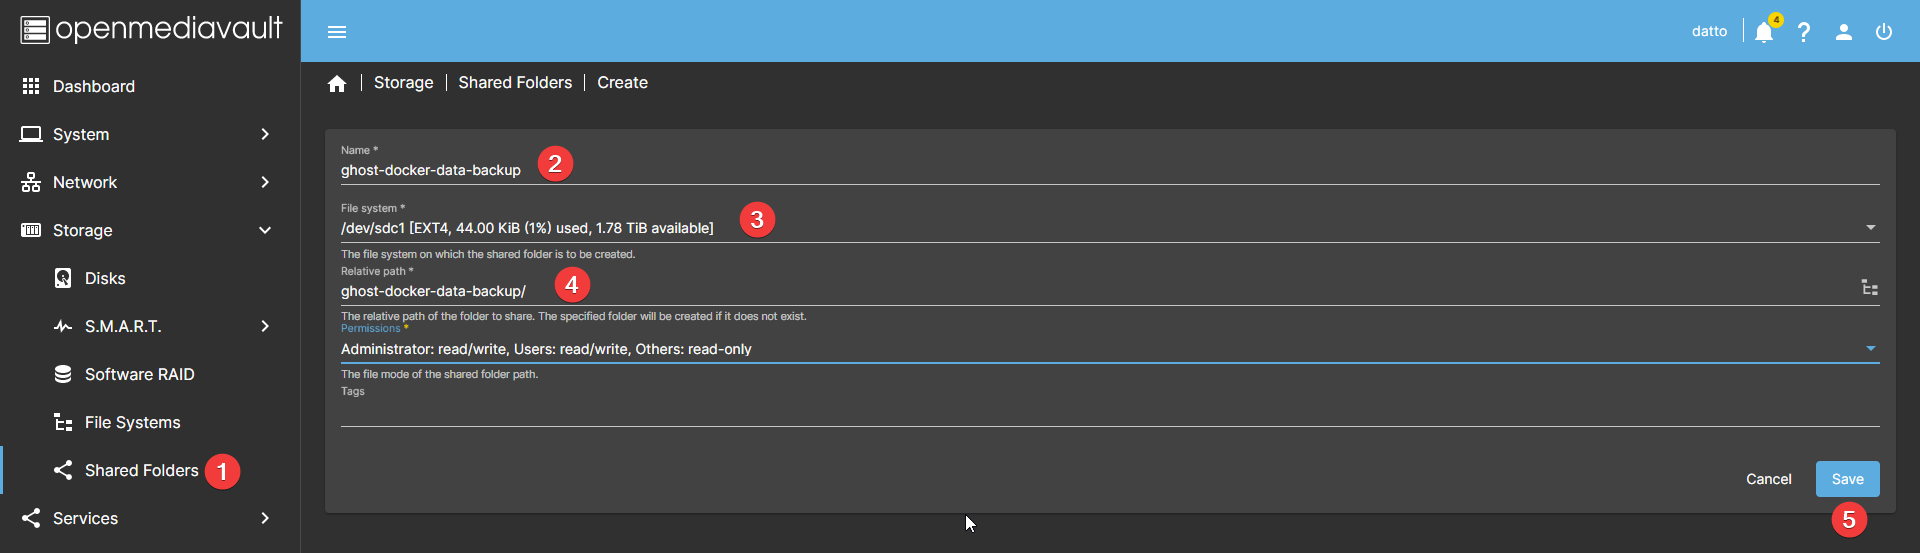
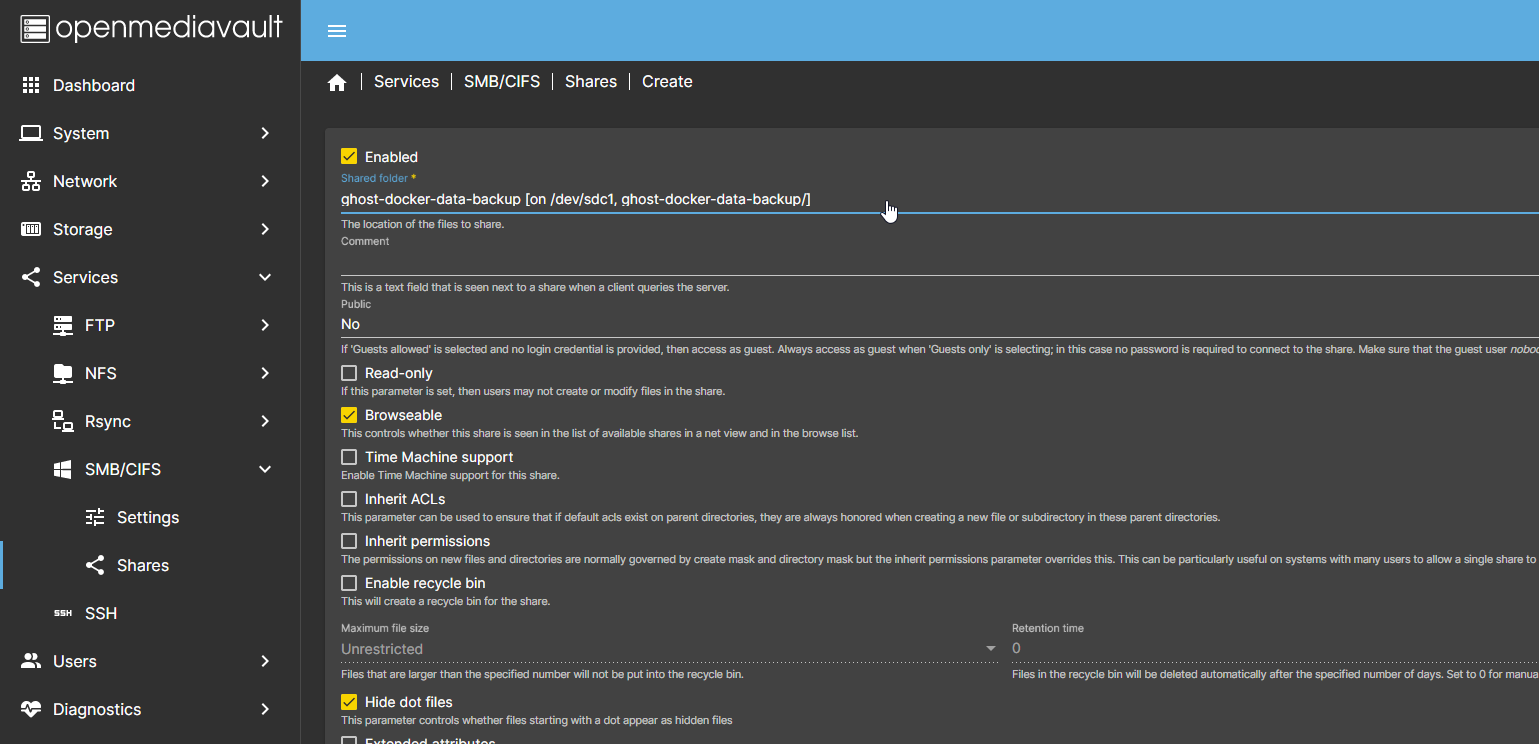
- Navigate to /#/storage/shared-folders/create.
- Name your shared folder to match what your backing up using rsync.
- Choose the drive we mounted
- Choose relative path. I usually leave this as default.
- Click save.
- Save pending changes on the next screen at the top.
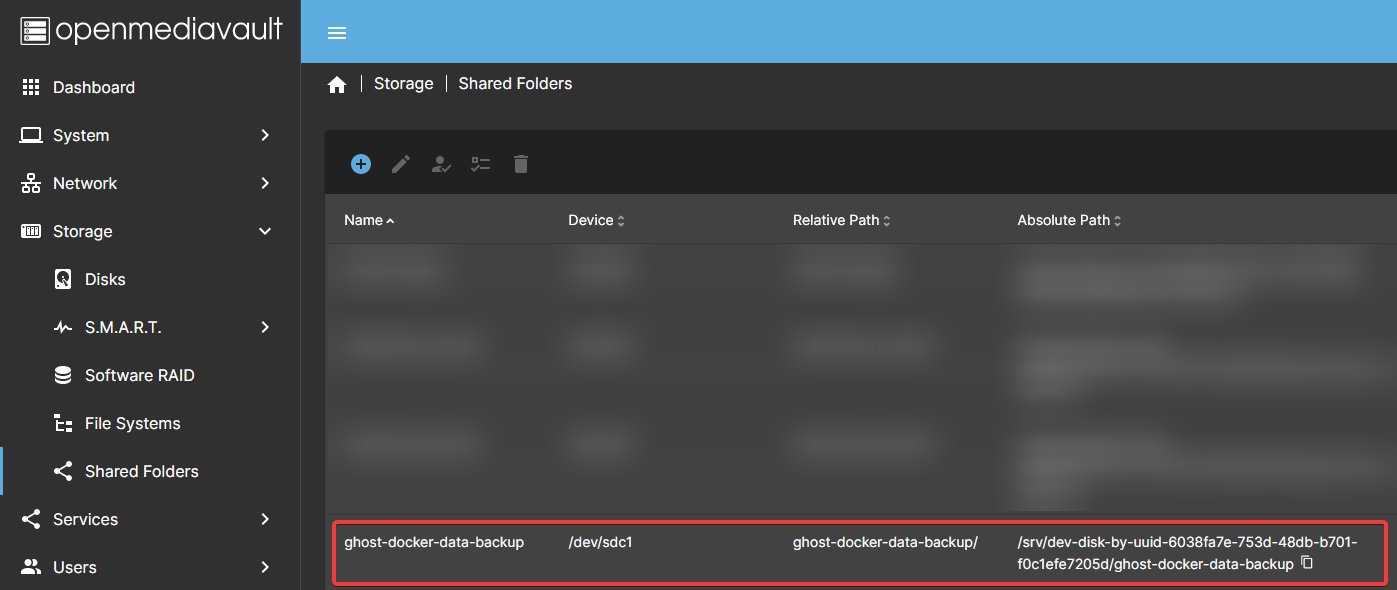
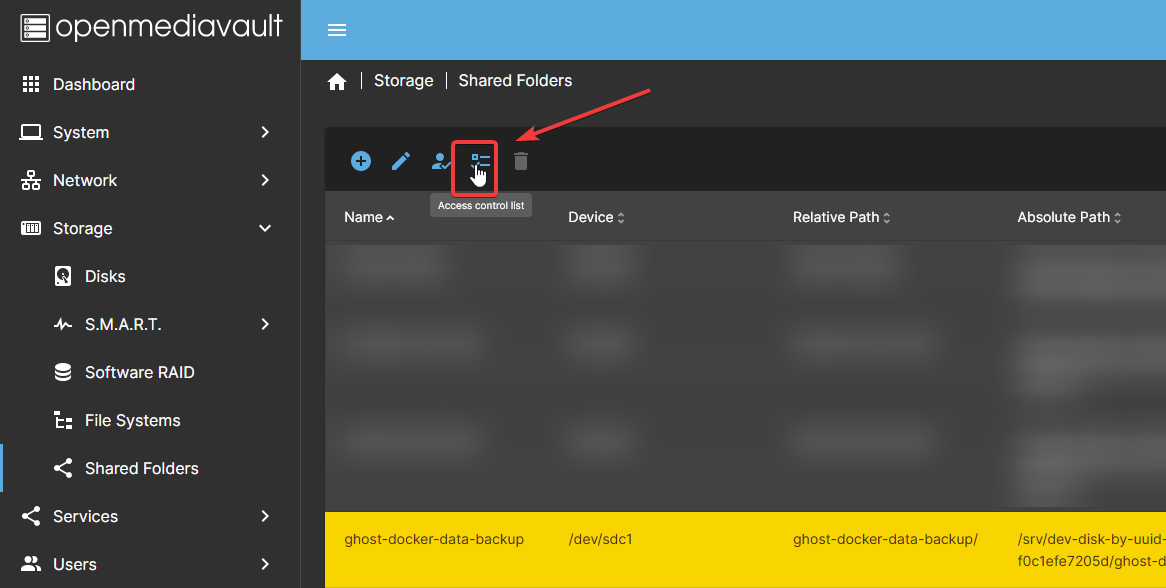
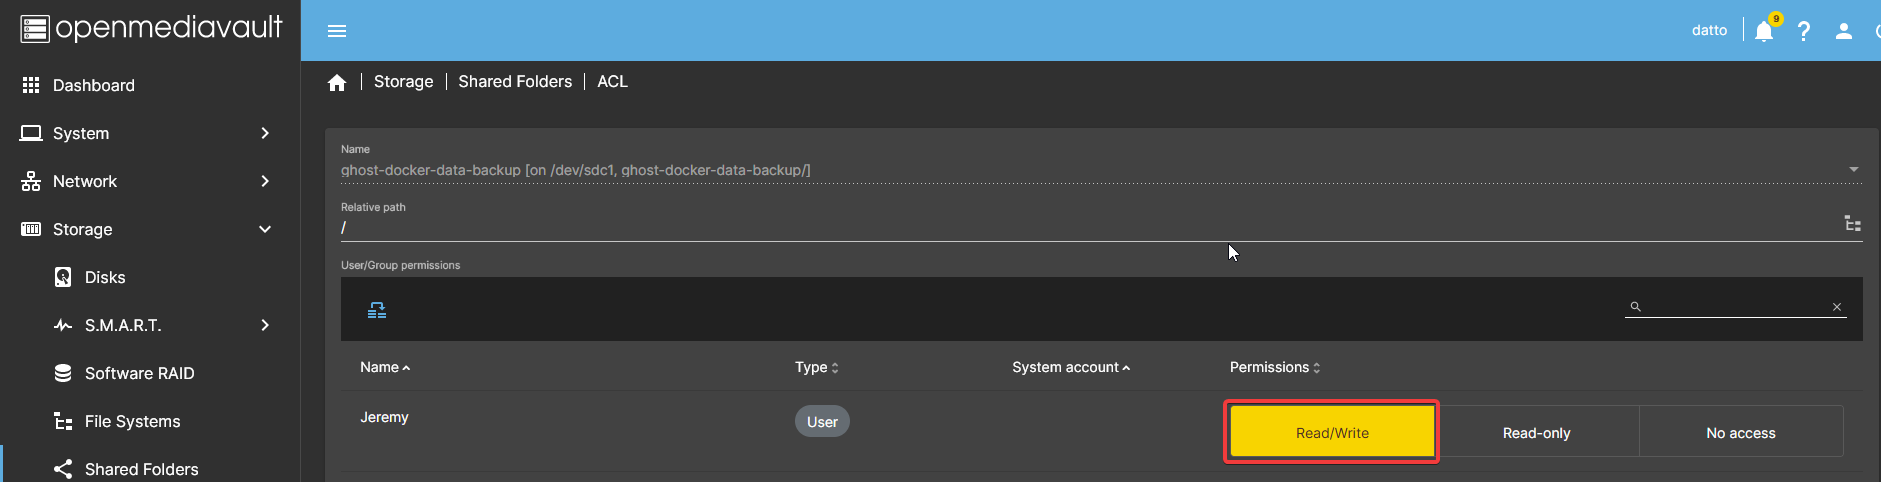
Now we can see our new shared folder. But we need to give it permissions so we can write files to it. Let's do that now.
In your OMV dashboard, navigate to /#/usermgmt/users and create a new user. I made a user with my name and gave it all the permissions. This keeps us off root but still gives us all the things we need to manage files.
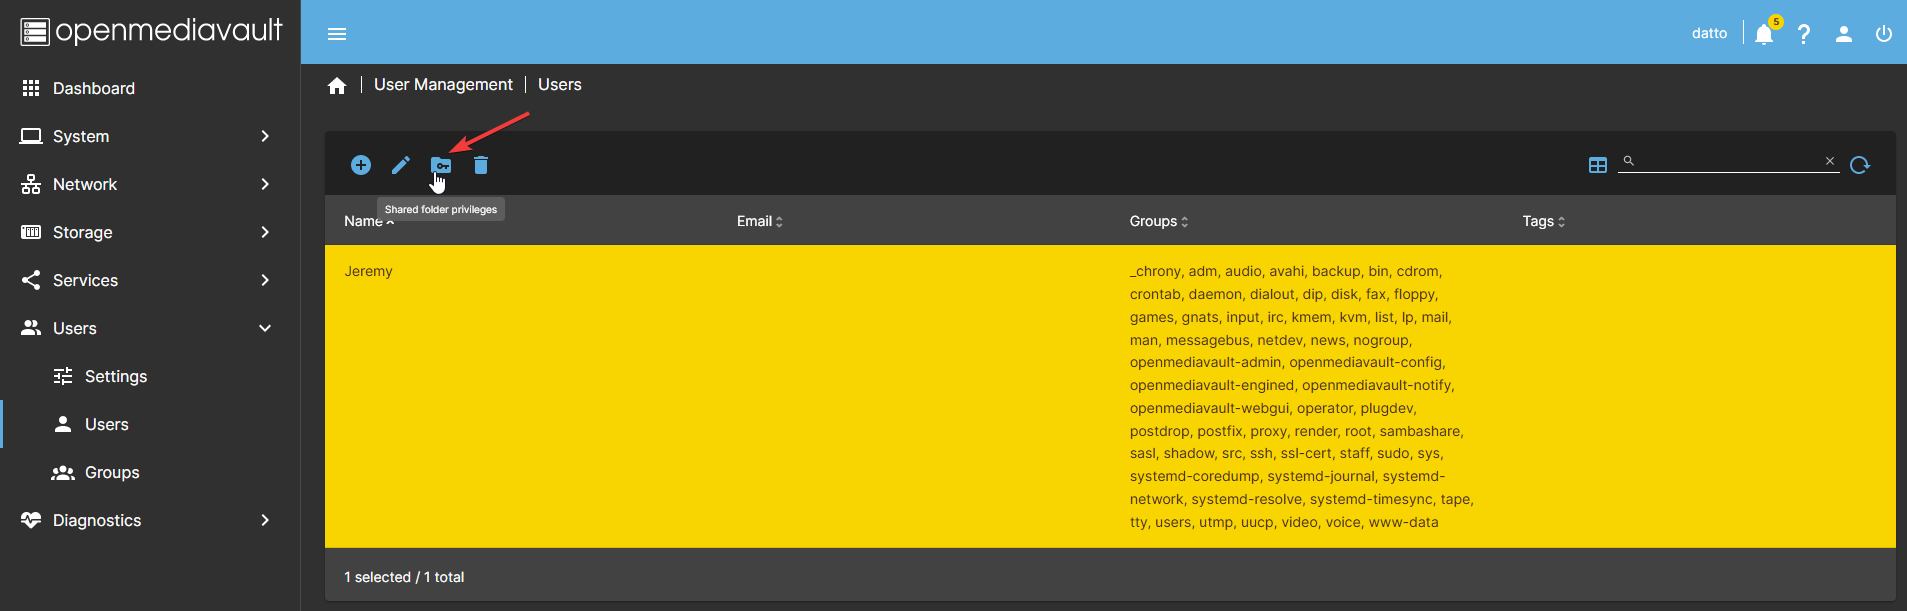
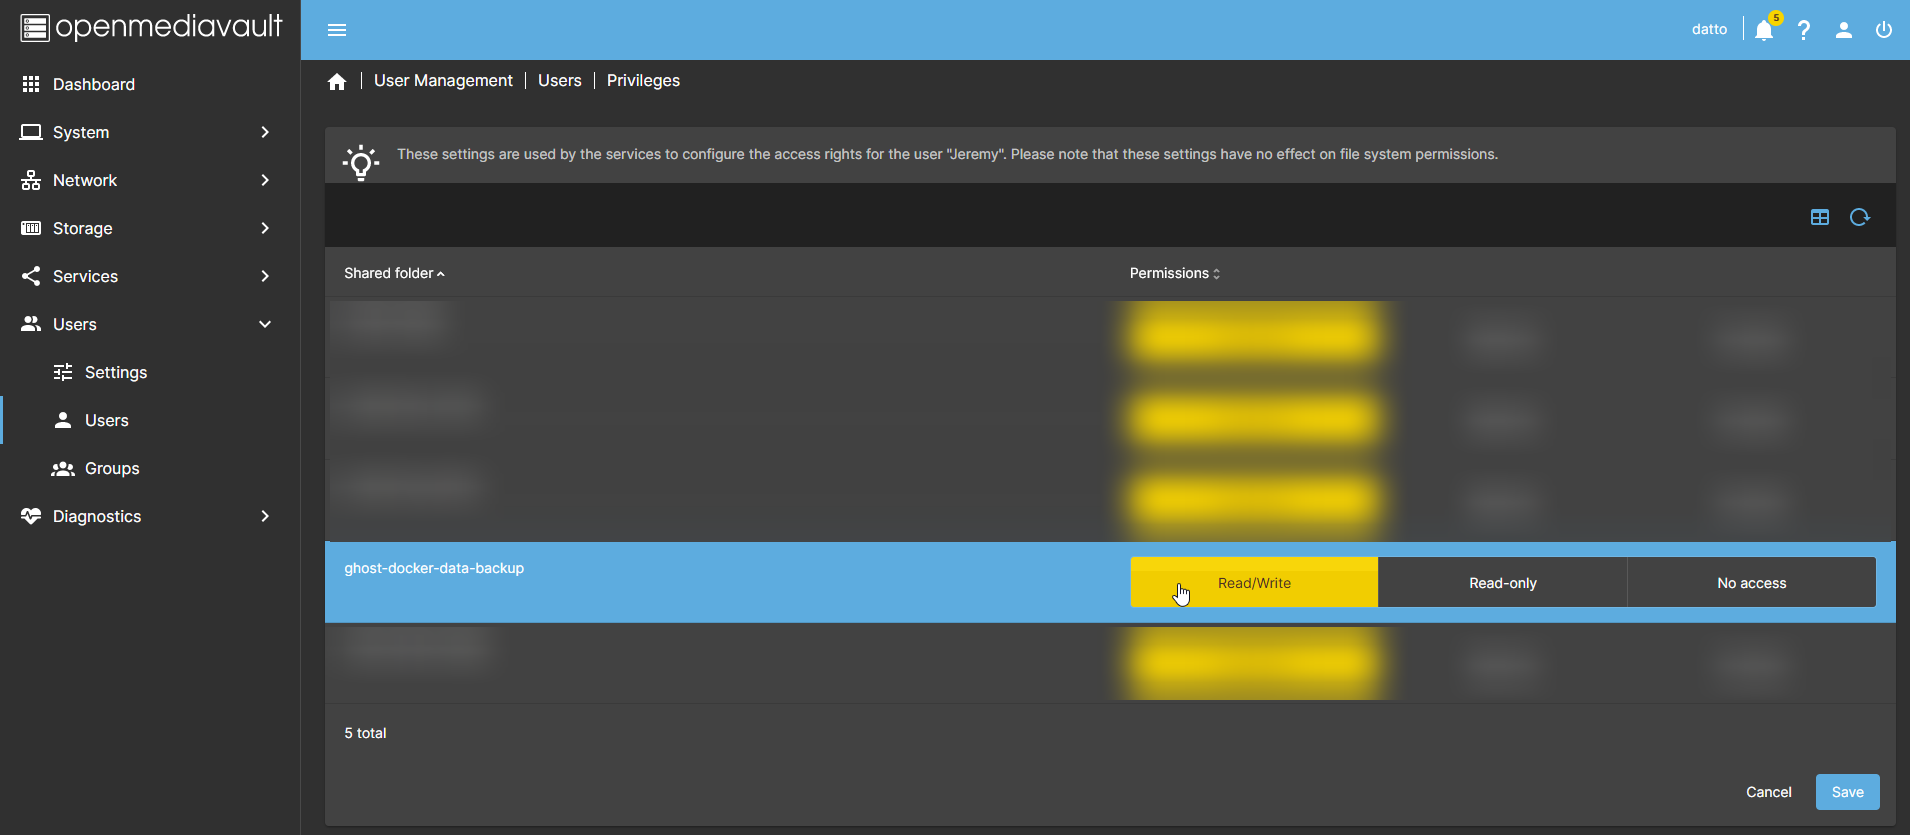
Click on the shared folder permissions icon and give your user read and write permissions to the shared folder. Click save and apply the pending changes to the server when prompted.
If you want your share to be visible via Windows SMB, navigate to /#/services/smb/settings and enable SMB.

Click save and then navigate to /#/services/smb/shares/create
Choose your shared folder and make sure it is enabled. Click save then apply the pending changes.
Under shared folders, you will have to give your new account access to the folder too. You have to make sure the folder is selected from the list in order to click the button.
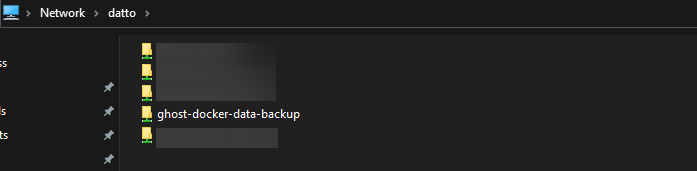
You should now have access to your new shared folder over Windows SMB! Just punch in the OMV IP address in the search bar as \\192.168.x.x and hit enter. Log in and view. For now though, we are done here.
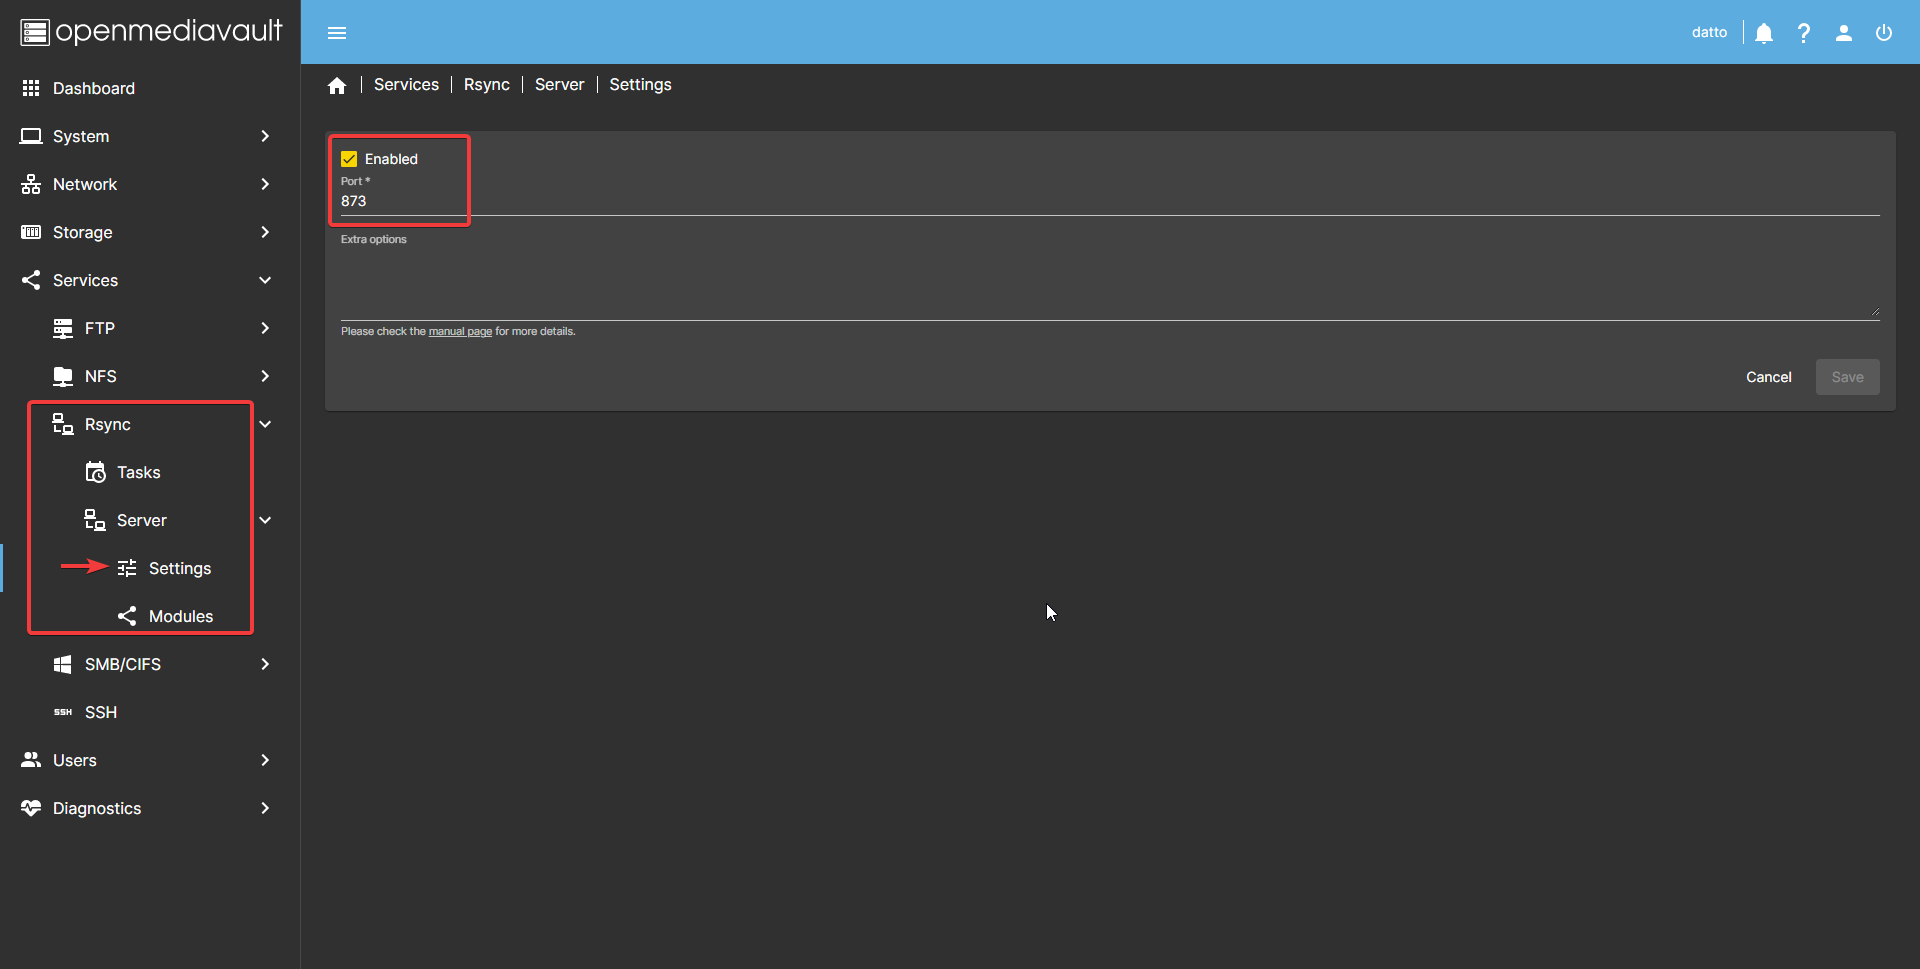
Enable Rsync Server on Open Media Vault
Now head over to Services > Rsync > Server > Settings and enable the rsync server.
Now we are switching over to our host where the files are we want to backup to the new OMV NAS. When we are done there, we will come back to our OMV dashboard to setup rsync tasks.
As an example, I will show you how to enable the rsync daemon on Ubuntu. I will use rsync to backup my docker data volumes for my Ghost website hosted on another VM on my network.
Pulling files from another host to store on OMV
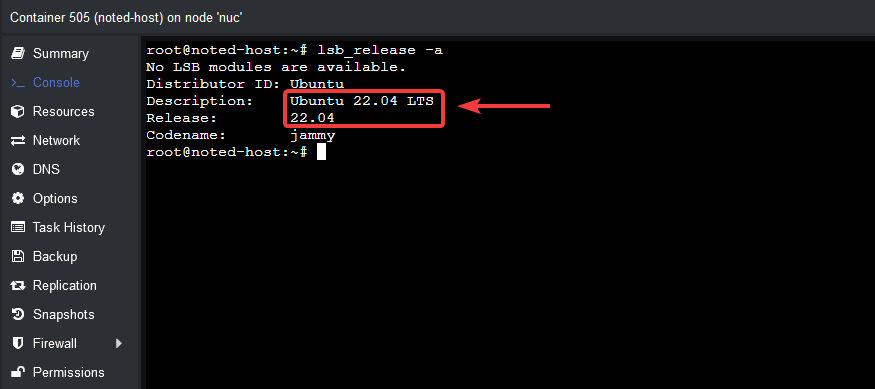
I am using a Proxmox Ubuntu 20.04 template with rsync installed for my Ghost site (Noted). By default, the rsync package is already installed on Ubuntu 20.04.
To backup files, we will need to install the rsync daemon where the files are located. To do this we need to run a few commands on my Ghost host.
Setting up an Rsync Daemon on Debian
First, using your preferred text editor, you’ll need to create the configuration file /etc/rsyncd.conf, if you do not have one already. Below is an example of our basic configuration parameters and explanations of each one.
nano /etc/rsync.conf and paste the following in the file. You will need to edit the module name, path and comment.
pid file = /var/run/rsyncd.pid
lock file = /var/run/rsync.lock
log file = /var/log/rsync.log
port = 873

[ghost]
path = /docker
comment = ghost blog files
read only = true
timeout = 300
See below for what the config parameters are in detail.
Rsync Config Options
pid file: The process id file the daemon uses.
lock file: The daemon lock file.
log file: The location of the log file.
port: If you do not want the rsync daemon to run on its default port (873) then you may specify a new port here. Make sure this port is open in your firewall. Rsync uses the TCP protocol for its transfers.
[ghost]: This is the module name. The name used here is what you’ll be putting in the rsync pull command as the first part of the source that acts as a shortcut to your file directory.
path: The file path for files associated with this module.
comment: Descriptive comment for this module.
read only: This tells the daemon the directory for this module is read-only. You cannot upload to it. For upload only, use upload only = true.
timeout: Time, in seconds, the rsync daemon will wait before terminating a dead connection.
What the config file is telling us is our module name is ghost and the path it links to is /docker. So now when I create my rsync link it will look like this. rsync://[email protected]/ghost where the IP is that of the host you are pulling files from. In this case the one we just created this config on to clear up any confusion.
Running Rsync as a Daemon on Debian
Now with this basic configuration we can start the daemon by itself by running the below:
rsync --daemon
You can verify the daemon is running with:
ps x | grep rsync
Now that the rsync daemon is running, it’s ready to accept connections! And this can easily be done on any other host you want to pull files from to your OMV backup NAS. Just drop in the config file and boot up the daemon.
Now we are going back to our OMV Dashboard to setup the rsync task
Setting up rsync tasks in Open Media Vault 6
Navigate to /#/services/rsync/tasks/create and add a new rsync task.

- Type: Remote
- Mode: Pull
- Source: This will be the IP where my Ghost files are. So mine will be rsync://[email protected]/ghost. As explained ealier, the ghost module is pulling files from /docker on that host.
- Desitnation shared folder: Choose the share you created.
- Authentication: Password
- Password: The root password of the host where your files are located. (don't worry, this NAS is not exposed)
For this next section, you have to setup the scheduled time this rsync task will trigger. With this setting, it will trigger every morning at 2am.
Scrolling down, you can setup the rsync options. These are very important to learn and you can read more about how rsync works here.
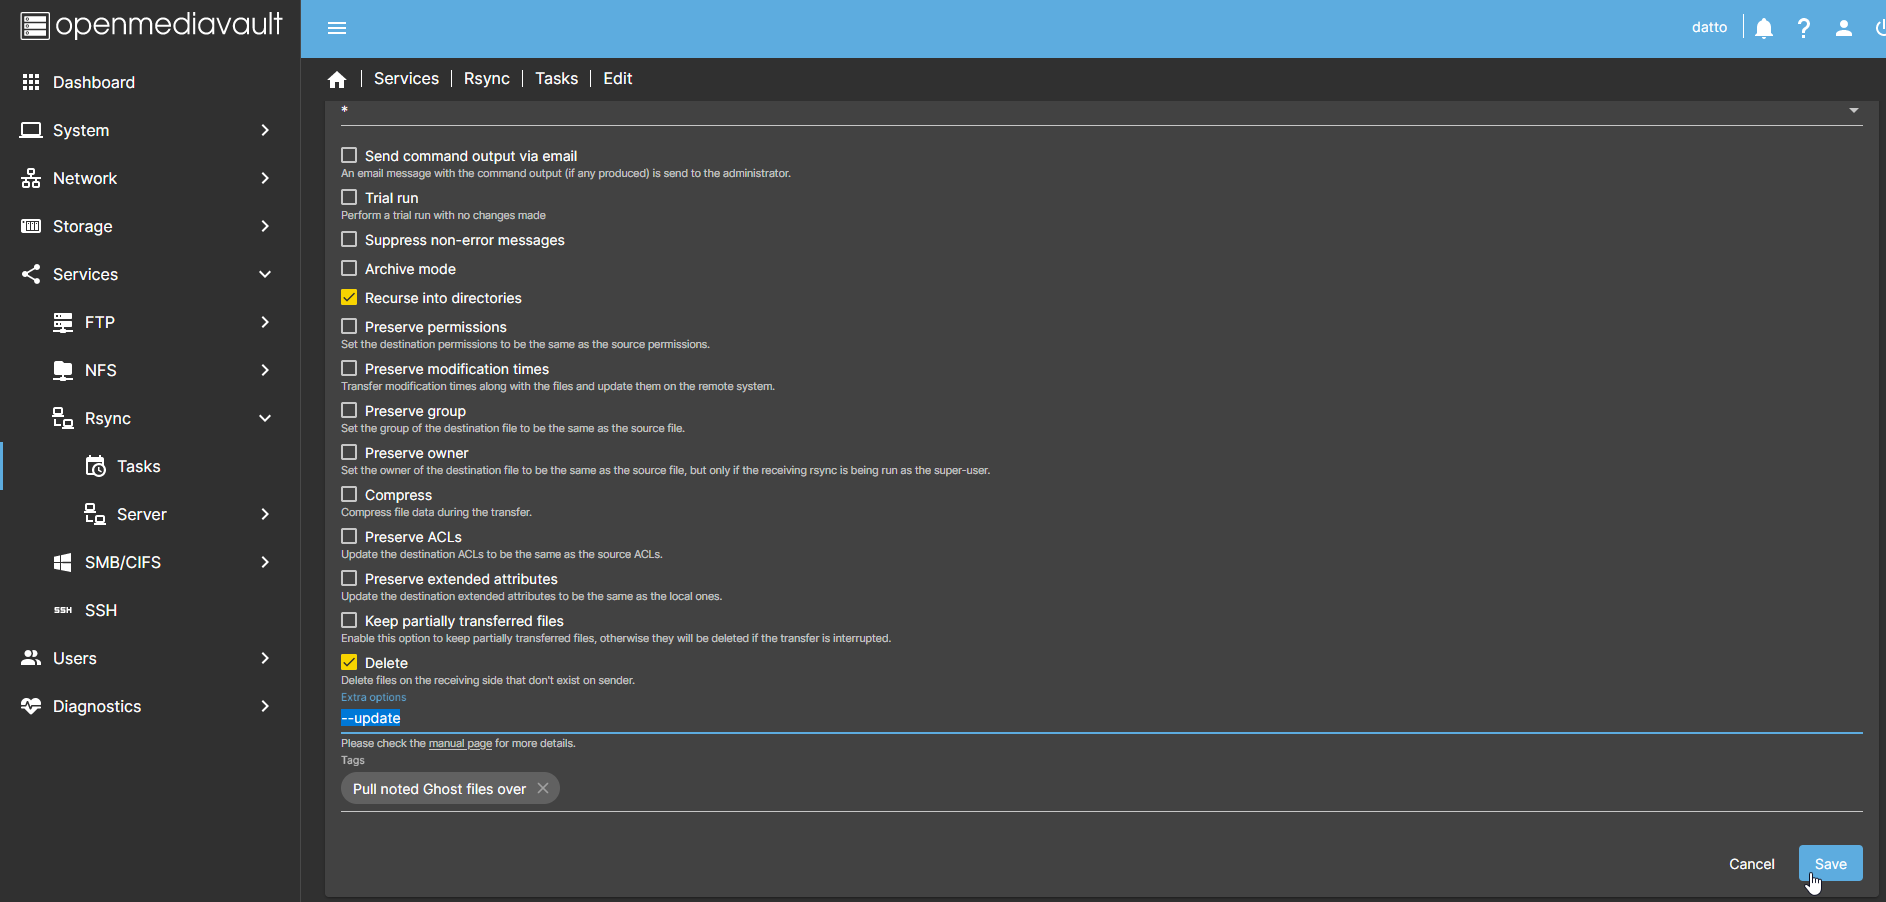
I like to tick "Recurse into directories" and for this one I also use "Delete" so if any files on my Ghost Docker server were removed by me or the system, they will also be removed from the OMV NAS side. If you want to do a test run you can tick "Trial run". You'll have to go back in and turn it off then re apply changes.
"Extra options" is where you can do some cool things like ignore files and update files. For this one I added --update which tells rsync to check if any files were updated and if so, overwrite them with the updated versions.
Finally, the tags. This is just a simple note so you know what this rsync task is for in the dashboard.
Click save and apply pending changes!
Now we run the task. Select the task from the list and highlight it then click the small play icon at the top.
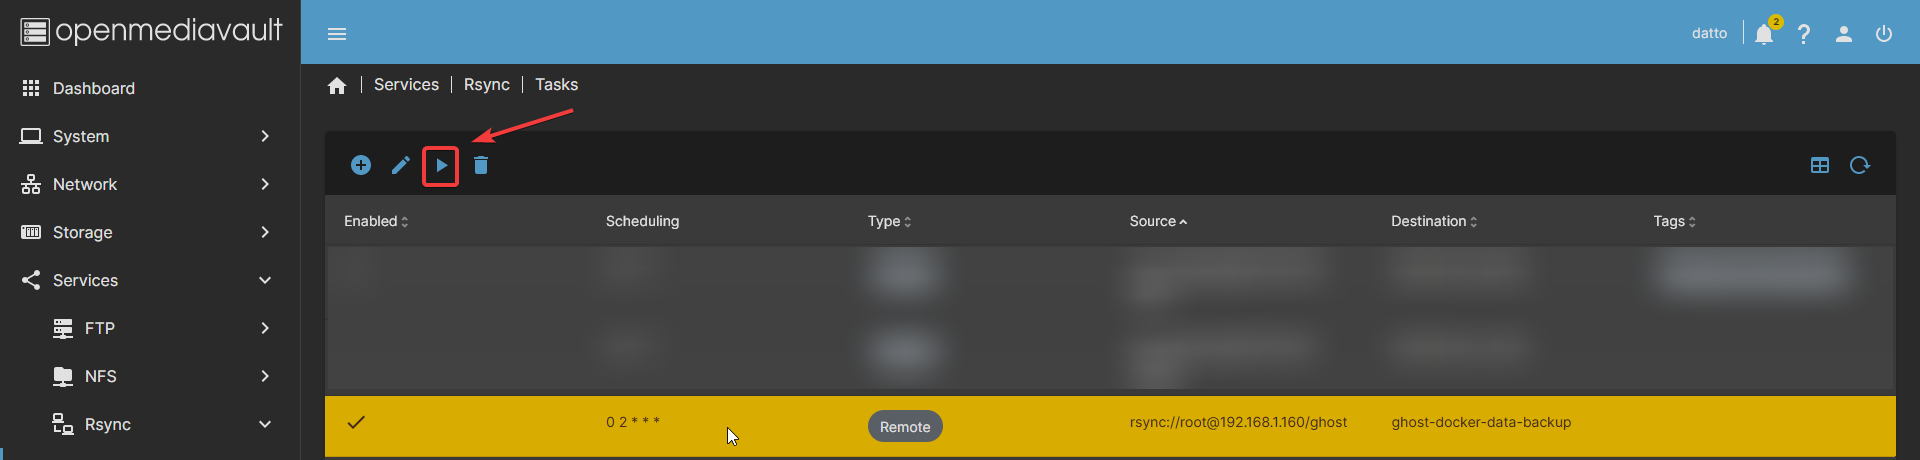
A window will appear where you can run the task and watch as it works. Click start and let it run.
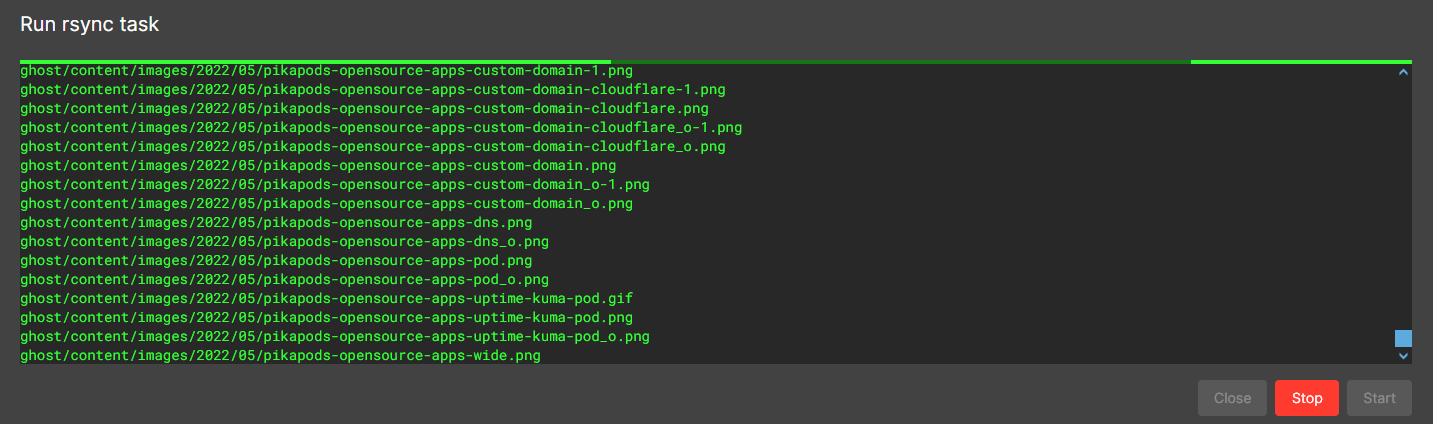
Let it run the rsync taks to pull the files over to your OMV NAS share. It will let you know when it has finished.
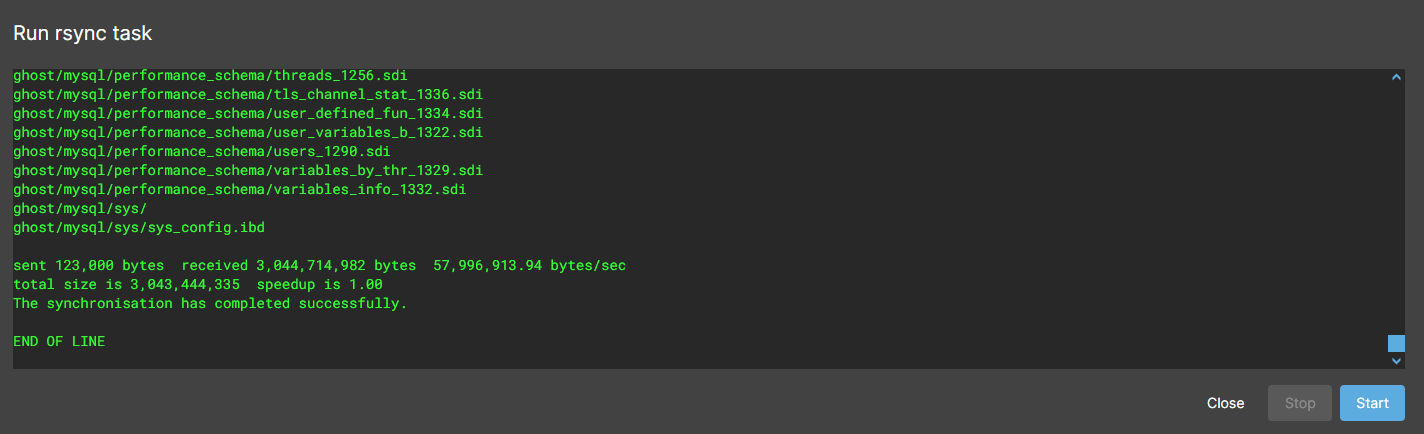
Close the window and check your shared folder.

Oh look! We have successfully used rsync to copy files over to our OMV NAS. You can run it manually like we just did but it will run on the schedule you set too. Now we have automatic "backups" of our Docker data.
Final Notes and Thoughts
I know this seems like a lot to consume however, I wanted to be as detailed as possible to cover all the steps. Cloudflare is going to hate me for all the images I used in this article! But hopefully you get something out of it.
Open Media Vault in my opinion is underrated for what it is. The rsync dashboard is absolute gold in itself. Rsync is an amazing tool and you should read more about the options to help you further setup recurring copies of your data. If you are seeking a means to an end for file backups, this is a roundabout way of doing just that.


Discussion