SerpBear - A Self Hosted Search Engine Rank Tracking Platform
Track your website keywords Google ranking with the self hosted SerpBear. Save hundreds or thousands of dollars per year.
When it comes to SEO ranking and other marketing tools, there are so many on the market and it can be a very expensive and overwhelming experience.
How many of you have Googled your own blog or website articles to see where you rank in Google? 🖐️ I have! Now you can put the past behind you because SerpBear does all of that tedious searching for you, and you can host it on your own server! It also does a lot more which we will get right into.
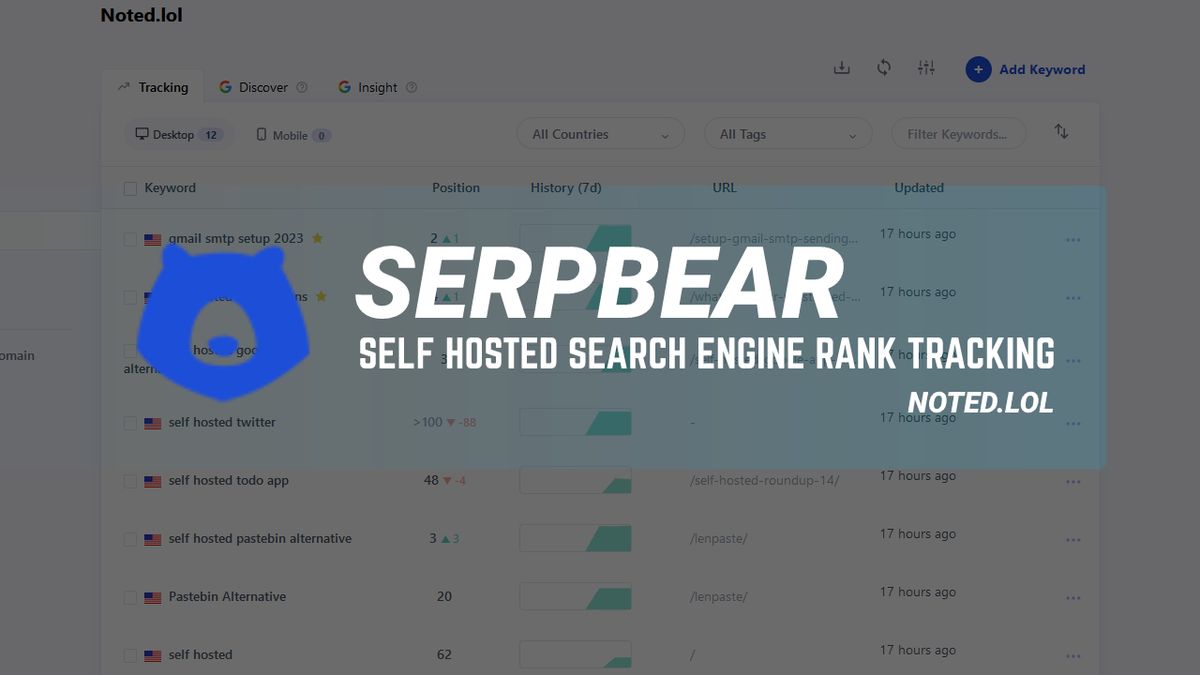
SerpBear is an effective tool that allows you to add keywords to track and monitor how Google ranks those keywords in hierarchy. The never ending game of targeted keywords to get to the top of Google search! SerpBear can help you visualize the competition you face.
What is SerpBear?
SerpBear is an Open Source Search Engine Position Tracking App. It allows you to track your website's keyword positions in Google and get notified of their positions via SMTP email alerts.
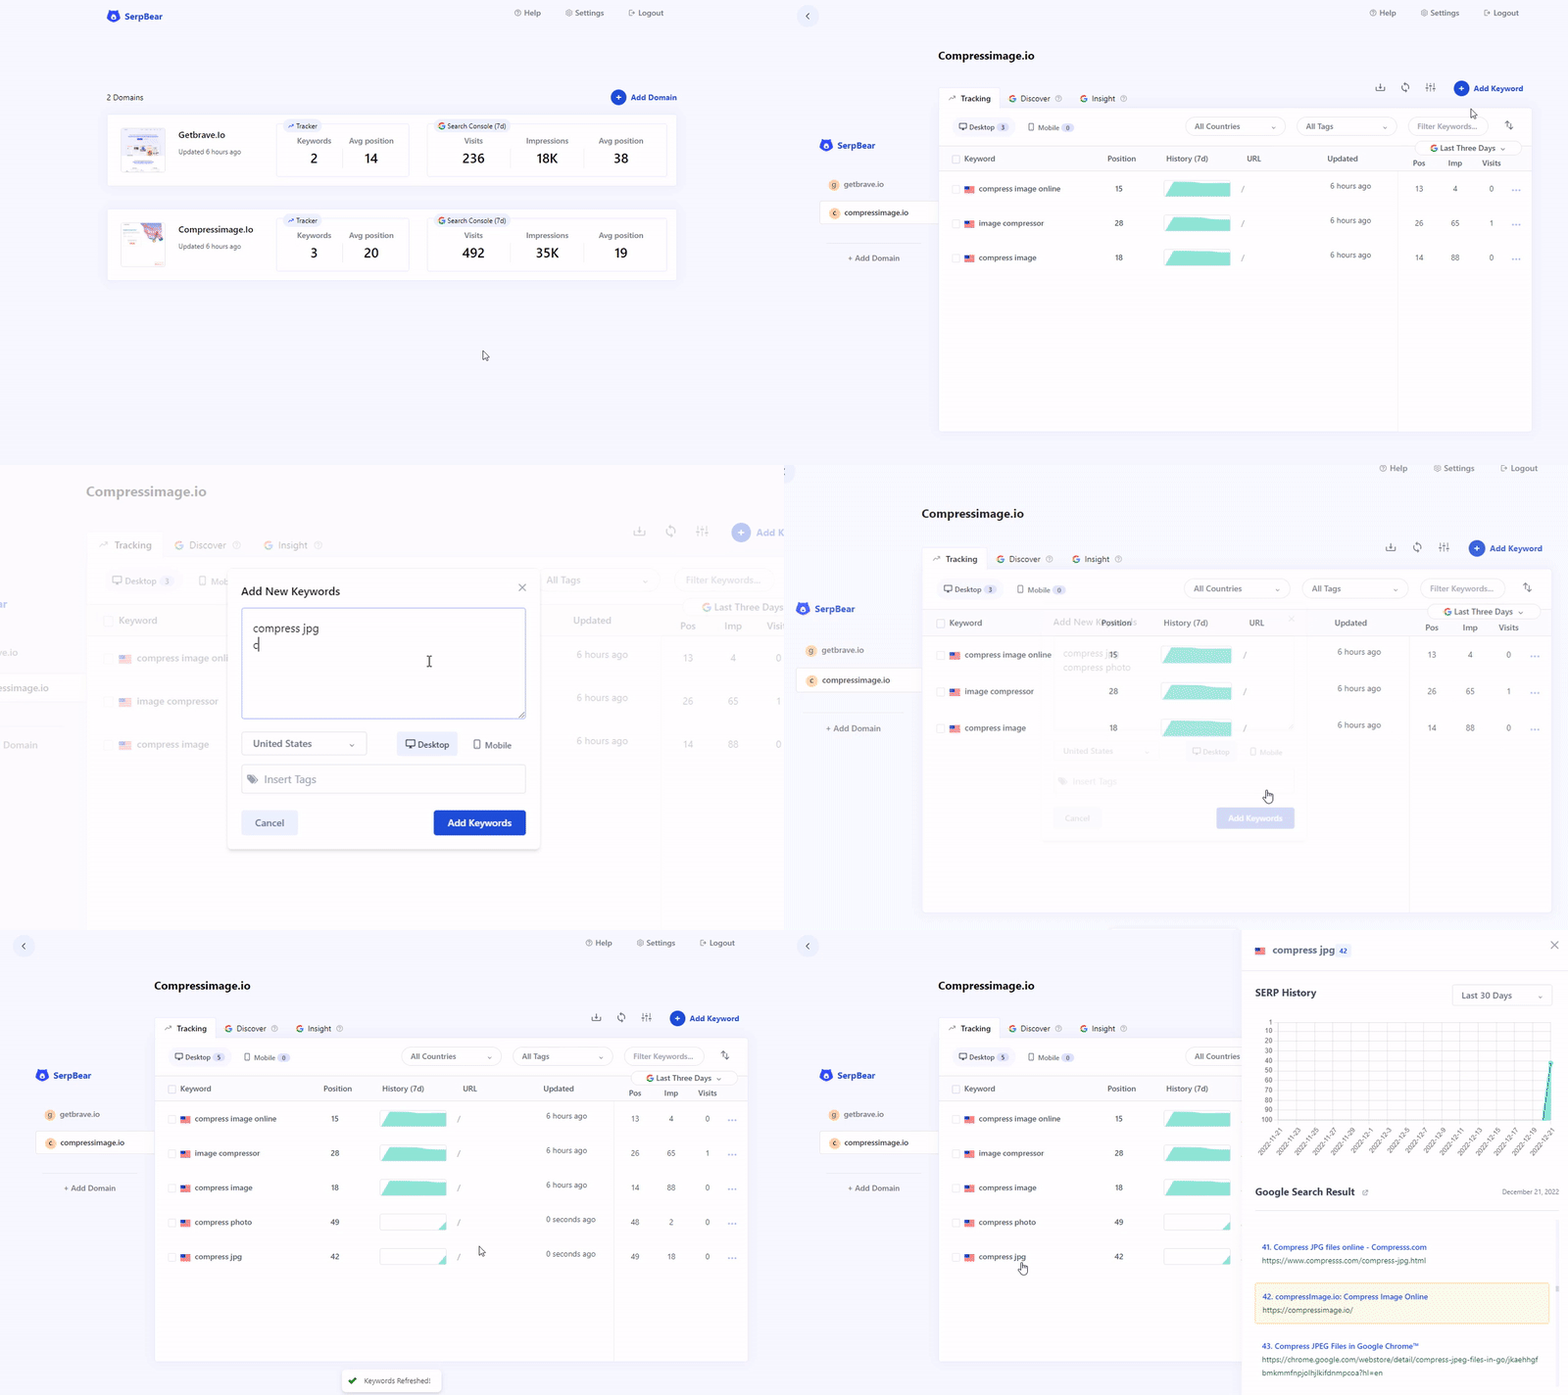
SerpBear Core Features
- Unlimited Keywords: Add unlimited domains and unlimited keywords to track their SERP.
- Email Notification: Get notified of your keyword position changes daily/weekly/monthly through email.
- SERP API: SerpBear comes with built-in API that you can use for your marketing & data reporting tools.
- Google Search Console Integration: Get the actual visit count, impressions & more for Each keyword.
- Mobile App: Add the PWA app to your mobile for a better mobile experience.
- Zero Cost to RUN: Run the App on mogenius.com or Fly.io for free.
Installing SerpBear using Docker Compose
Step 1:
Create a new folder and create a docker-compose.yaml file with the following content:
version: "3.8"

services:
  app:
    image: towfiqi/serpbear
    restart: unless-stopped
    ports:
      - 3000:3000
    environment:
      - USER=admin
      - PASSWORD=0123456789
      - SECRET=4715aed3216f7b0a38e6b534a958362654e96d10fbc04700770d572af3dce43625dd
      - APIKEY=5saedXklbslhnapihe2pihp3pih4fdnakhjwq5
      - NEXT_PUBLIC_APP_URL=http://localhost:3000
    volumes:
      - serpbear_appdata:/app/data
networks:
  my-network:
    driver: bridge
volumes:
  serpbear_appdata:
Change Environment Variables to your need. The Details of the Environment Variables can be found here.
Step 2:
From the same directory, run the container using the following Command:
docker compose up -d
Here is a link to the SerpBear docs where you can see this and more options for installing SerpBear.
Getting started with SerpBear
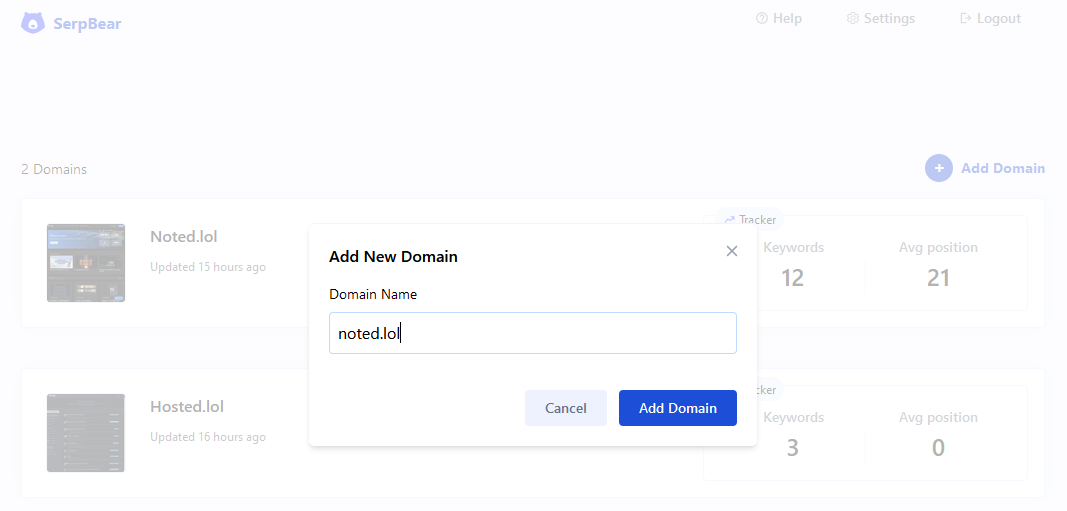
When you first log in using the username and password from the Docker Compose environments, you will see a dashboard that looks pretty empty. To get started, add your website domain by clicking the "Add Domain" button.
Setting up a SERP Scraper in SerpBear
Before you jump in and try to add keywords, you will need to register for a scraper. I use ScrapingAnt and found it to be super simple. As soon as you signin, there's a dashboard with your API key. No digging or hunting through loads of menus to find it. It's just right there in plain sight and I love that!

You will get 10k free API calls per month which so far is more than enough for my usecase with 1 or 2 domains.
Now you can grab your API key and plug it into the SerpBear scraper API settings.
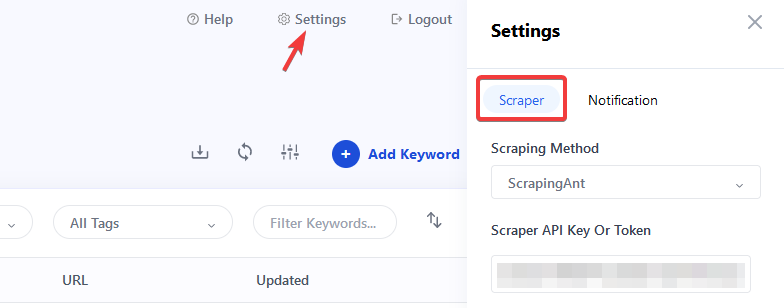
Don't forget to click "Update Settings" at the bottom of that menu.
Adding Key Words in SerpBear
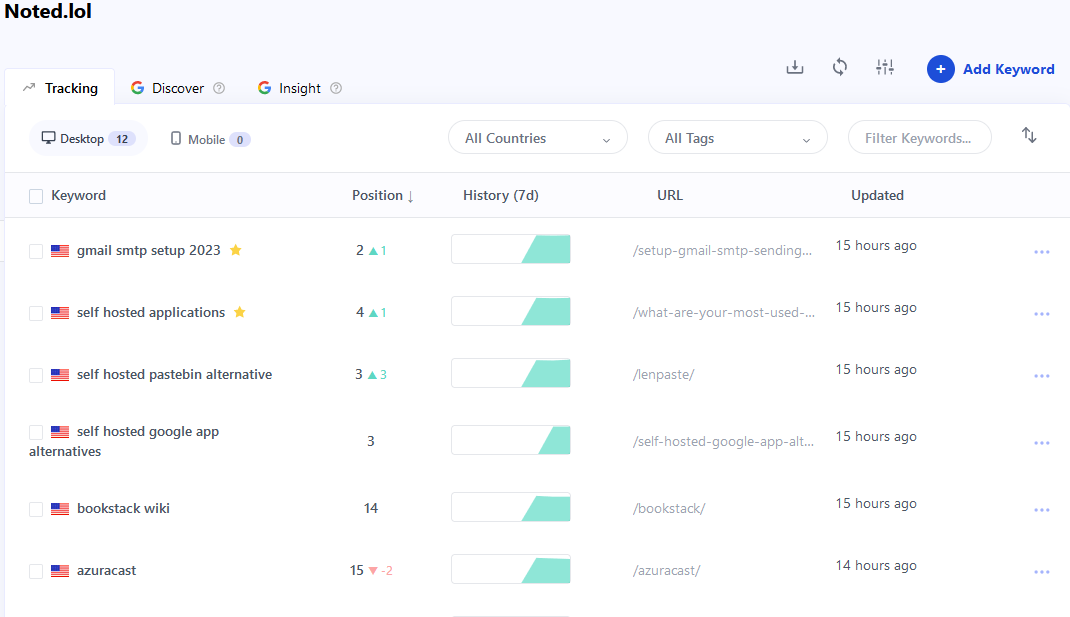
Now the fun begins! You can start adding keywords related to the content in your website articls. For example, if you have an article about setting up Gmail SMTP in 2023, you might want to know how you rank when people search for that term. So we add a keyword "gmail smtp setup 2023".
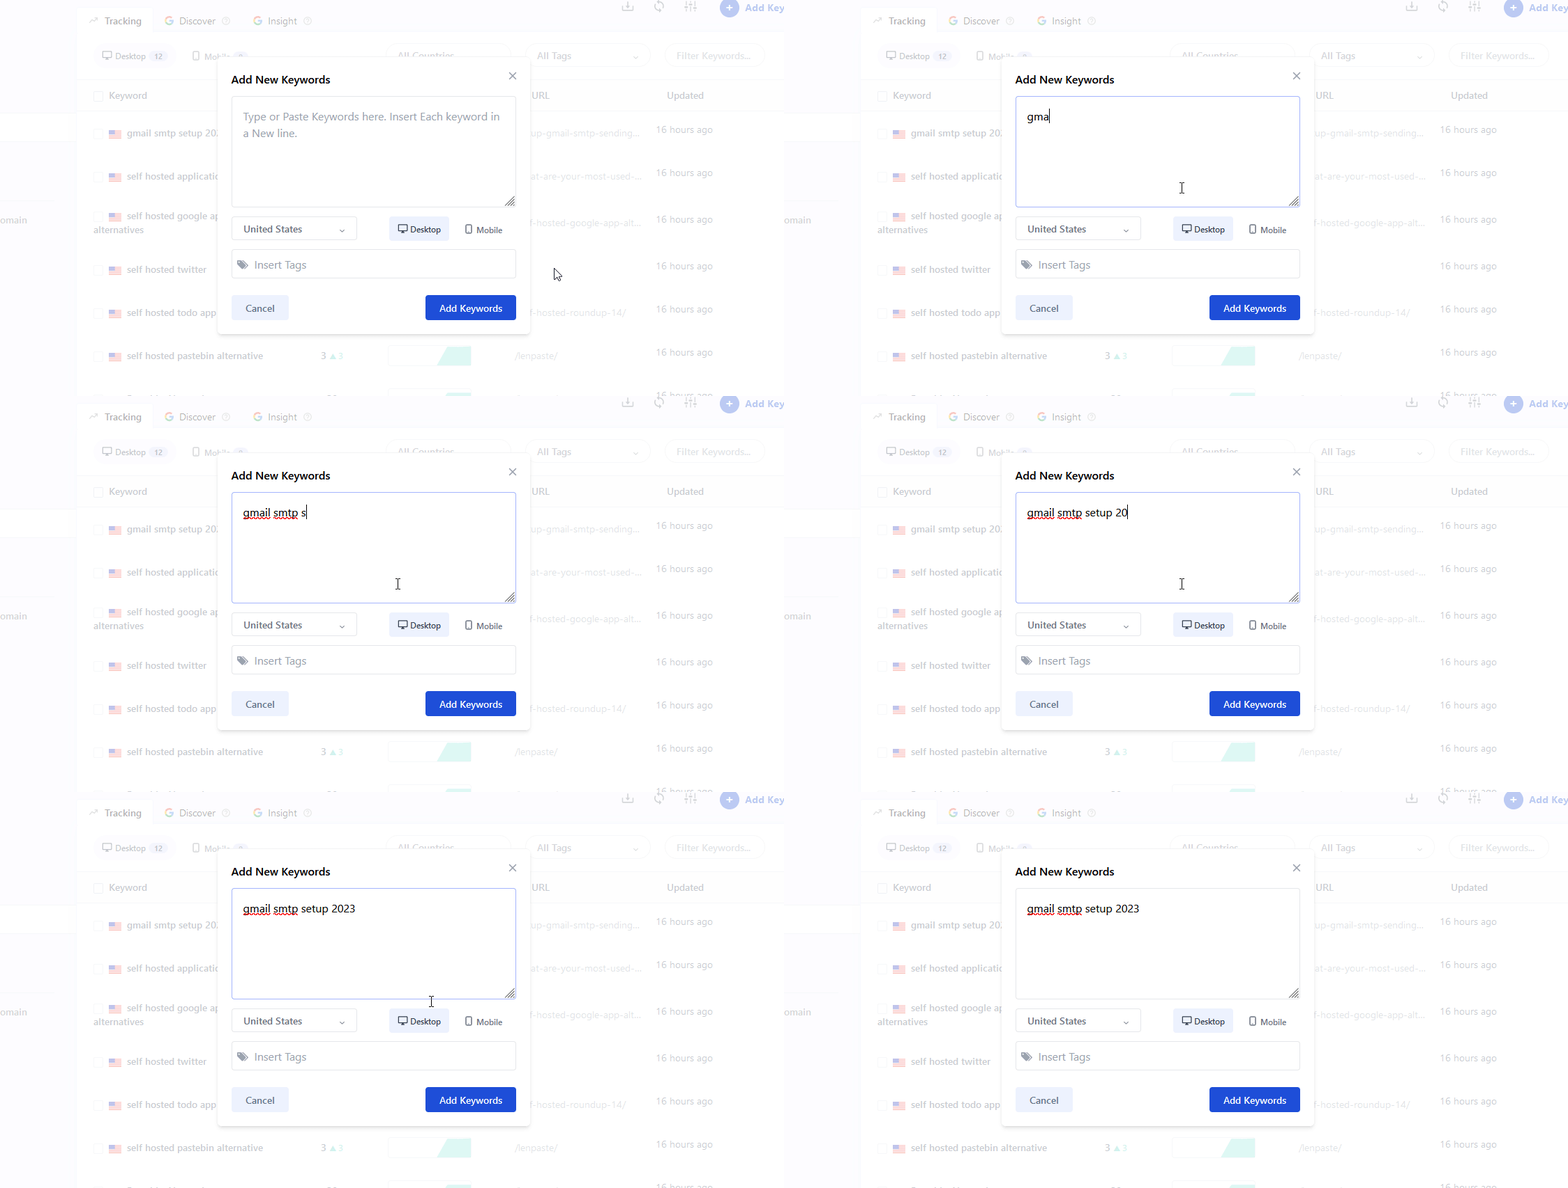
When the keyword is added it sends a call to ScrapingAnt to go do some work. It will go out and scrape Google then send the results back to the dahsboard. It takes about 10-20 seconds to see results. A Scraper Cron runs internally in the Docker container everyday at 12am that updates the SERP of all the keywords. Or, you can trigger it manually by pressing the refresh icon. Just keep in mind it uses more API calls every time you press the refresh button.
Viewing SERP History in SerpBear
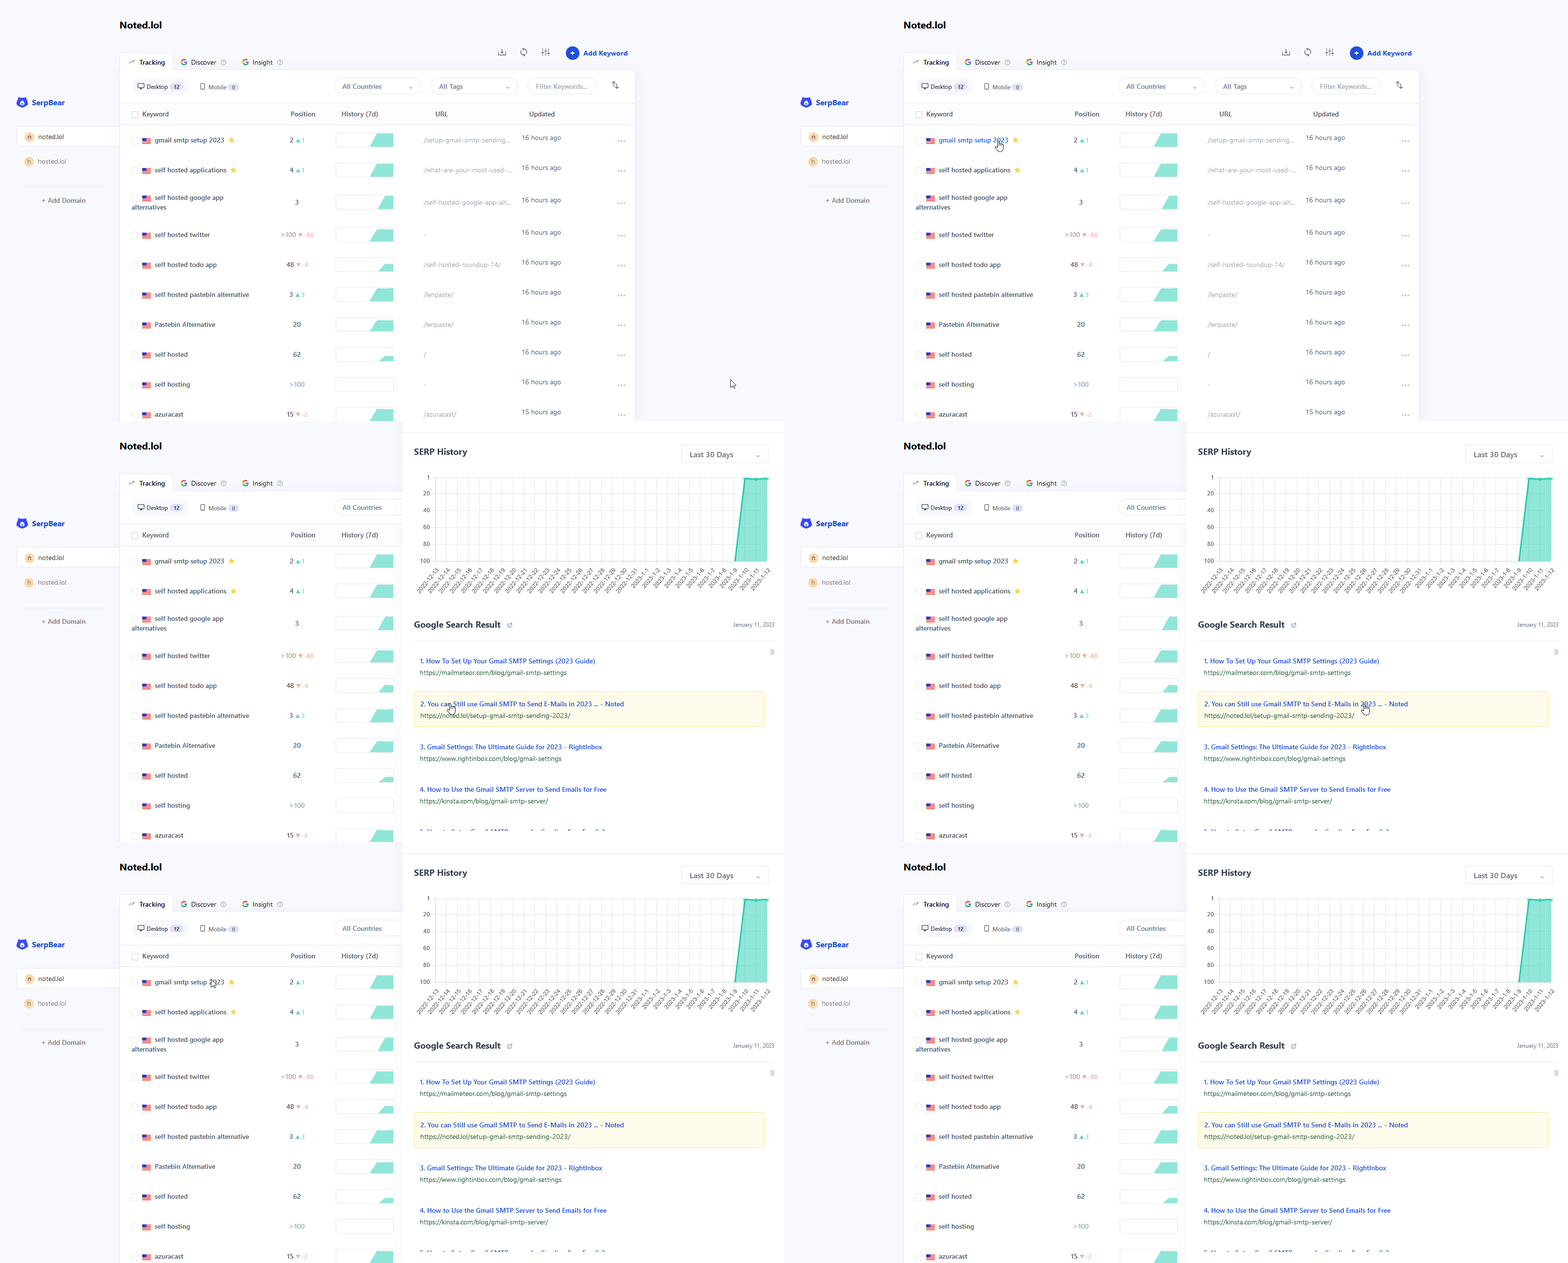
You can click each keyword to open the dialogue window that shows exactly where you are on Google. Your result will be highlighted in yellow making it easier to find. The number in the graph showing your position will match that in the dialogue window.
Integrate Google Search Console
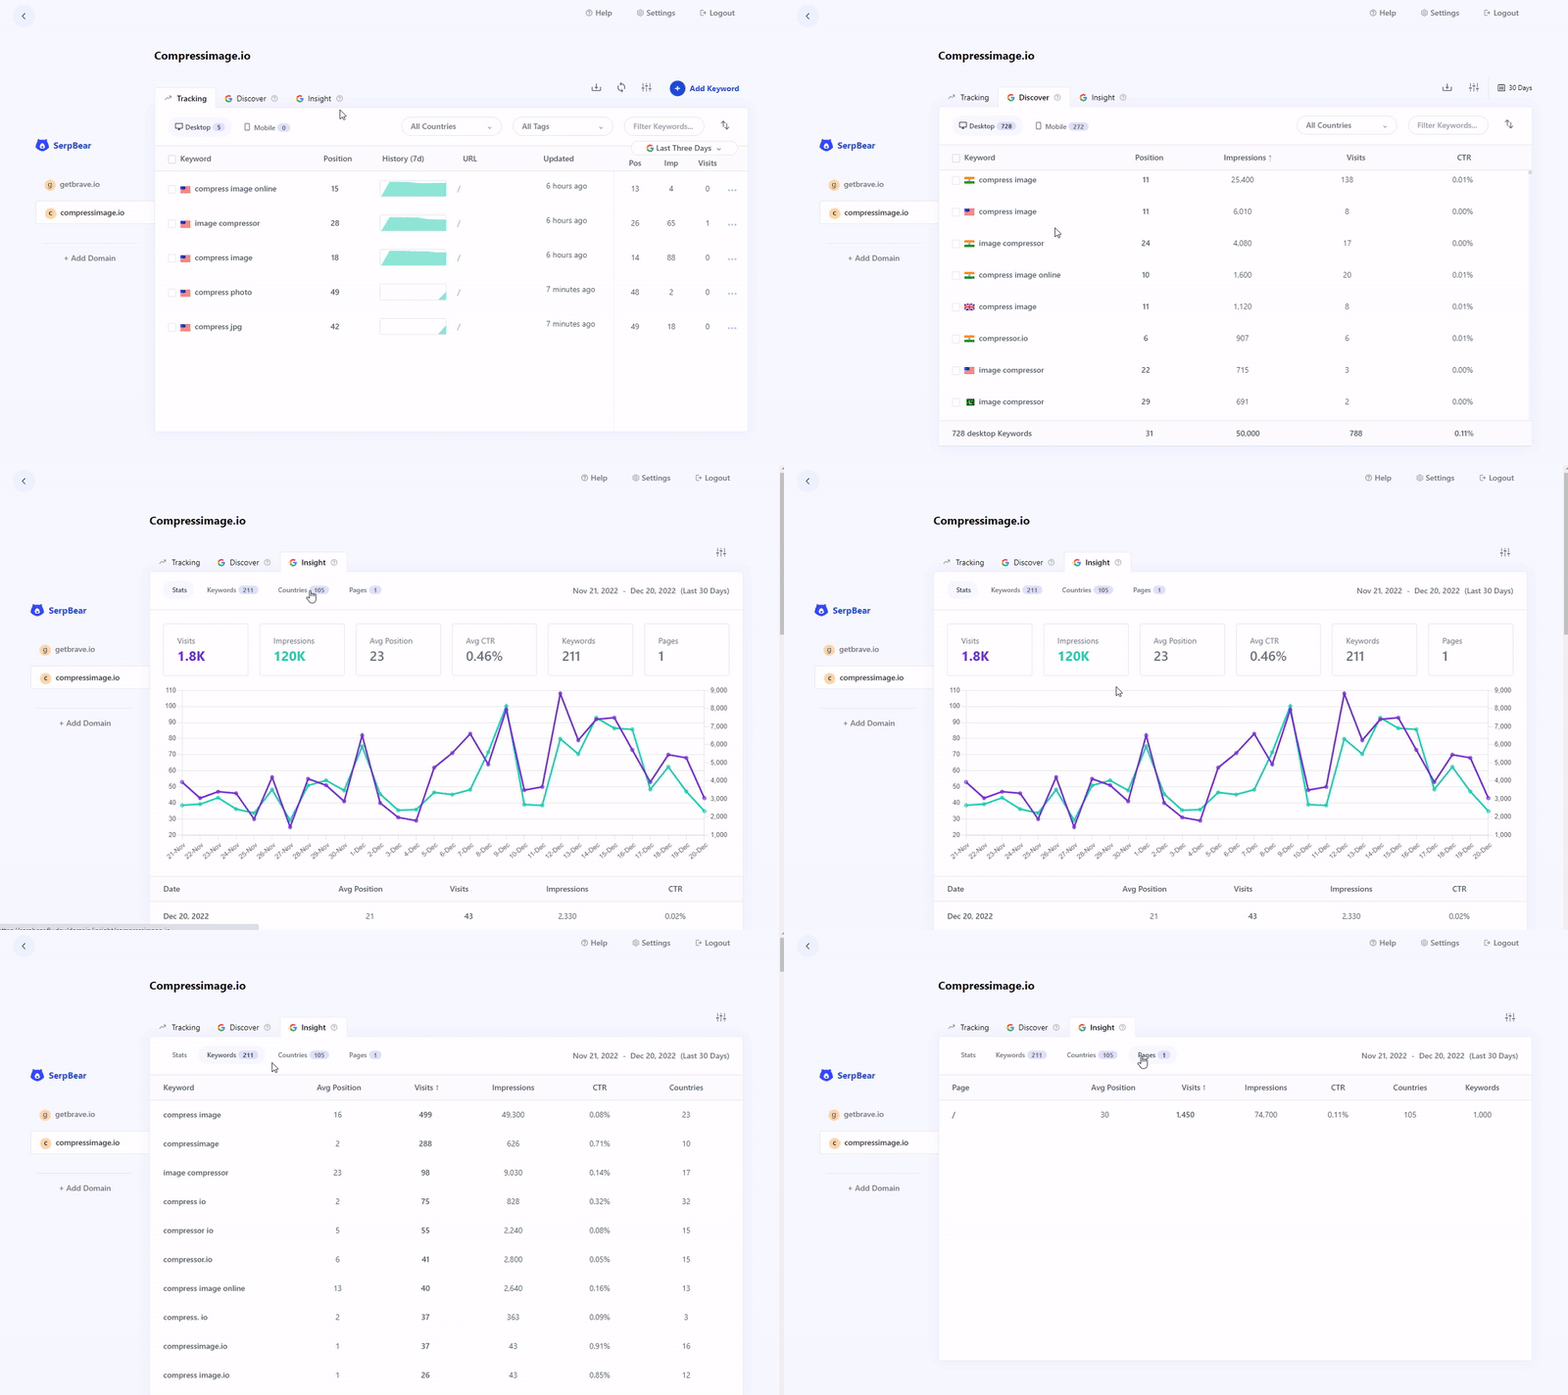
When you integrate your Google Search Console Account, you will unlock these features:
- Ability to View the Actual visit counts, impressions and Average Position beside each tracked data.
- Ability to Explore already ranking keywords in Google.
- Ability to View the Stats for Last 30 days. Easily View the top keywords, countries & Pages.
- Get the Last 7 days Search Console Data in the notification Email.
To better understand how to set this up, please see the SerpBear documentation.
SerpBear Notifications
Setting up notifications in SerpBear using SMTP is simple. Click "Settings" then the "Notofication" button. You can use any free SMTP provider such as Gmail. I have a detailed guide for setting up Gmail SMTP here. It's not hard at all!
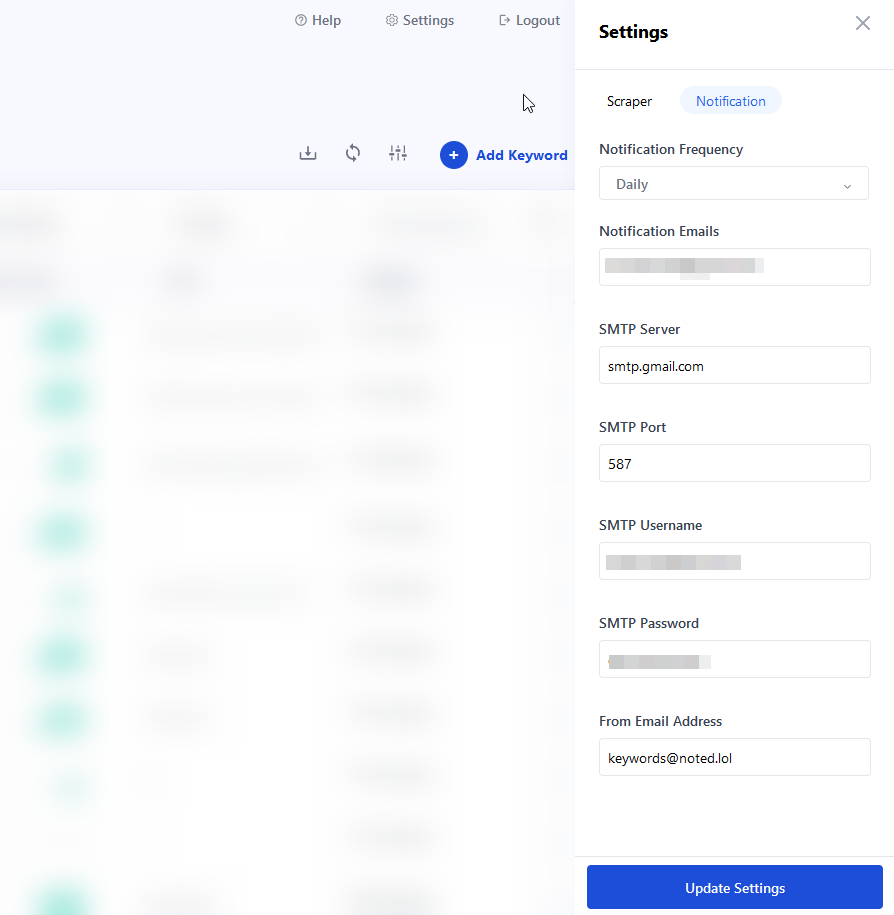
You can choose to get daily, weekly or monthly notifications. It will send an email with your current SERP positions based on your chosen interval.
Final Notes and Thoughts
SerpBear is a phenomenal, free and open source tool that does a lot of work. It saves you tons of money and grunt work. The fact it can be self hosted is even better!
Other SERP tracking services can be very expensive because they are a vital part of marketing operations.
If you find SerpBear useful, be sure to stop by the SerpBear Github page and give it a star on the repo!


