

Hello, everyone! I'm Alvaro, the developer who brought Wrestic to life, and I'm delighted to have the opportunity to introduce this project to the Noted community today.
Wrestic, developed in Rust, is a backup tool that streamlines the backup process by utilizing Restic's encryption and compression features. It's ideal for both personal and business data, automating the task and ensuring the safety of said data.
When managing our own server, it becomes essential to prioritize the security and integrity of our files. Therefore, we invest considerable time in research to identify the best tools for the task and determine the most secure backup storage solutions. This process can be quite time consuming.
Wrestic is all about making backup management as simple as possible. The thing is, it's not limited to just one way of using it. You can go for the easy navigation Text User Interface (TUI) or get hands on with the Command Line Interface (CLI). We'll get into why having these options is a plus in a bit.
So, with Wrestic, all you really need to do is pick where you want to stash your backups and set up a single file. Here's how it all works.
Getting Started with Wrestic
First, let's install Wrestic in our linux machine:
curl -sL $(curl -s https://api.github.com/repos/alvaro17f/wrestic/releases/latest | grep browser_download_url | cut -d '"' -f 4) | sudo tar zxf - -C /usr/bin --overwriteNow that Wrestic is installed, let's deep dive into its configuration.
Everything in wrestic is configured in a file called wrestic.toml .
Let's create it with a single command:
mkdir -p ~/.config/wrestic && touch ~/.config/wrestic/wrestic.tomlAs you can see, the path must be /home/<$USER>/.config/wrestic/wrestic.toml .
Now that we have generated our config file, let's configure it.
Wrestic Configuration
Profiles are basically an object with the information needed to manage your repository.
wrestic.toml you’ll be asked for the profile you want to use when performing an action.To add a profile to your wrestic.toml file look at the following example:
[settings.my_profile]
BACKEND = "local"
RESTIC_PASSWORD = "mysupersecretpassword"
REPOSITORY = "/home/alvaro17f/NOTED/Backups"
BACKUP_FOLDER = "/home/alvaro17f/NOTED/Documents"
RESTORE_FOLDER = "/home/alvaro17f/NOTED/Restored"
KEEP_LAST = 10
In this example we've added a profile named my_profile to manage a local repository that will backup the Documents folder into the Backups repository.
If I'd like to restore the backup, data would be restored into Restored folder.
Lastly we've set KEEP_LAST = 10 to only keep the las 10 snapshots.
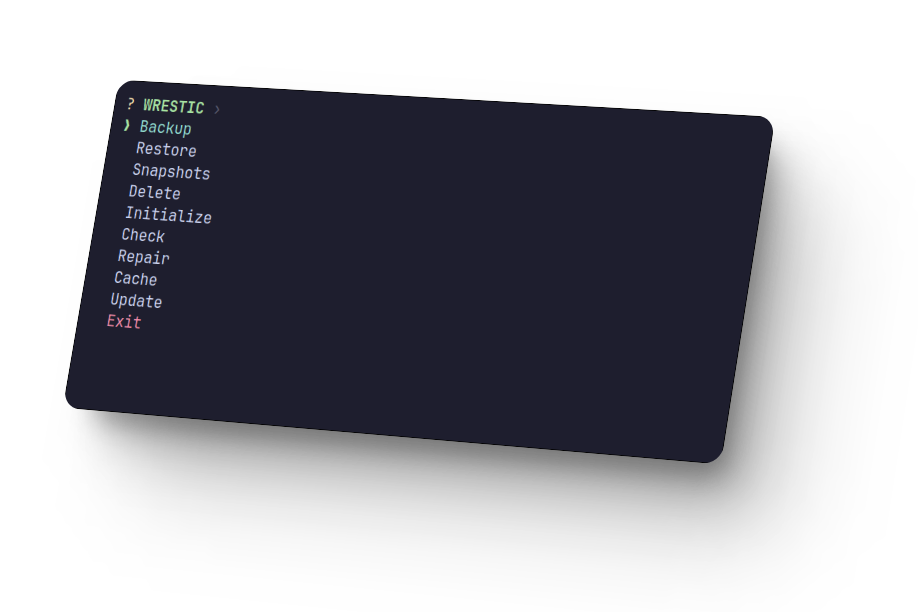
Usage Using TUI


Wrestic as a CLI
If you want to list all the available commands for Wrestic you can run:sudo wrestic help
Then you'll see a screen like this:
Restic wrapper built in Rust

Usage: wrestic [OPTIONS] [COMMAND]

Commands:
  backup     Make a backup of all your repositories
  restore    Restore a snapshot
  snapshots  List snapshots
  delete     Delete a snapshot
  init       Initialize all of your repositories
  check      Check repository health
  repair     Fix any issue
  cache      Clean cache
  update     Update Wrestic
  help       Print this message or the help of the given subcommand(s)

Options:
      --generate <GENERATOR>  [possible values: bash, elvish, fish, powershell, zsh]
  -h, --help                  Print help
  -V, --version               Print version
This can be useful when automating the backup process, for example, you can set a cronjob to backup everything everyday at 4:00 am. Let's see how:
- Make sure you have
cronieor some cron app installed. - Run:
sudo crontab -eto edit your cronjobs. - Add the following:
PATH="/usr/local/bin:/usr/bin:/bin"

0 4 * * * wrestic backup
Final Notes and Thoughts
I'd like to give a big shoutout to our amazing community 👋 for taking the time to read this, and a special mention to Jeremy for his fantastic contributions here on Noted and abroad. I genuinely hope that Wrestic becomes a valuable part of your backup workflow, making your data management easier and more secure.
For more information about how to configure and use Wrestic check out
Wrestic's website.
If you see value in this application or want to dive deeper into it, I invite you to check out the Wrestic GitHub repository and consider giving the project a star. Your support is greatly appreciated.


Discussion