

What makes Rsync so awesome is the ability to refine your tasks and customize them to your needs. So many people struggle with Rsync when using it in the terminal but today, we change that.
Having Rsync built into the Open Media Vault dashboard as a service option makes it so simple to use. Setting up scheduled Rsync tasks is a great way to copy your data from one location to another for peace of mind.
Know going in, this is not a recommended way to "backup" your data. However, this is a great way to make copies and can be treated as such but knowing the ramifications.

It's important that Rsync is enabled on both the sending and receiving ends or it will not work. Copying data from one Open Media Vault NAS to another is the easiest method but I have also pulled data from a Synology NAS to Open Media Vault and it works great. For this demonstration, I will show how it can be done from one Open Media Vault NAS to another.
Step 1: Make sure Rsync is enabled
On your Open Media Vault 6 dashboard, go to Services > Rsync > Server then Settings and make sure Rsync is ticked to enable it. You do not need to make any changes to the port number so don't change that setting. Do this on both the sending and receiving sides.
Step 2: Create a Module on the Sending Side
Modules are shortcuts for Rsync paths. Since Open Media Vault uses such long shared folder structure IDs, it's best to use modules as a shorter version to the path you want to share. You can still use the full path but it's not as easy to remember. The Open Media Vault dashboard lets you choose which folder to assign a Module to.
Go to Services > Rsync > Server > Modules to assign a Module shortcut to a shared folder you want to push out to your receiving Rsync machine or server. I usually name mine something similar to the shared folder name. Make sure to tick "Enabled" and then save and apply the changes. No other changes need to be made here.
Step 3: Create a Rsync Task on the Receiving Side
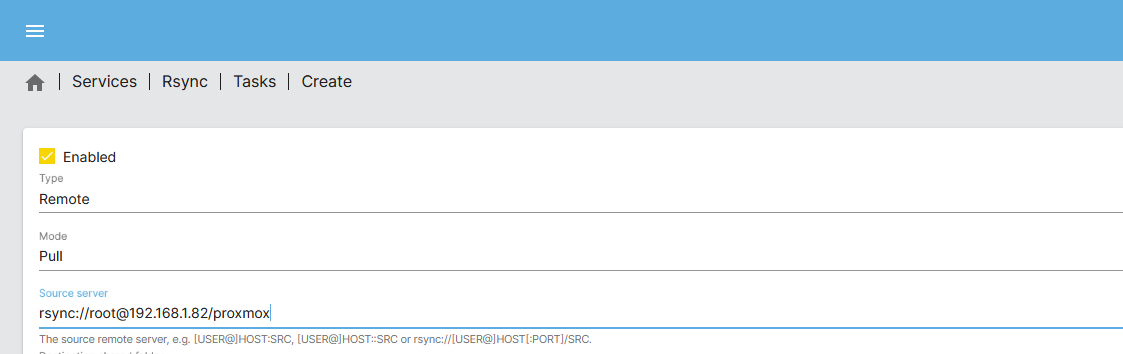
Go to Services > Rsync > Tasks > Create. Tick "Enabled" and change the type to "Remote" then change mode to "Pull".
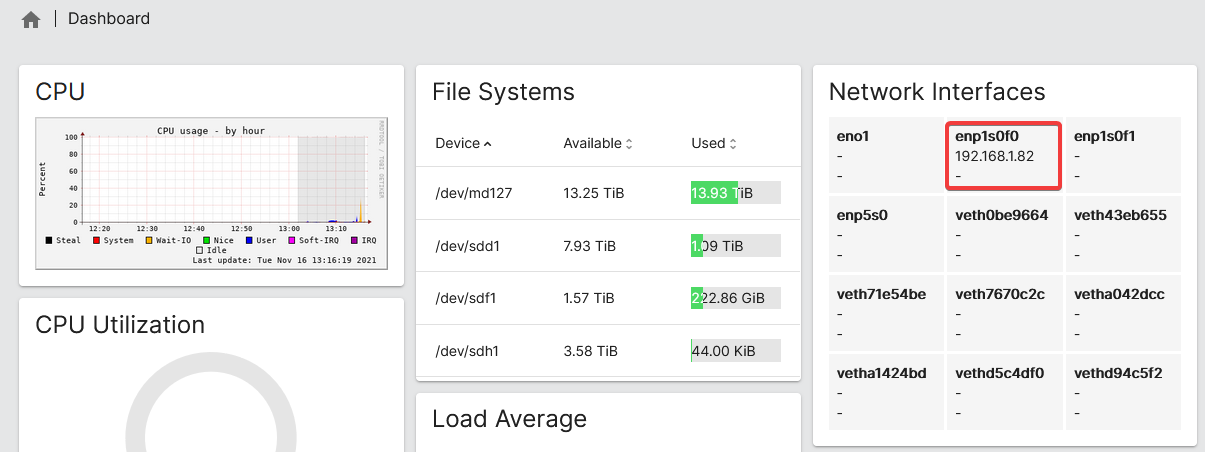
This next part confuses people the most. Adding the Source Server. For this to work, you need the IP of the sending server which can be found on the dashboard under Network Interfaces.
Knowing the IP, now all we have to do is create the Rsync Source Server URI. Mine will look like this:
rsync://[email protected]/proxmox
Notice how I appended the Module shortcut name "proxmox" to the end of the URI? Also it's important to note Modules are case sensitive. So if you used any capitol letters, you will have to do the same in the URI Module shortcut name. Here's what it looks like so far.
Now we need to select the Destination Folder. It's important you choose a shared folder with enough space to accomidate the files you are pulling into this Open Media Vault server.
For Authentication Type I usually use "Password" and enter the password for the root account of the sending Open Media Vault server. You can use another account but for now, we already have the root account setup and I am not exposing my NAS to the internet in any way. You can look into how to create more accounts and grant rights to that user if you wish.

The next section is the scheduled time. This will tell the system how often the Rsync Task will run. If you need a cheat sheet, you can use the website Crontab Guru. As an example, I want my task to run once a week on Sundays. Here's what it will look like.
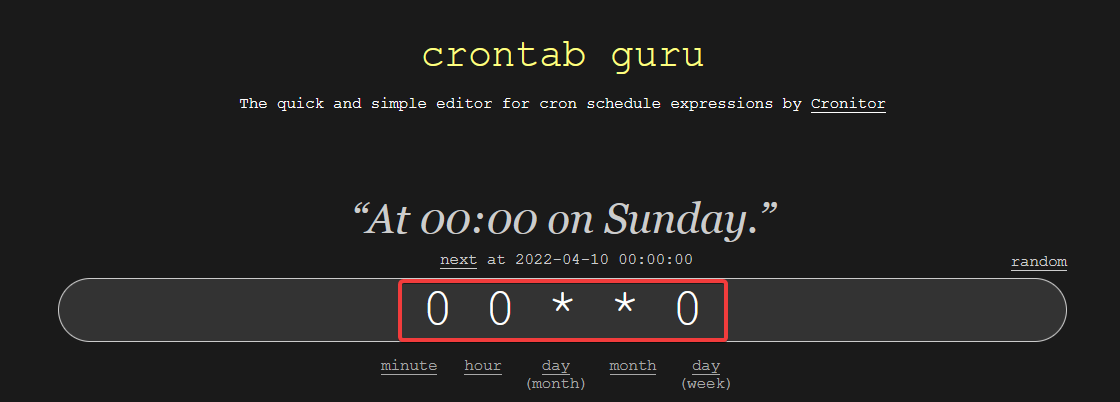
You simply reflect this into the Rsync time in your dashboard as follows:

This next section is for any additional options you want the Rsync command to handle while it runs. This example tells the system to keep my files in the folders they are in if at all then delete any files on the receiving side that are no longer on the sending side.
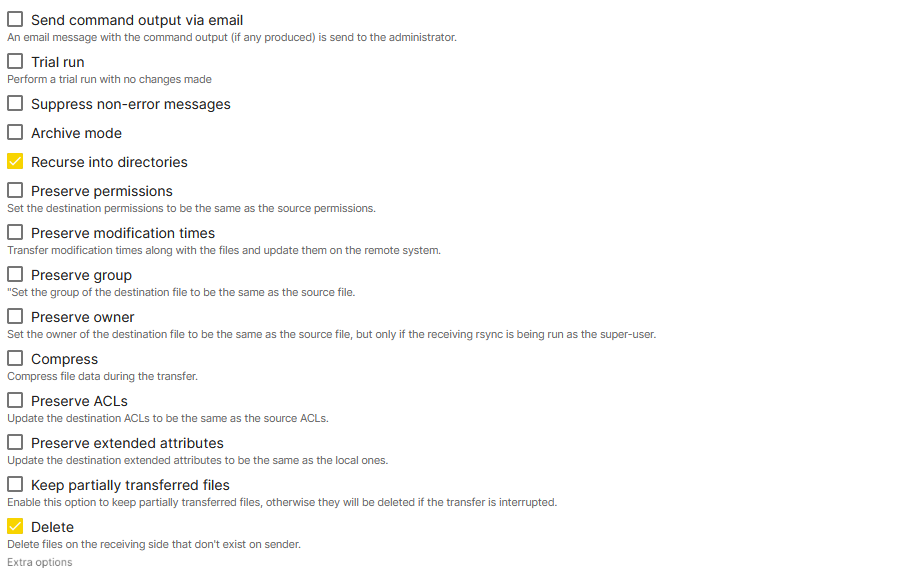
My advise is to read up on these options and decide for yourself what they all mean and how they can benefit you for your use case.
If this is your first time running the task, it's a good idea to run a Trial run so you can see the task results before it actually runs. You can do that by ticking "Trial run". Just make sure to untick it when you are done testing so the task actually runs.
Finally there is a section at the bottom called "Extra Options". This is a critical part of the task that allows us to skip files that are already on the system so we don't rewrite the files every time the task runs. We can also ignore certain files or folders we don't want to copy over. Here is what my string looks like.
--ignore-existing --exclude=@eaDir --exclude=.stfolder --exclude=.sync
Place this string in the "Extra Options" section like so:

Just keep in mind if you have files with the same name that need to be updated, the option "ignore-existing" is not recommended. A good example of this is DB files for persistent Docker data. The DB files change as things are added but the file name stays the same. If this option is included, it doesn't know the DB file has changed. It only checks for the name of the file and ignores it if it already sees it. A good use case for this is media files or files that are not being edited in any way.
👉 Click to read more about "ignore-existing"
--ignore-existing
This tells rsync to skip updating files that already exist on the destination (this does not ignore existing directories, or nothing would get done). See also --ignore-non-existing.
This option is a transfer rule, not an exclude, so it doesn't affect the data that goes into the file-lists, and thus it doesn't affect deletions. It just limits the files that the receiver requests to be transferred.
This option can be useful for those doing backups using the --link-dest option when they need to continue a backup run that got interrupted. Since a --link-dest run is copied into a new directory hierarchy (when it is used properly), using [--ignore-existing will ensure that the already-handled files don't get tweaked (which avoids a change in permissions on the hard-linked files). This does mean that this option is only looking at the existing files in the destination hierarchy itself.
When --info=skip2 is used rsync will output "FILENAME exists (INFO)" messages where the INFO indicates one of "type change", "sum change" (requires -c), "file change" (based on the quick check), "attr change", or "uptodate". Using --info=skip1 (which is also implied by 2 -v options) outputs the exists message without the INFO suffix.
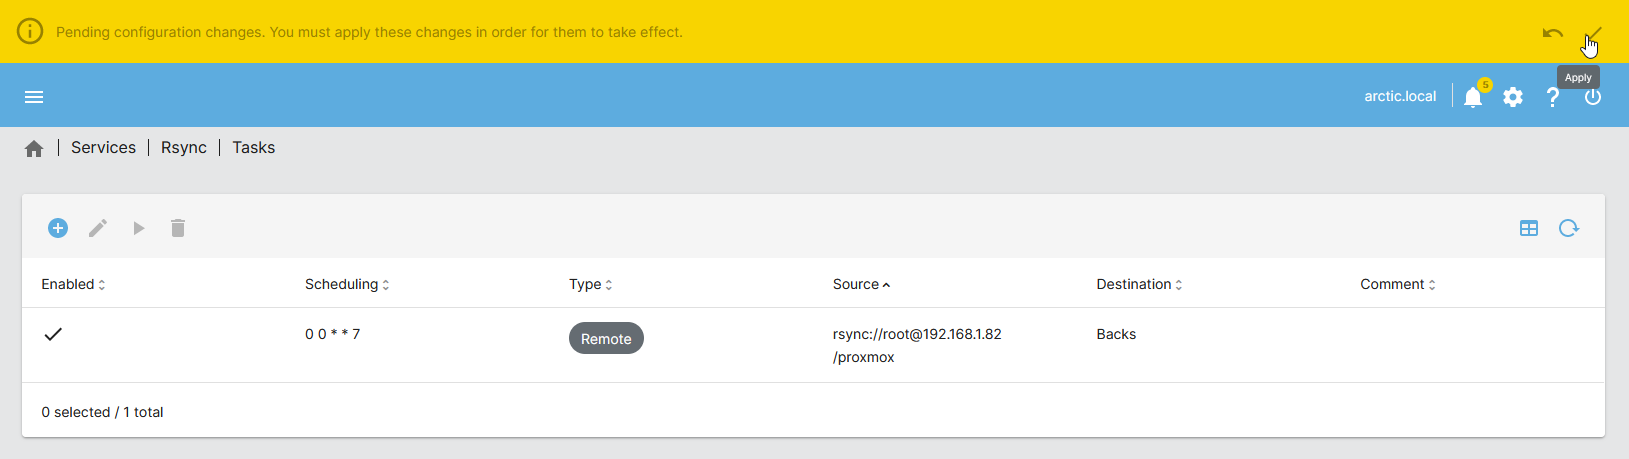
To finish things up, make sure your settings are all correct after you run a trial.
Make sure to save and apply the settings to the Open Media Vault server and always double and triple check your settings before running the task.
Final Notes and Thoughts
I recommend reading more about Rsync and how it works. Open Media Vault makes using Rsync an absolute breeze. I have been using this same method to clone data to other servers for over 2 years and it has proven to be extremely beneficial to my home lab. I cannot tell you how many times I have accidentally deleted files while tinkering with docker images or other projects only to rejoice because I had copies on another server over Rsync.
Check out my previous article about why I love Open Media Vault so much!
 Jeremy
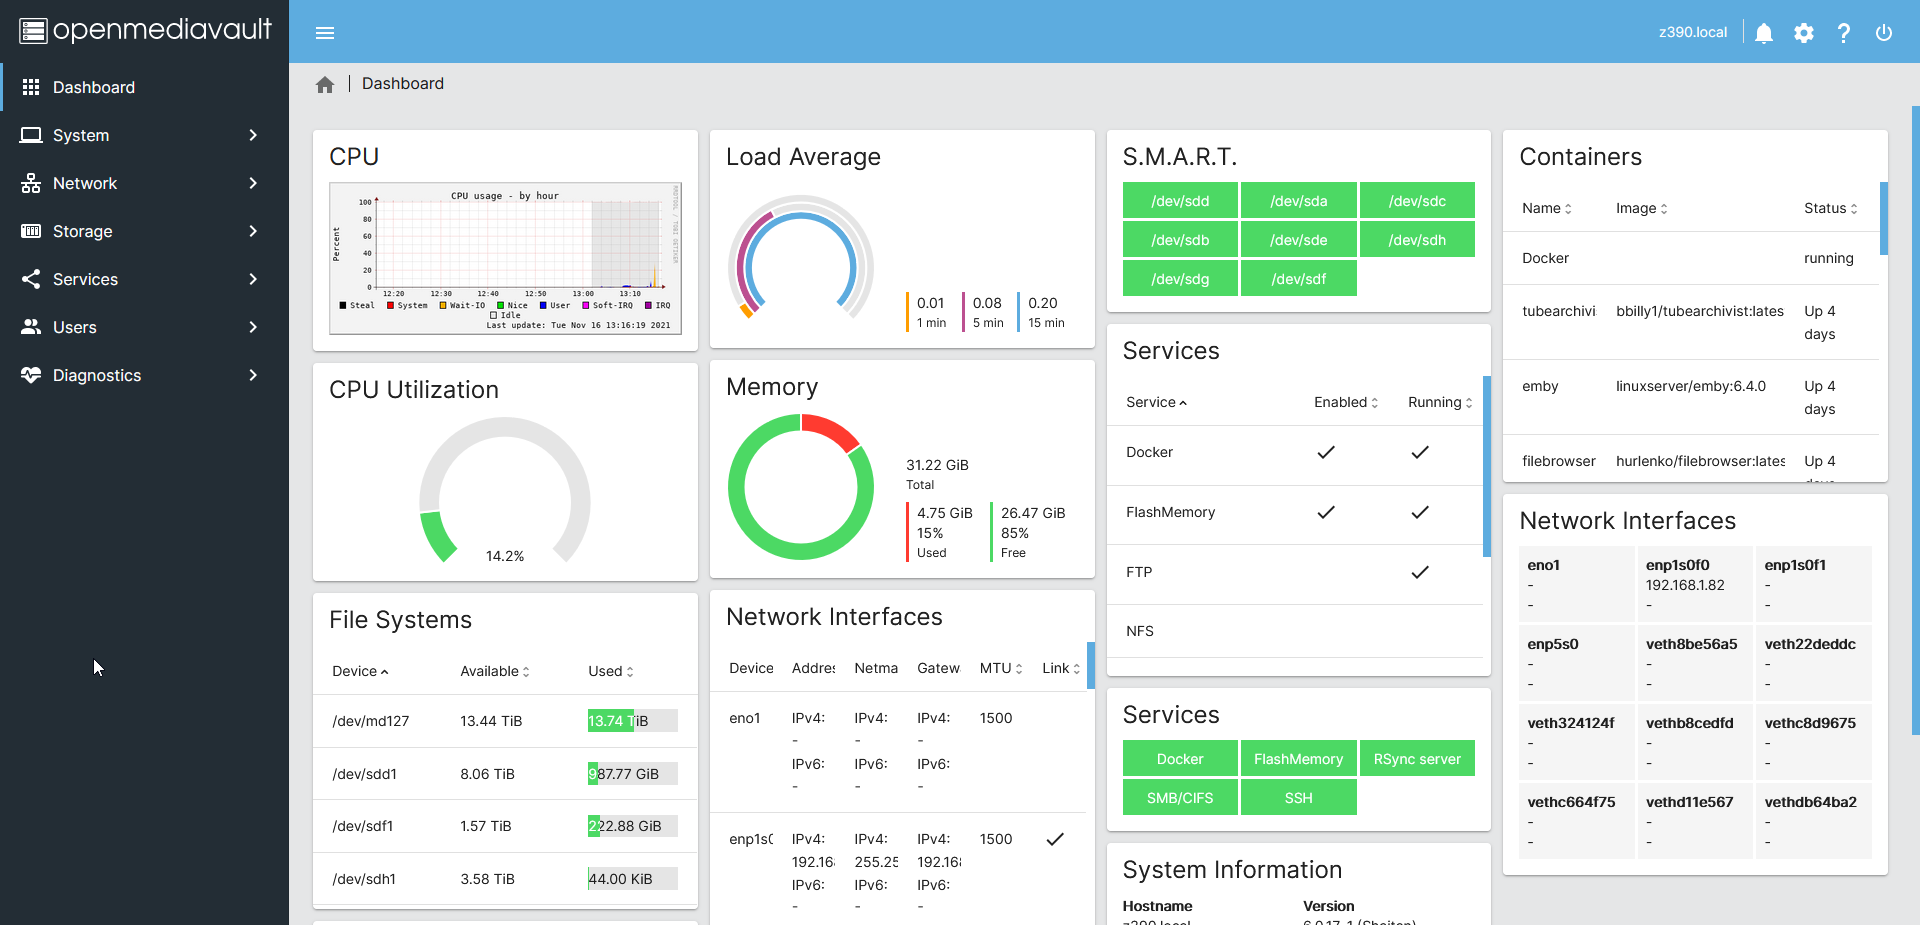


Discussion