

Previously I wrote about creating your first Docker container using a simple Apache web page. It went over pretty well so today I will cover how publish a pre-built image to Docker Hub.
What is Docker Hub?
Docker Hub is a cloud-based platform and registry service provided by Docker, Inc. It serves as a central repository for Docker containers, which are lightweight, portable, and executable packages that contain software and all its dependencies. Docker Hub allows users to store, share, and distribute Docker containers, making it easier for developers to access and deploy pre-built software components and applications. It also provides features for version control, automated builds, and collaboration, making it a valuable resource for containerized application development and deployment.
I emphasise "pre-built software" because that's the whole idea. By pushing your pre-built image to Docker Hub, you take half the work out of it for others so they can just simply run the Docker command and stand up the container using your image. This makes it easier to just use a Docker run command or Docker Compose stack without having to build the image.
Build your Docker Image and Create the Container
I will start from scratch for this example and I want to use an application I discovered recently called Open Resume. There was no "pre-built" image for Open Resume so I decided to build it myself and document the process for you here. The Dockerfile is basic enough for this example and will make this a rather simple build.
Step 1. Create a working directory on your machine. It doesn't really matter where but I like to keep all my Docker apps in a directory called "docker" to keep things simple.
mkdir /docker
cd /docker
Step 2. Once inside the main docker directory we need to pull the Github repo down. This will clone the entire repo to your current directory and create a folder inside your docker directory called open-resume.
git clone https://github.com/xitanggg/open-resume.gitStep 3. cd into the open-resume directory to begin the build process.
cd open-resumeOpen Resume does a good job explaining how to build their image on the Github repo.
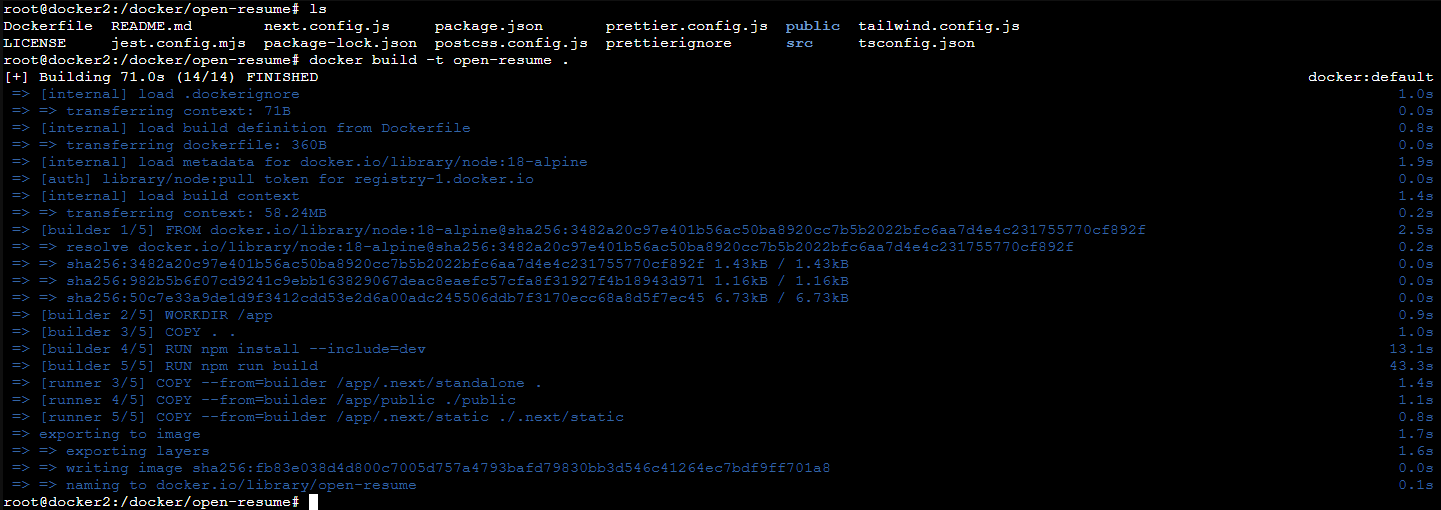
Step 4. Build the container using the following command. Besure you are still inside the open-resume directory.
docker build -t open-resume .This step can take some time so be patient as it runs the build process.
Step 5. Run and start the container using the following command.
docker run -p 3000:3000 open-resumeIf all you wanted to do is build the image and create the container, you're done! You can access the application on the IP of the machine on port 3000. However, if you want others to be able to use your built image, we will need to push it to Docker Hub.
Publish your Docker Image to Docker Hub
Now that we built the image, we can push it to Docker Hub so it can be pulled down remotely from anywhere. Keep in mind, this locks the application into whatever version number you built this image. So if the developer makes an update, you should also update your image and push it to Docker Hub. You can do that by simply re cloning the repo and building it again.
Step 1. Login to Docker Hub: Open a terminal or command prompt and log in to your Docker Hub account using the docker login command. You'll need to provide your Docker Hub username and password. Docker Hub accounts are free for this purpose.
docker login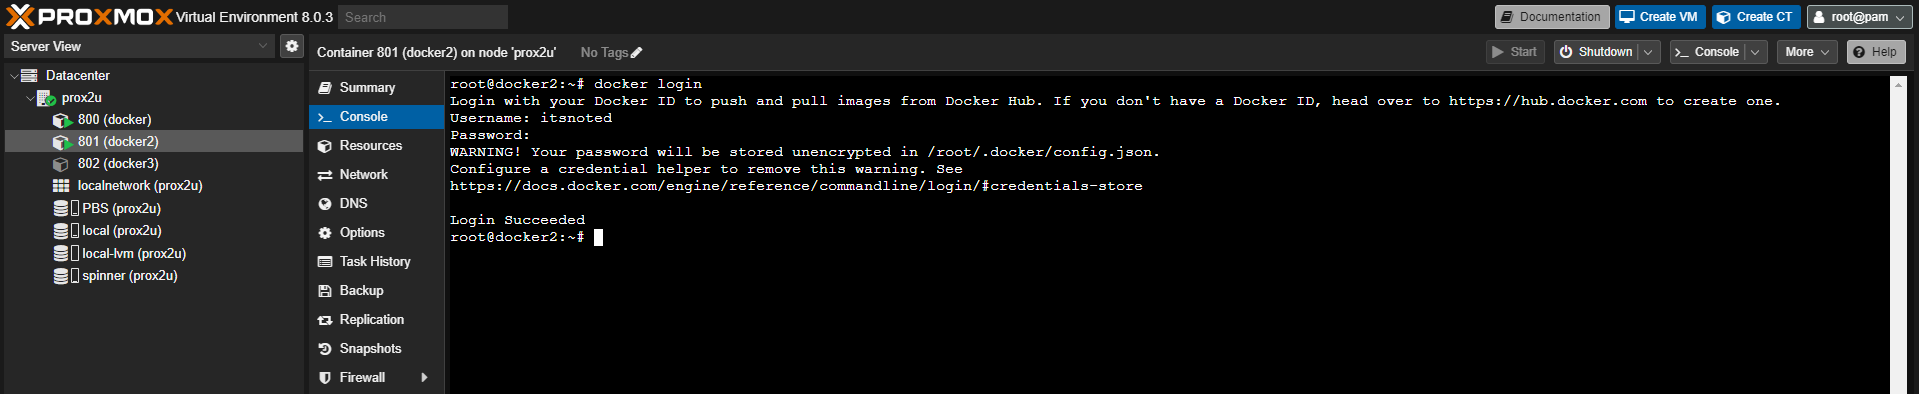
Step 2. Tag Your Image: Before pushing the image to Docker Hub, you need to tag it with your Docker Hub username and the repository name. The basic format is:
docker tag <local-image> <dockerhub-username>/<repository-name>:<tag>
Replace <local-image> with the name of your local Docker image, <dockerhub-username> with your Docker Hub username, <repository-name> with the name you want to use on Docker Hub, and <tag> with the version or tag you want to give to your image.
My username is itsnoted so mine looks like this (do not use my examples, be sure to replace my username with your username!):
docker tag open-resume itsnoted/open-resume:latestStep 3. Push Your Image: After tagging your image, you can use the docker push command to push it to Docker Hub:
docker push <dockerhub-username>/<repository-name>:<tag>
Mine will look like this as an example:
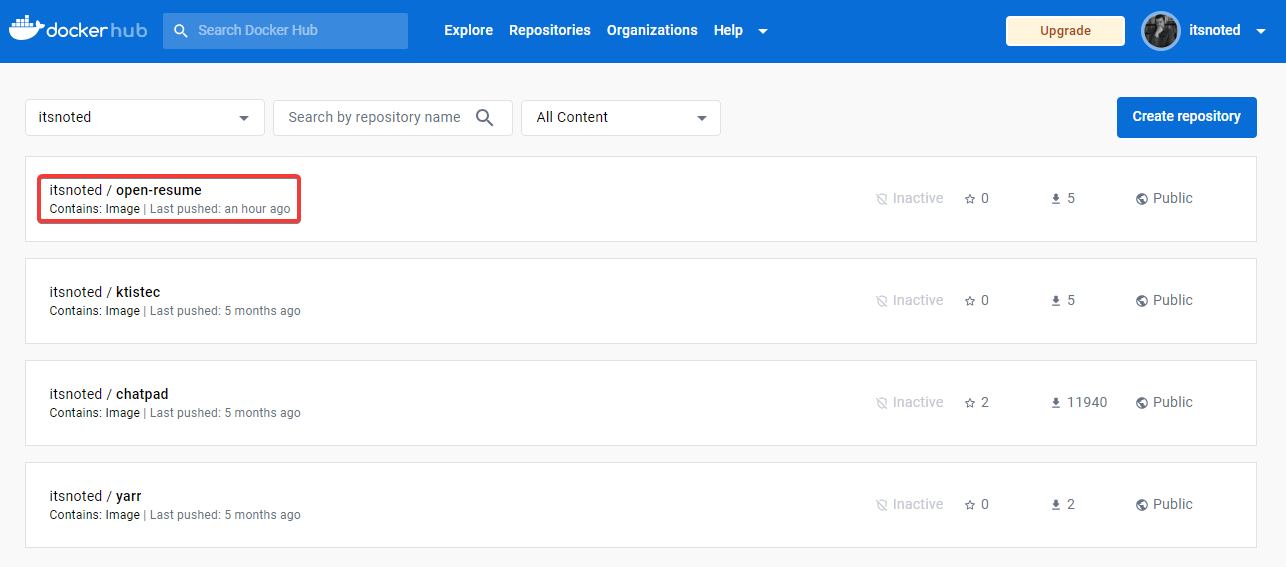
docker push itsnoted/open-resume:latestStep 4. Verify: Once the push is successful, you can verify that your image is available on Docker Hub by visiting your Docker Hub repository page in a web browser or by searching for it on Docker Hub.
Create a Docker Compose or Docker run from your Docker Hub image.
From here we can create a simple Docker Compose using our pre-built Open Resume image. On Docker Hub, click the image you just created then navigate to the tags page.
So We can revisit step 5 under "Build your Docker Image and Create the Container" where we see the Docker run command. Instead of running it locally, we will use our image that we pushed to Docker Hub.
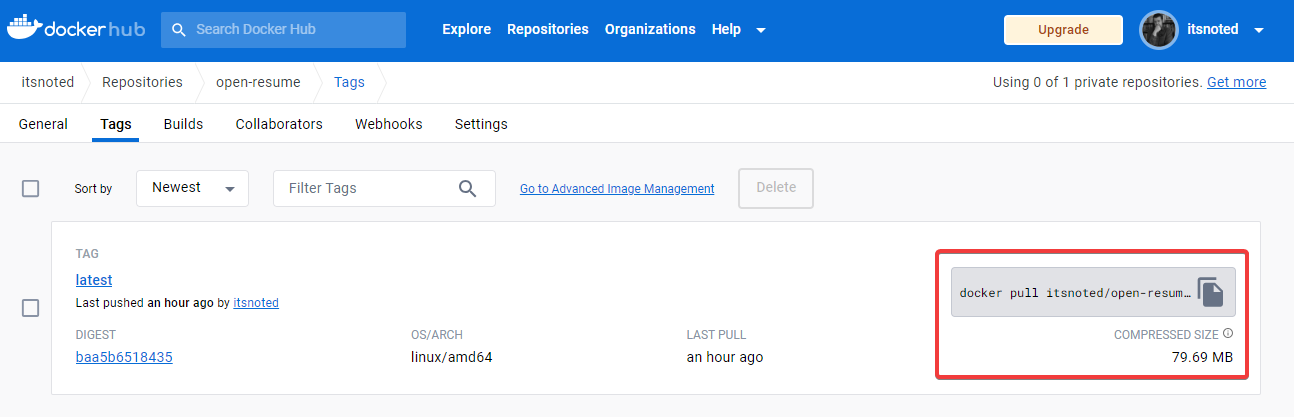
On the tags page you can see the docker image name. For me it is itsnoted/open-resume:latest So my Docker run command will be the following:
docker run -p 3000:3000 itsnoted/open-resume:latestTo create a Docker Compose, I'll pop open my instance of IT-Tools and use the converter.
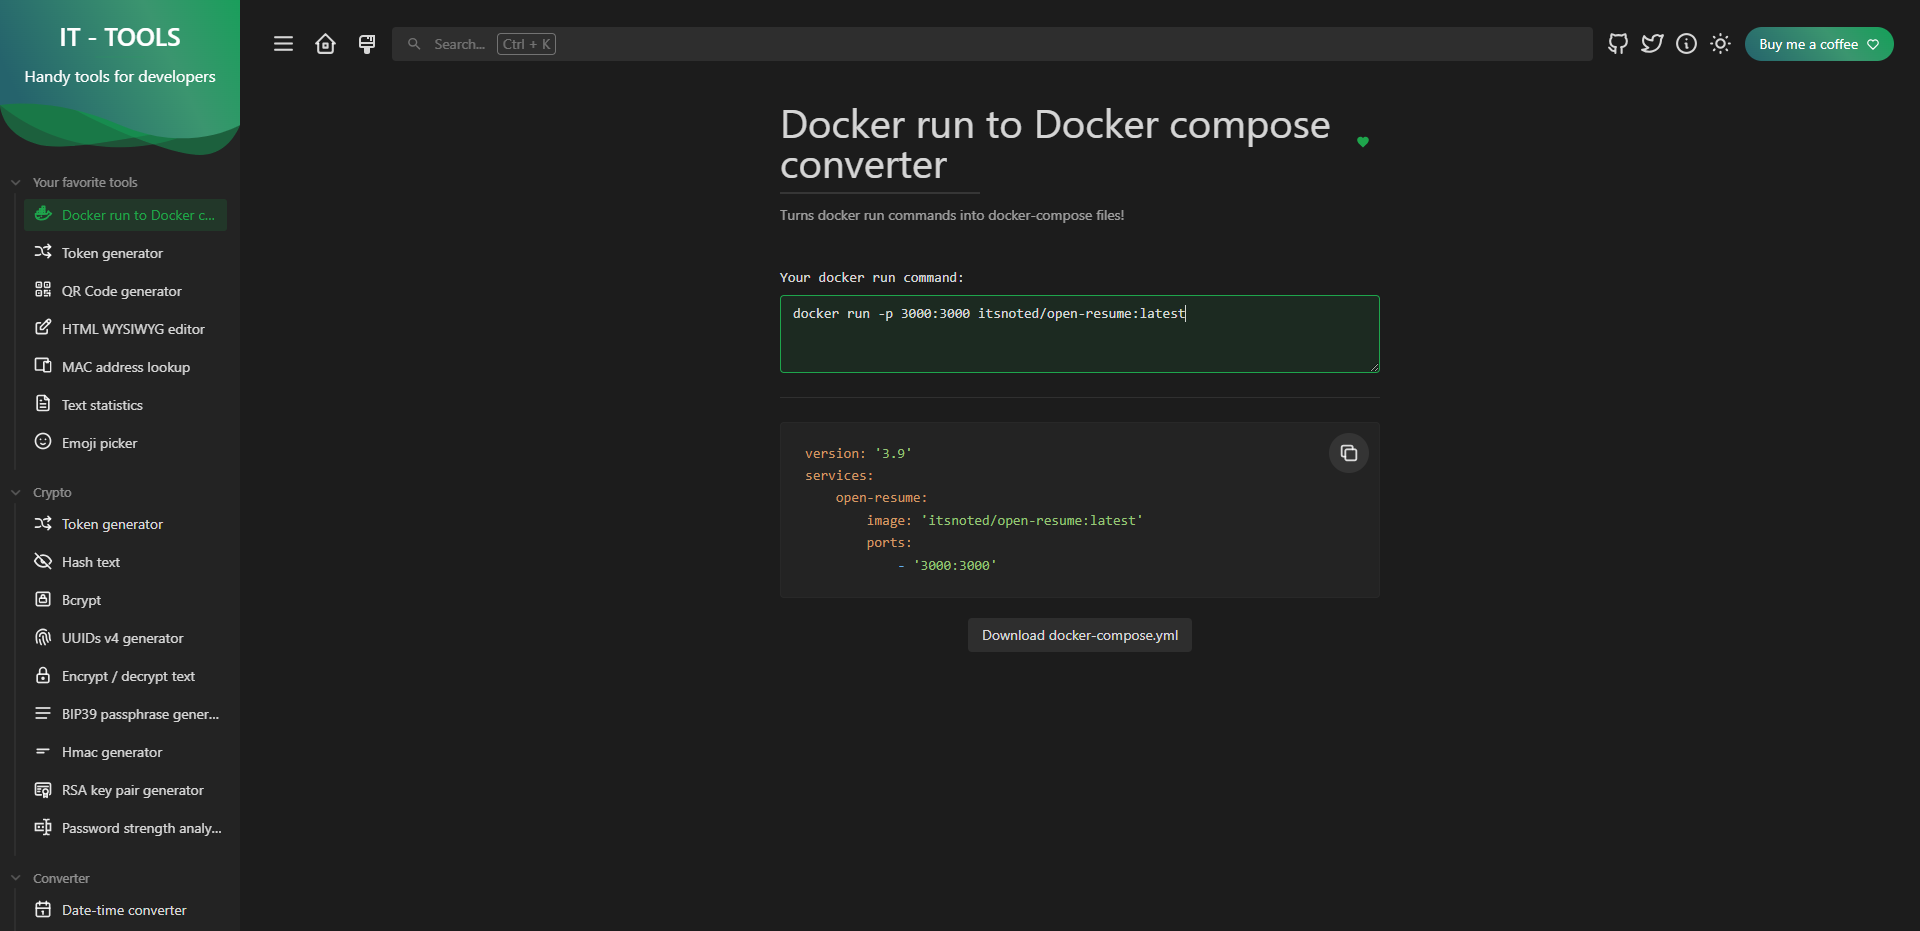
The Docker Compose is now the following:
version: '3.9'
services:
    open-resume:
        image: 'itsnoted/open-resume:latest'
        ports:
            - '3000:3000'
Try it yourself using your Docker Hub username. If all checks out, you should be able to deploy the container and see Open Resume running on port 3000!
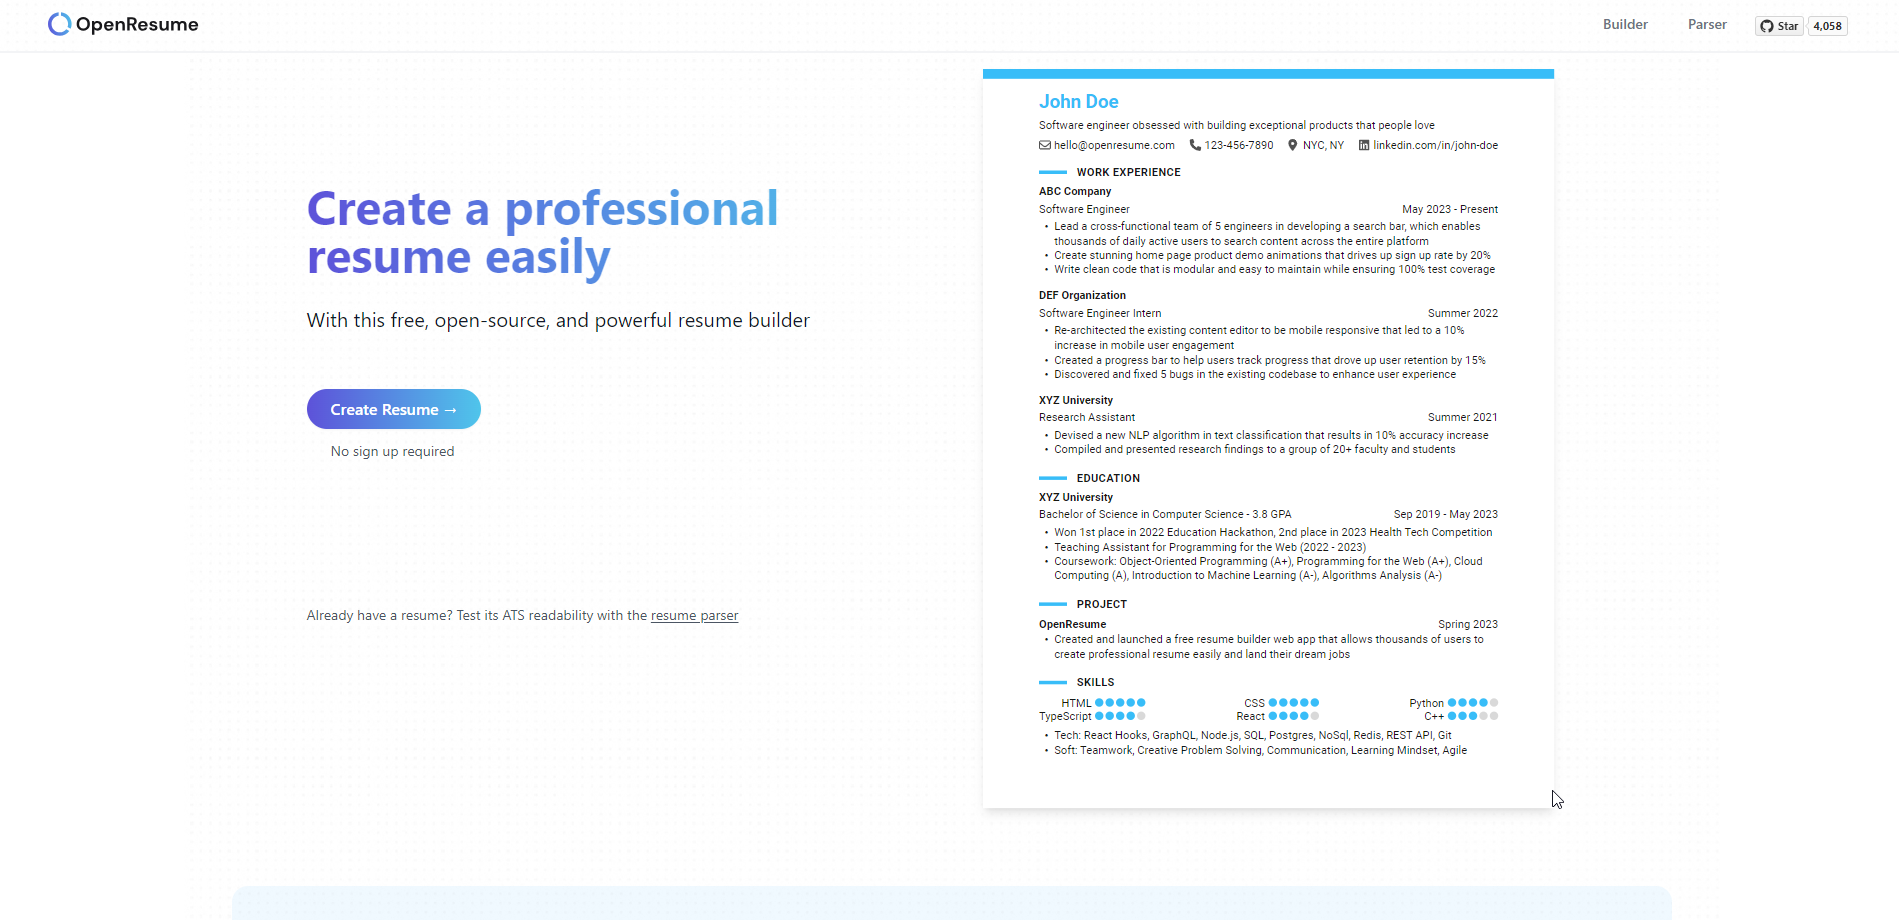
You can install Open Resume using my Docker Compose stack above to try my image too. Next, I'll be sure to write up an article about Open Resume to highlight this amazing open source resume builder.

Final Notes and Thoughts
That's it! You have successfully pushed your Docker image to Docker Hub. Other users can now pull and use your image from Docker Hub if it's a public repository or if they have the necessary permissions for a private repository.
Again, this is a very basic example on how you can publish your pre-built Docker image to Docker Hub. I hope this helps someone out there who needs a push in the right direction. Let me know if you have any questions!


Discussion