

There's plenty of 3rd party contact forms out there that you can use. Some are free and others are paid options. Have you ever considered using a open source, self-hosted option? Today I'll show you exactly how you can do just that.
What is NocoDB?
Turns any MySQL, PostgreSQL, SQL Server, SQLite & MariaDB into a smart spreadsheet. The open source Airtable alternative.
This project is a little obscure for NocoDB because we are not using the tool for its intended purposes. However this tool is exactly what we need to create our contact form and it works very well.
This project requires Docker to be installed on your host machine.
Step 1. Install NocoDB using Docker
version: '3.9'
services:
    nocodb:
        image: 'nocodb/nocodb:latest'
        ports:
            - '8044:8080'
        volumes:
            - '/docker/nocodb:/usr/app/data/'
Be sure to change the port or volume mount to your liking.
Step 2. Navigate to the host IP and port of the NocoDB install. For me it will be on port 8044. You can find your host IP by typing ip addr in the terminal.
Step 3. Register a new account then log in.
Once logged in, you will see a blank workspace. It will look quite lonely and desolate. Let's move on and create a project.
Step 4. Create a new project.
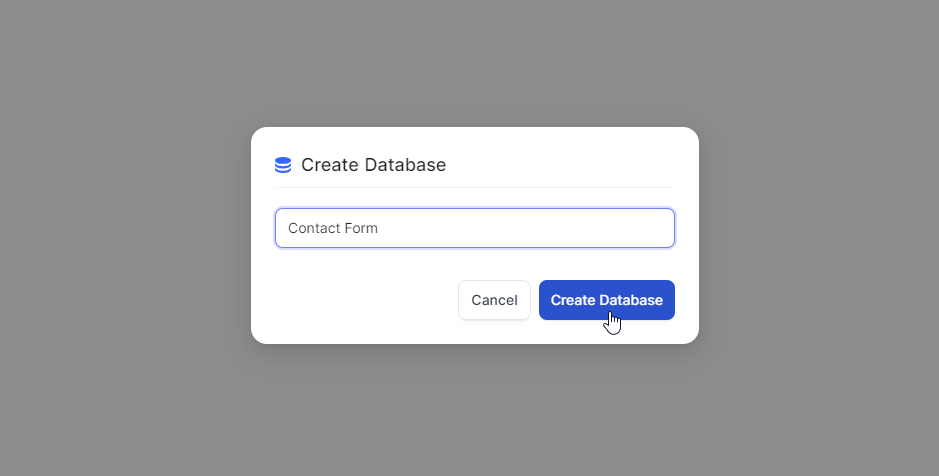
Click "New project", give it a name and press "Create Database".
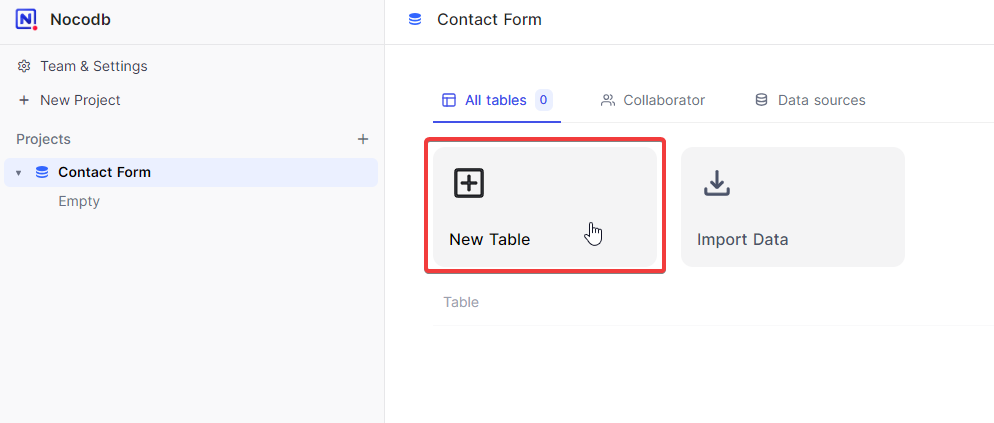
Step 5. Click "New table".
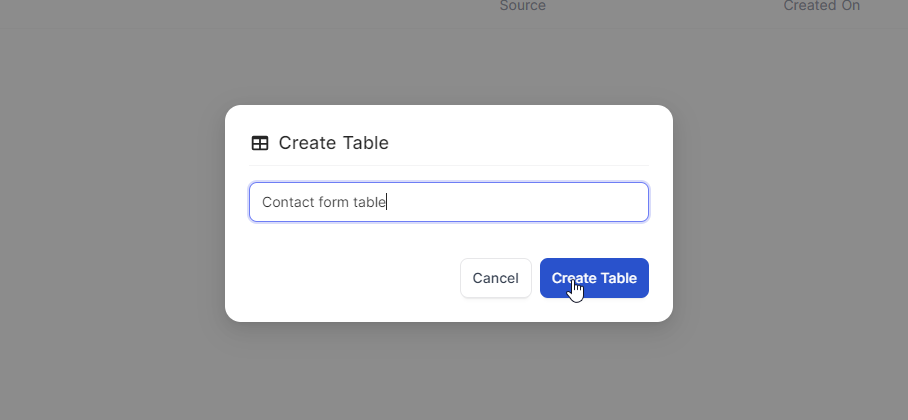
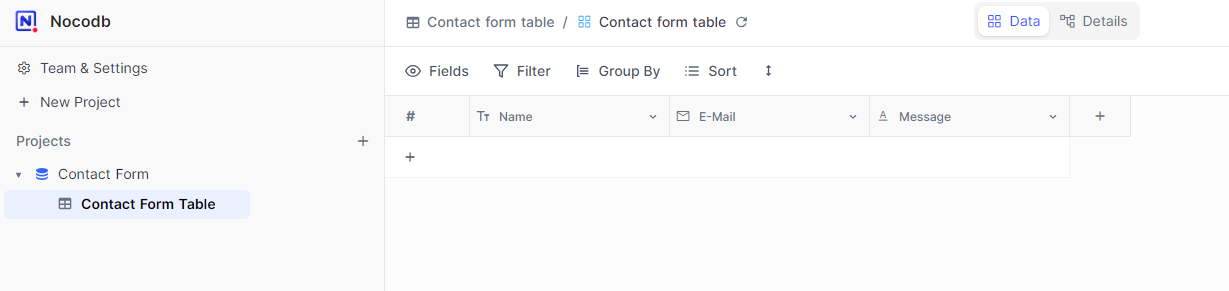
This will prompt you to give the table a name. Name it "Contact form table" then click "Create Table".
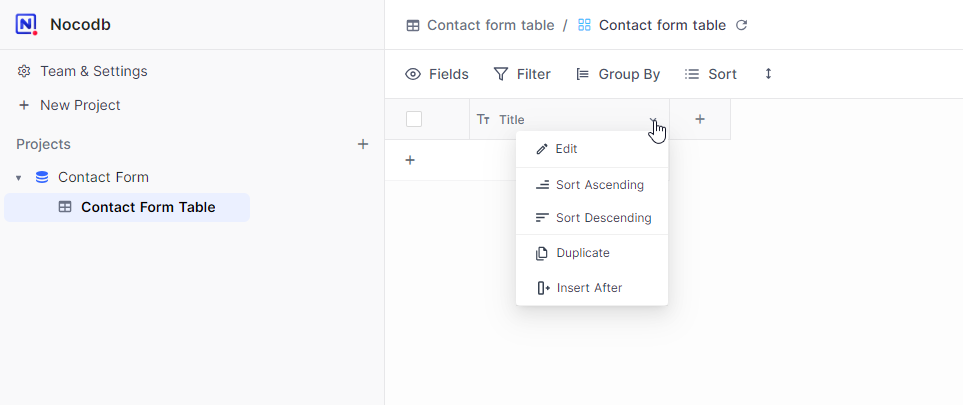
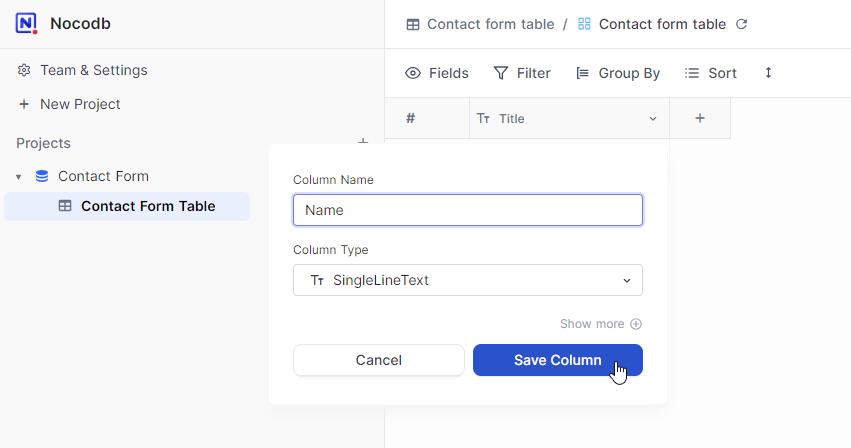
Step 6. Edit the first column name by clicking on the dropdown arrow. We will call it "Name" and save.
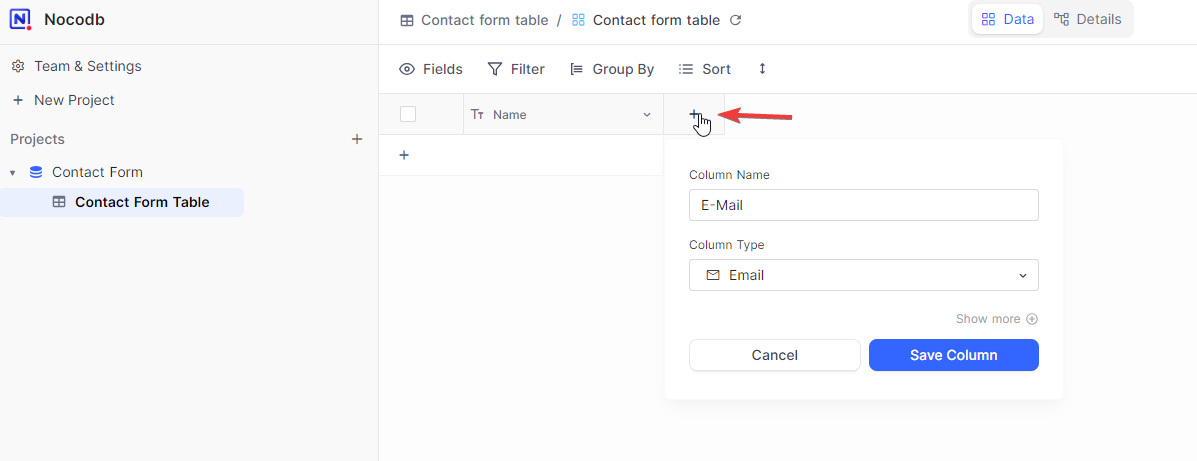
Step 7. Add another column and call it "E-Mail" with a column type "Email" then click save. This column type will allow the email to be clicked and responded to using your default email client. We will cover this more later.
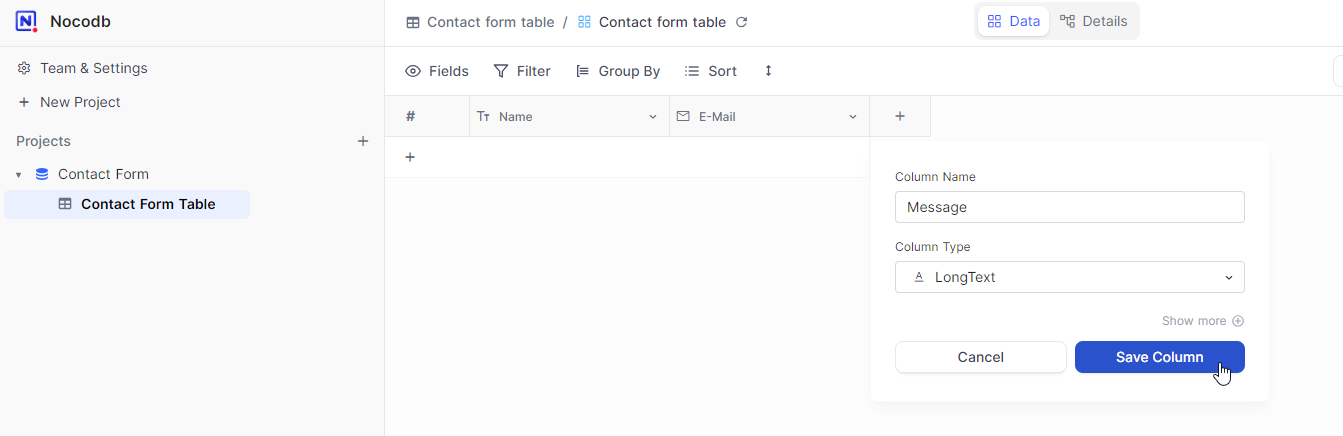
Step 8. Add a 3rd column called "Message" with a column type of "LongText". Click save column.
Let's take a look at what our table looks like right now before we move forward. We have a Name, E-Mail and Message column.
Adding the SMTP App in NocoDB
Step 9. Add the SMTP app. Before we create the form out of the table we just created, I want to go ahead and add the SMTP app. This can be tricky to find so follow along closely.
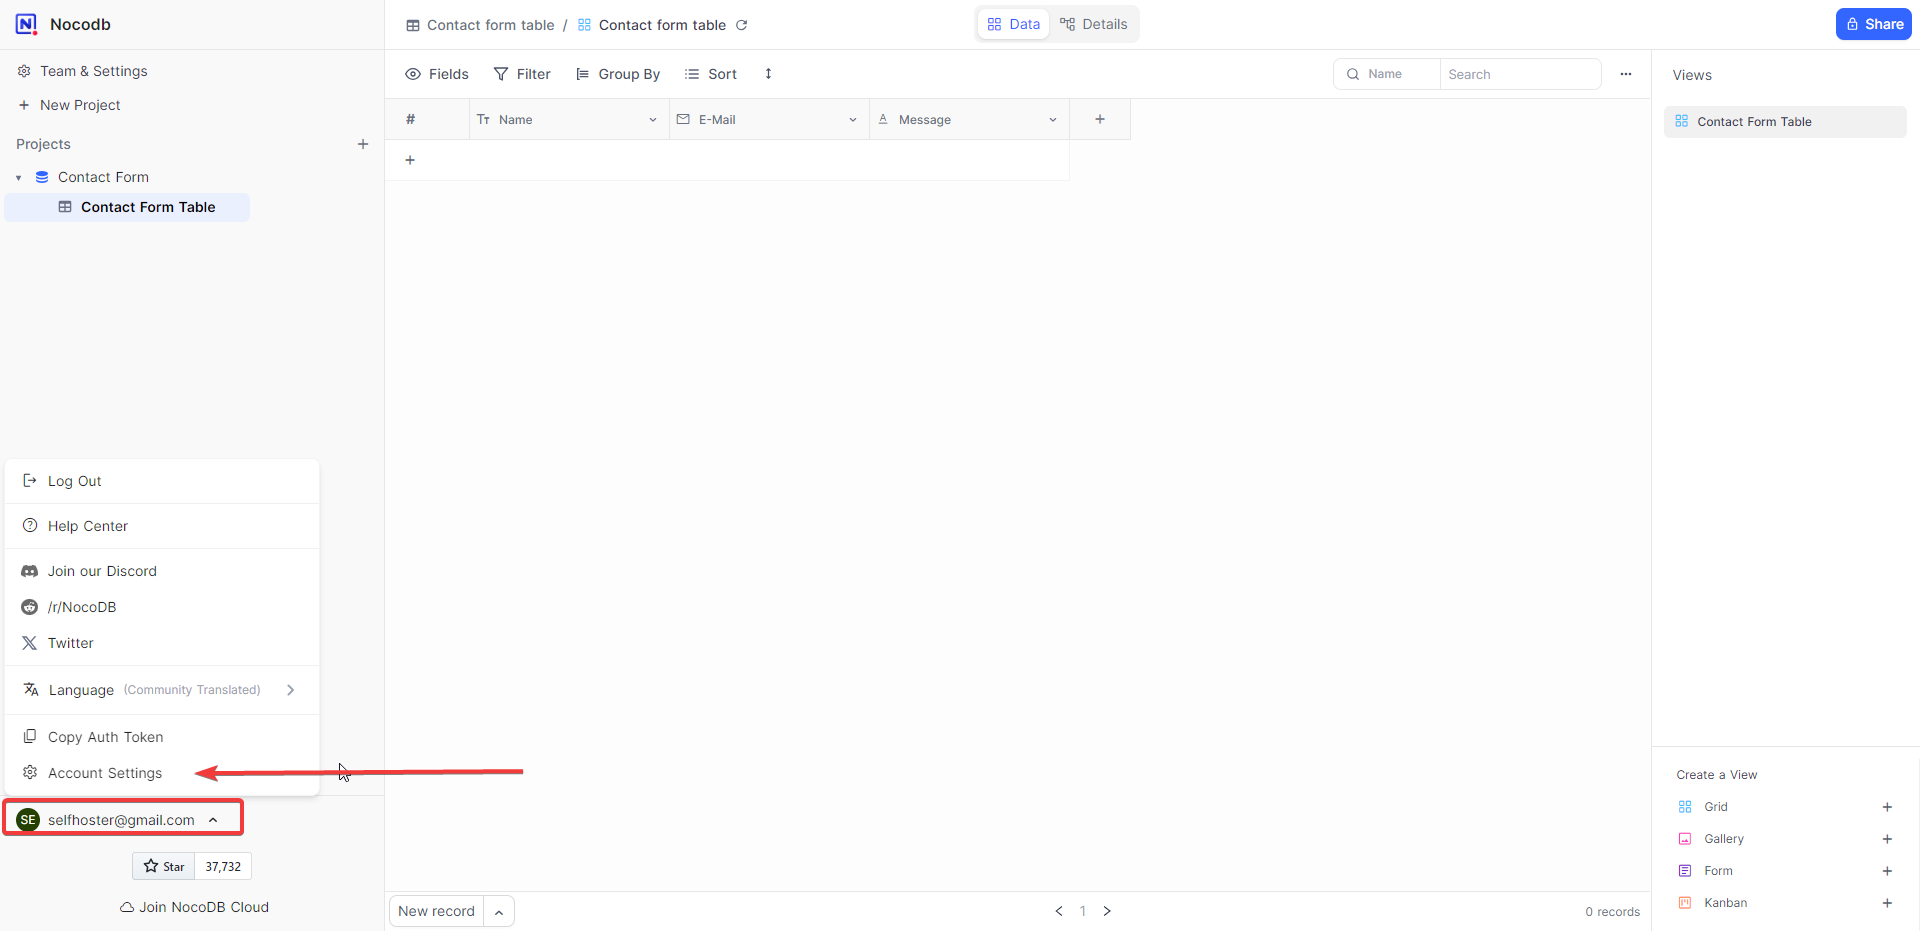
In the lower left click on your email to open the menu then click on "Account Settings".
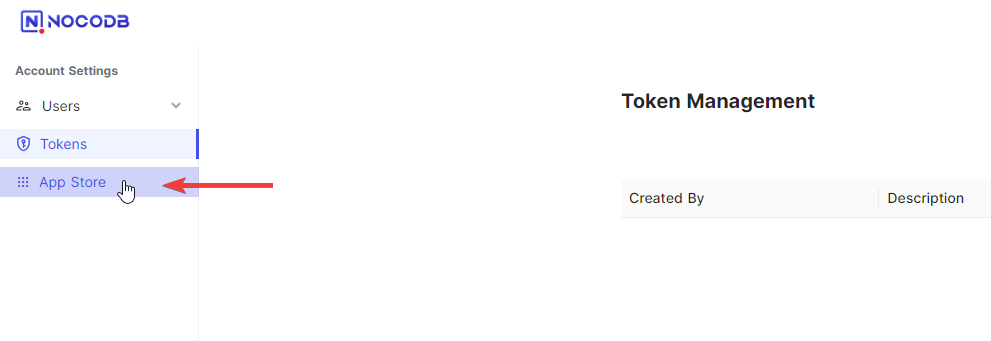
Now click "App Store" and scroll down to SMTP towards the bottom.
Click install and enter your GMail SMTP information. You can use our detailed guide on how to setup GMail SMTP.
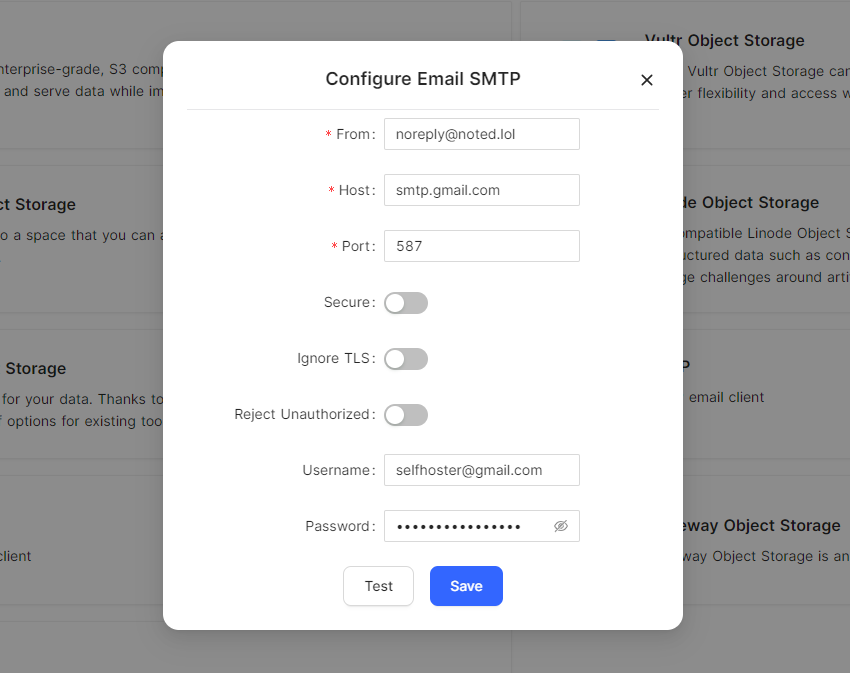
It's important that you leave Secure, Ignore TLS and Reject Unauthorized disabled. Now click save.
Step 10. Create a form. To create a form, navigate back to the main project and select the Contact Form Table we created.
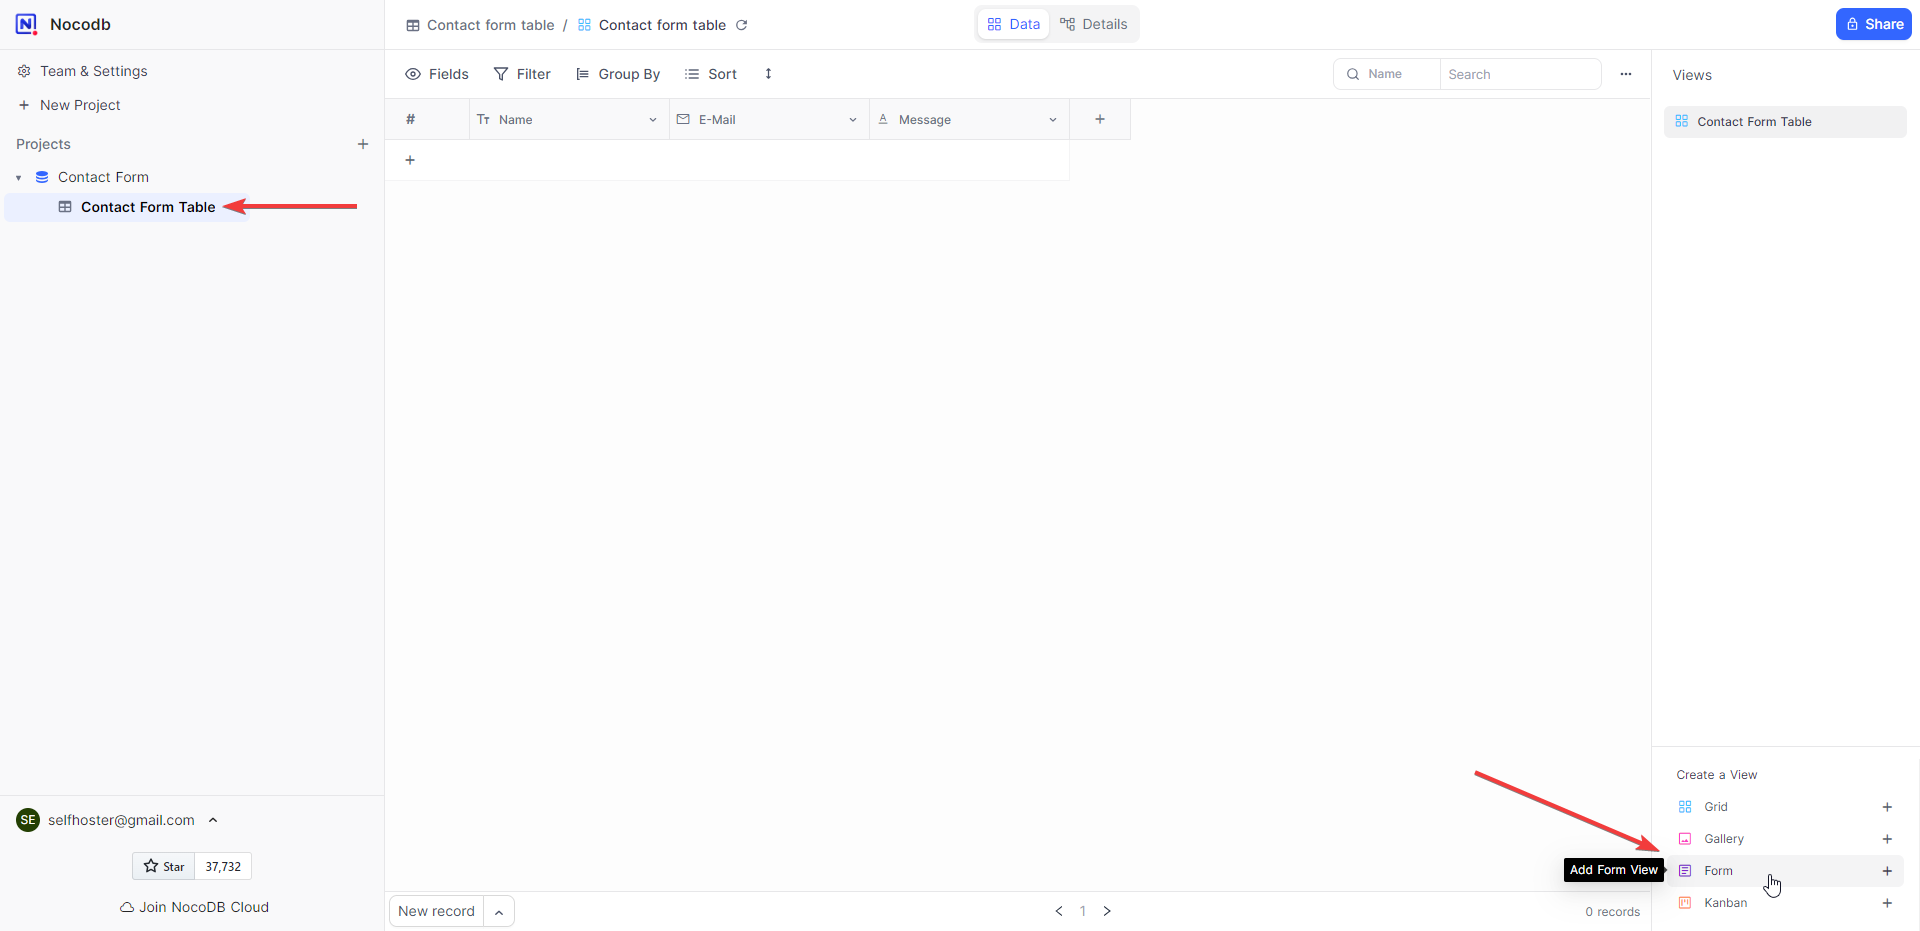
Now, in the lower right click form to create a Form view of our table.
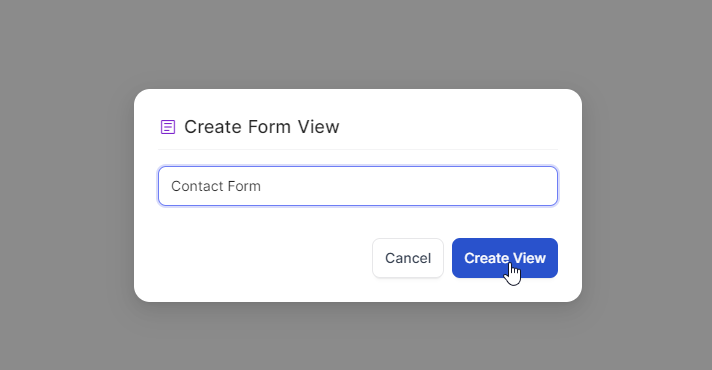
Call it "Contact Form" and click "Create View".
Step 11. Add options for when the form is submitted.

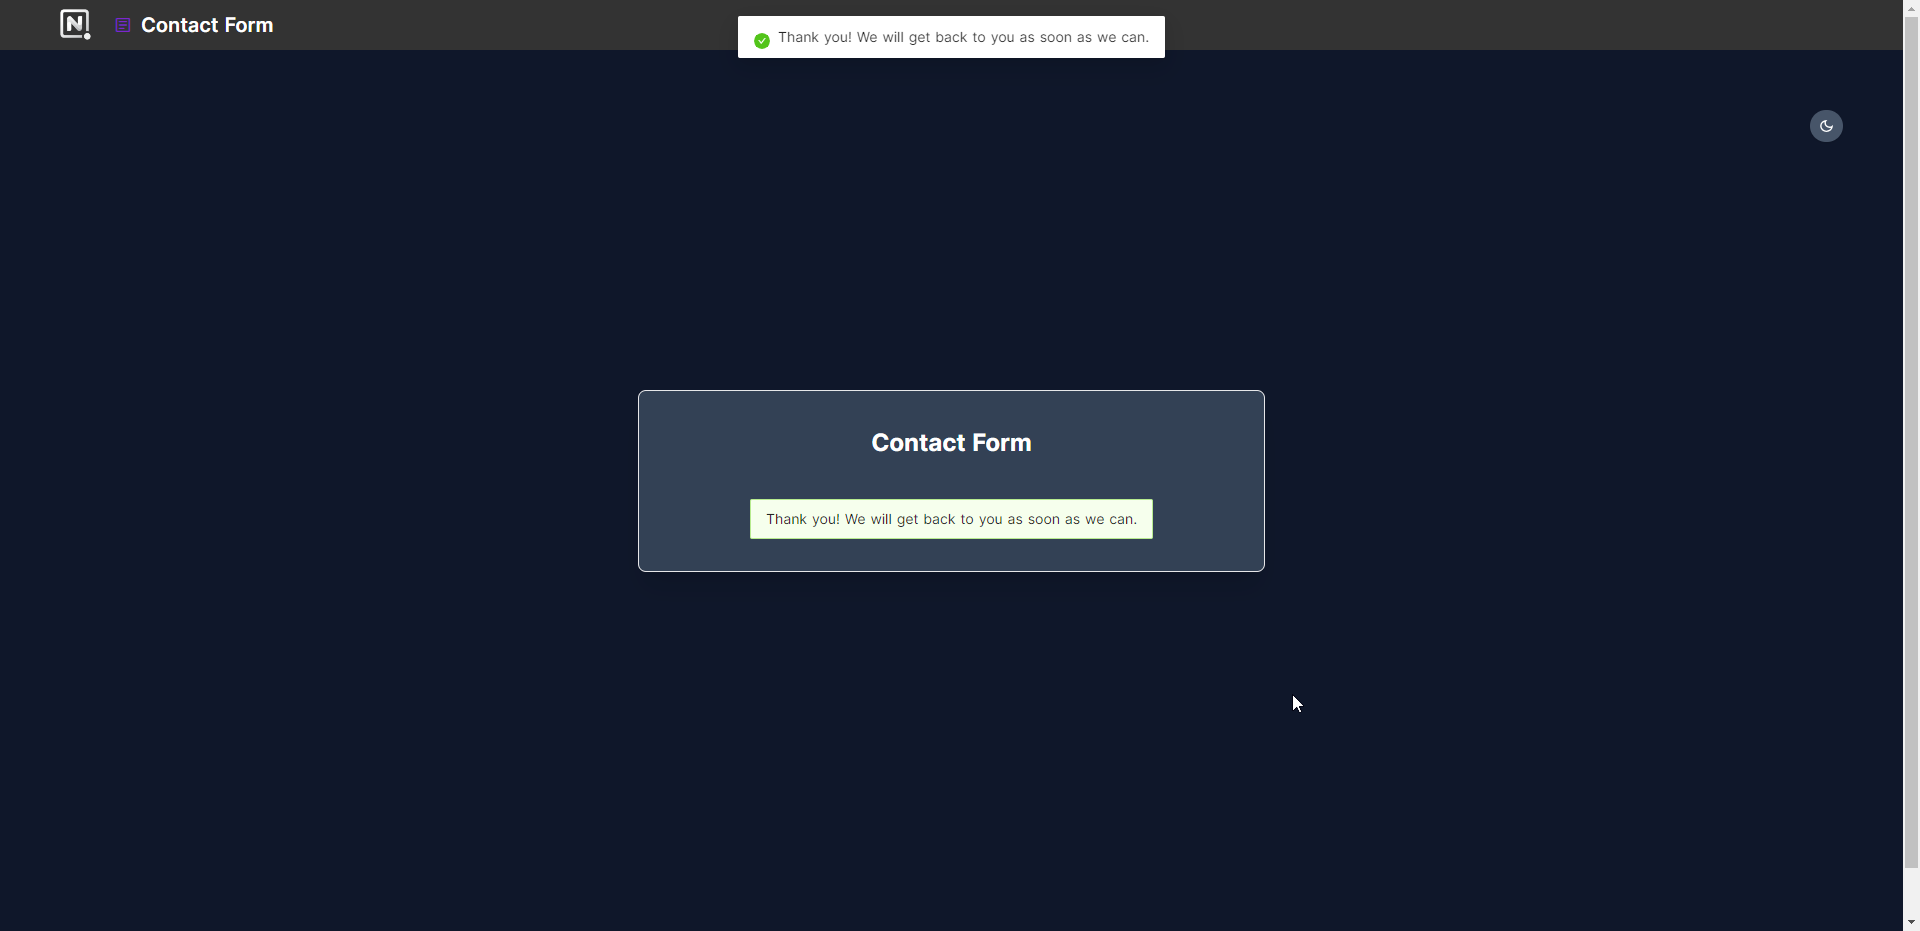
At the bottom, you should add a message people will see when they submit the form. Also, make sure you enable the "E-mail me at [email protected]".
To be clear, the form will email you at whatever email you registered with on your NocoDB instance.
Step 12. Create a public share of the form and test it.
Now that we have the form view created and the options set, we need to create a public share so we can access and use the form publicly.
In the upper right corner, click on 'Share".
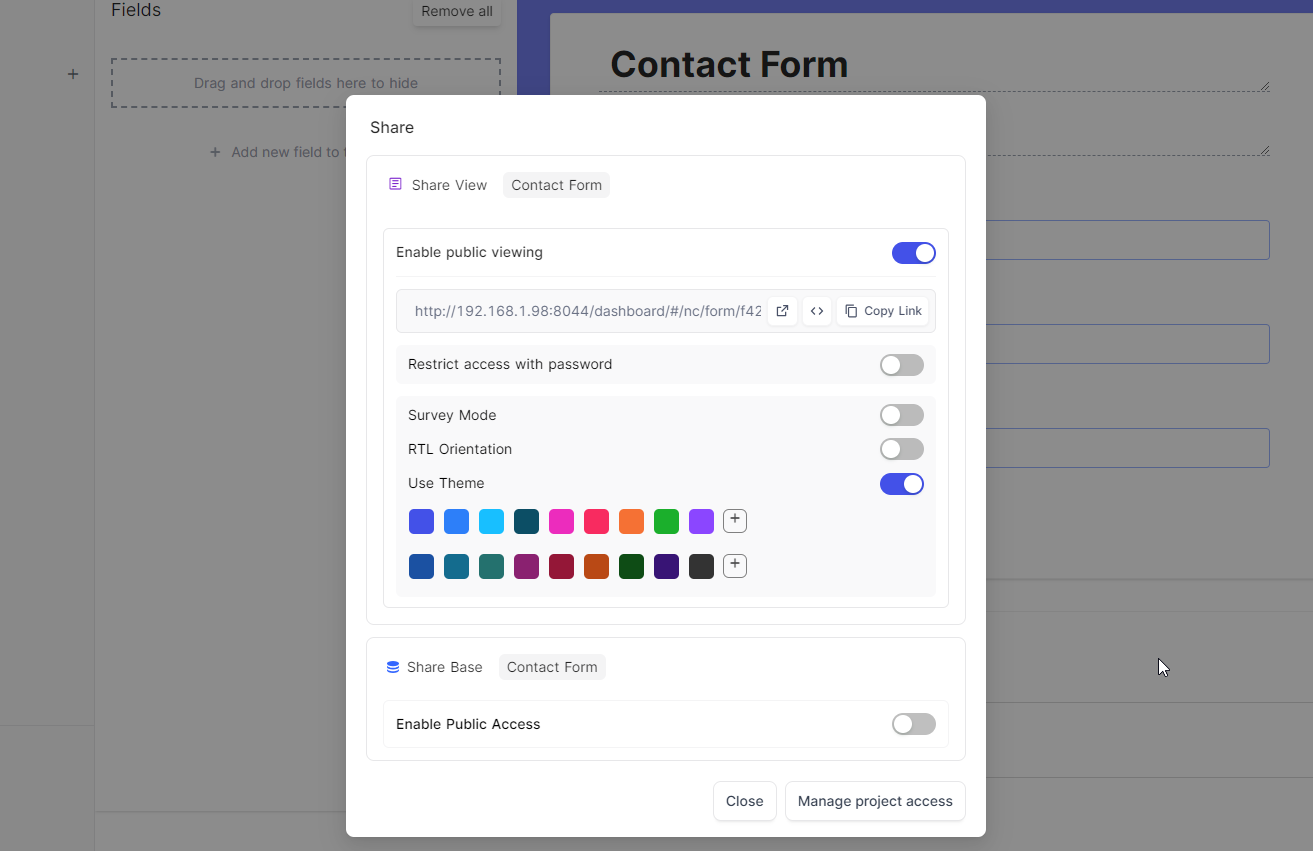
Make sure "Enable public viewing" is enabled. You can also choose a color if you wish. The theme colors don't apply to the theme itself sadly but only the web UI surrounding it. Now copy the link and open it in a browser tab to test the form.

Check your inbox to see if you got the email you sent using the form. If you did, the subject will be "NocoDB Form" and the email content will look like this.
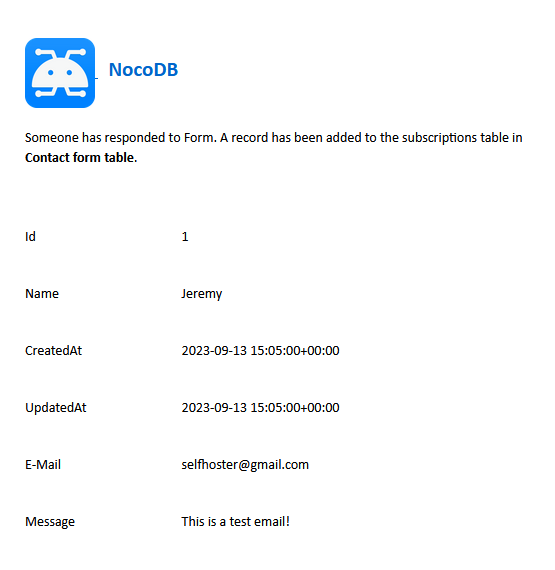
Step 13. Confirm the submitted email was also logged in the table we created.
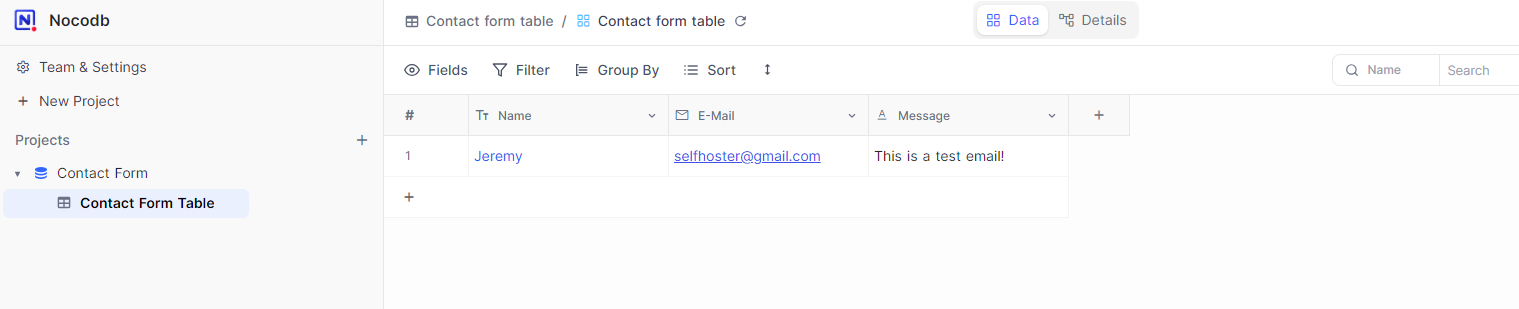
Here we can see the email that was sent in the table view. This information can be exported and saved as well.
Embed your public shared form link
You can use your public shared link by attaching a domain name to it using Cloudflare.
Setup your Domain using Cloudflare Tunnels and Zero Trust
Here's how you can utilize Cloudflare DNS and Zero Trust to access your self hosted website with your domain name.
Here is an example embed code you can use to embed the form on your website.
<iframe>
    class="nc-embed"
    src="https://nocodb.noted.lol/dashboard/#/nc/form/f42affl0-25d2-2f31-a90a-8d1996d8ck0l"
    frameborder="0"
    width="100%"
    height="800"
    style="background: transparent; border: 1px solid #ddd"
</iframe>
You will have to replace the src url with your link to use your form so don't forget to do that!

Final Notes and Thoughts
While it may seem like this took a lot of time to get a working contact form, it really isn't as bad as it may seem. You can either create your own form at no cost or, go pay for a 3rd party service that may or may not be collecting all the emails coming through the form. You will never know.
There are a couple caveats of using NocoDB as a contact form. The subject of the emails and context cannot be modified. So the emails will always have a subject of NocoDB which for me, is quite fine and I'll always know where the emails came from. Now, there may be a way to change that by modifying NocoDB internal files then building the Docker image yourself... but that is a bit beyond the scope of this guide. 😆
Check out NocoDb on Github and be sure to give the project a star!


Discussion