XBackBone and ShareX - A Self Hosted Lightshot Alternative
Setup XBackbone with ShareX for your own self hosted screenshot and screen recording host.
Have you ever wanted to host your own version of Lightshot where you could take a screenshot or short recording of your screen and have it automatically uploaded to your own image host? Yep, there's an app for that too! Well, not an iPhone app but a self hosted app none the less.

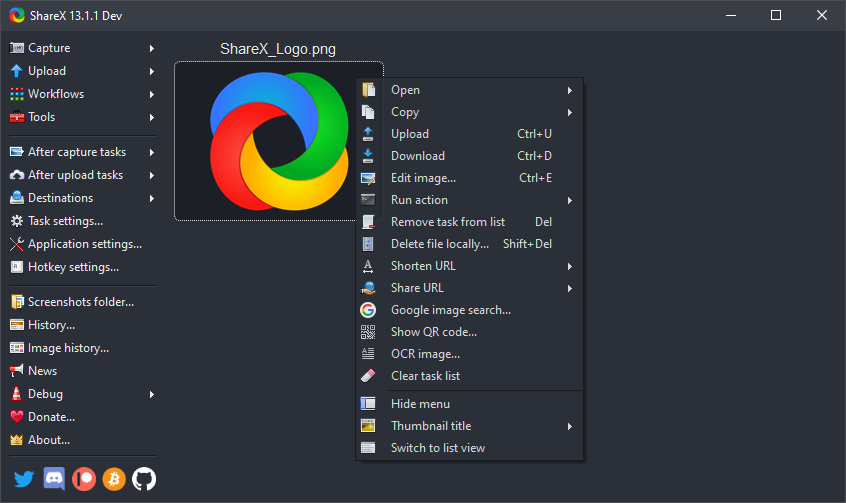
XBackBone works in conjunction with Sharex to give you a complete solution for screenshots, desktop recordings and even text snippets. It even lets you right click on any image or file and upload it with a single click to your server.
Install ShareX on Your Desktop
First head over to the ShareX website to grab the latest copy of the software. This is the software that does all the work. Don't worry, it's free AND open source!
Install XBackBone using Docker Compose
You can use Portainer to simply drop this Linux Server compose stack in and have it up and running in just a few clicks. This is what will do the hosting for your files.
services:
  xbackbone:
    image: lscr.io/linuxserver/xbackbone
    container_name: xbackbone
    environment:
      - PUID=1000
      - PGID=1000
      - TZ=Europe/Oslo
    volumes:
      - /path/to/data:/config
    ports:
      - 80:80
      - 443:443
    restart: unless-stopped
Import the XBackBone Client Configuration
Once installed you have to head over to your profile to download the config file for ShareX. This will allow us to join them together so we can upload files automatically to XBackBone.
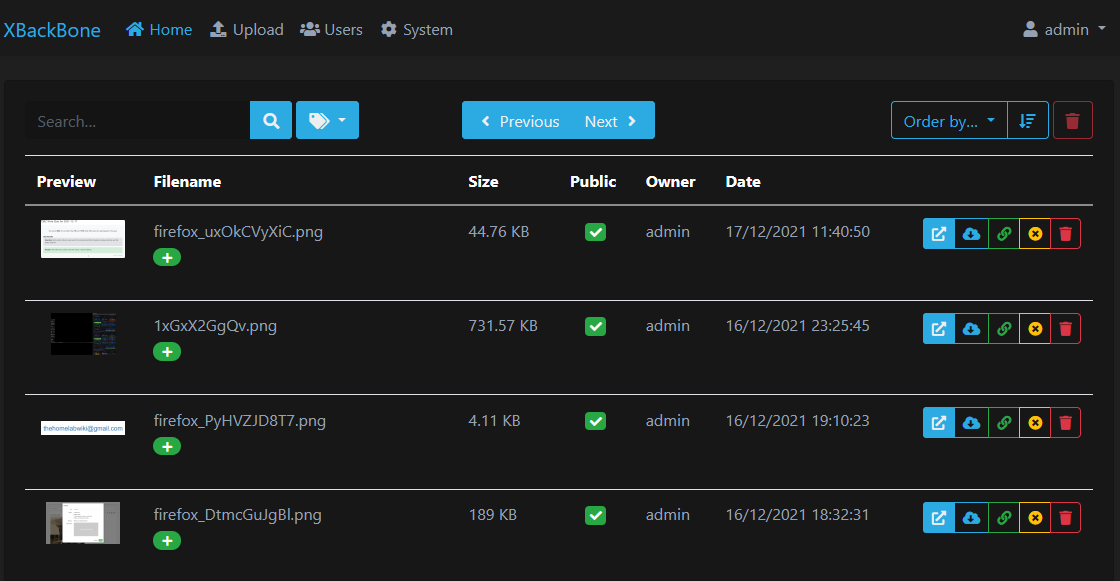
You can click the image above to see an example of a hosted image on my server.
Save the config file to your desktop or download folder then open the ShareX custom uploader settings. You can get there by right clicking the ShareX icon in your system tray.
ere by right clicking the ShareX icon in your system tray.
Now import the file you downloaded from your XBackBone dashboard like seen in the image below. This will automatically fill in some details like the XBackBone ip or domain you are using. I use a domain name but this can also be done locally on your network.
Be sure to choose the uploaders on the bottom left side that you want to use. Once you are finished there, you can try it out but taking a screenshot using your hot key or by clicking the icon in the system tray.
Test and Enjoy!
If you use a domain name, you can now share the image link in discord or anywhere you want. Now lets try text on a page. This can be done by using the Chrome or Firefox addon for ShareX.
Check out the text syntax example here.
Now you never have to worry about your images disappearing because this puts you in complete control. If you don't want to use your own image host such as XBackBone, ShareX also allows uploading to other 3rd party image hosts and paste bins. And if you are a Linux user, it also supports Screencloud and Linux Script.


