How to Protect Self Hosted Login Pages using Cloudflare Zero Trust Policies
Protect your Self-Hosted, SaaS and Private applications with Zero Trust policies. Only users who match your policies will have access to your configured applications.
Many self hosted apps have basic authentication and are susceptible to brute force attacks. Cloudflare offers a solution called Access Applications. Access Applications allow us to use some form of authentication in front of our already built in basic authentication.
Table of Contents
Today I will focus on the One Time Pin Access. Cloudflare Access can send a one-time PIN (OTP) to approved email addresses as an alternative to integrating an identity provider. You can simultaneously configure OTP login and the identity provider of your choice to allow users to select their own authentication method.
If you are not using Cloudflare Zero Trust for your domain management, please see our article about how to Setup your Domain using Cloudflare Tunnels and Zero Trust before moving forward here. You cannot add Access Applications to domains that are being managed outside of Zero Trust.
Let's dive right in and get started. Make sure you are logged into the Zero Trust dashboard.
Setting up Authentication
First thing we have to do is go into settings > authentication then make sure we have the One-time PIN in the Login methods section.
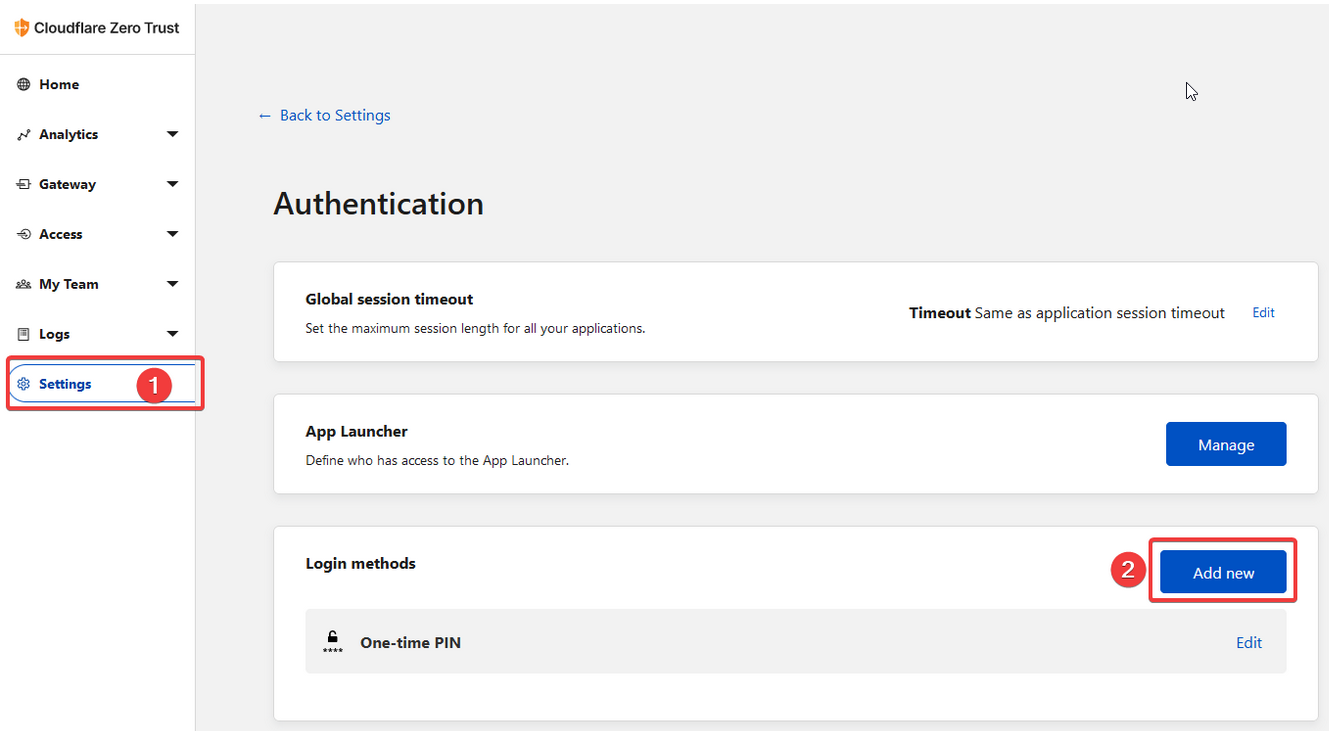
If you don't see it there, click the "Add new" button and add it from the list of options. There is no further setup required from this screen.
Since we already added our Cloudflare tunnel and public hostname, we can skip that part and go right to the application builder. If you need help adding your public hostname, I will again, refer you to our previous article about how to Setup your Domain using Cloudflare Tunnels and Zero Trust.
Create a Access Application using One-Time PIN
On the left side, click "Access" to expand the menu, then click "Applications".
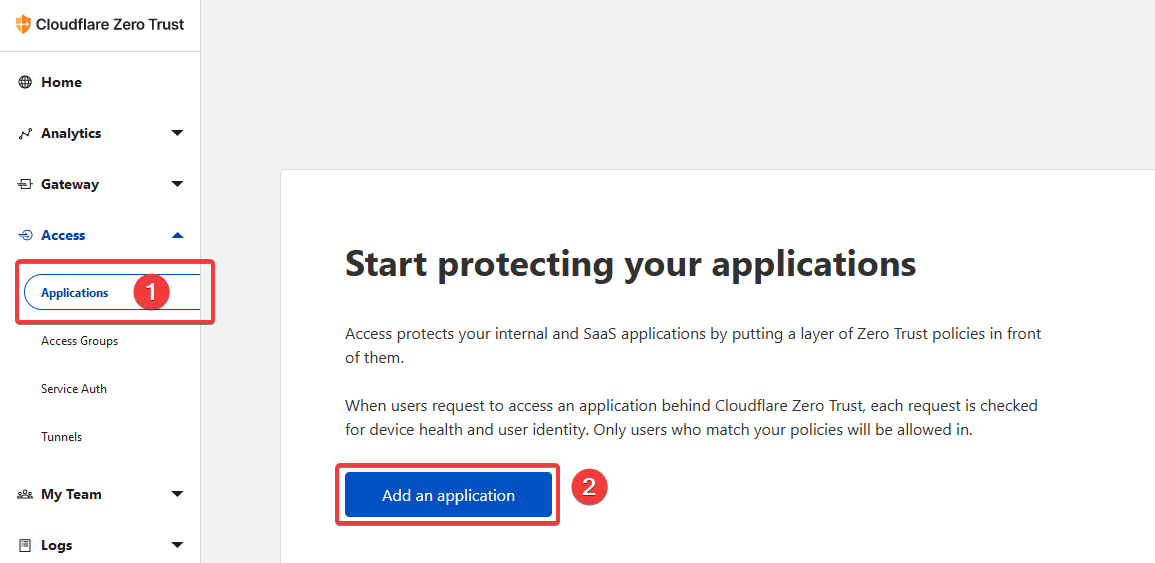
Here we will begin creating our Access Application using the One-Time PIN.
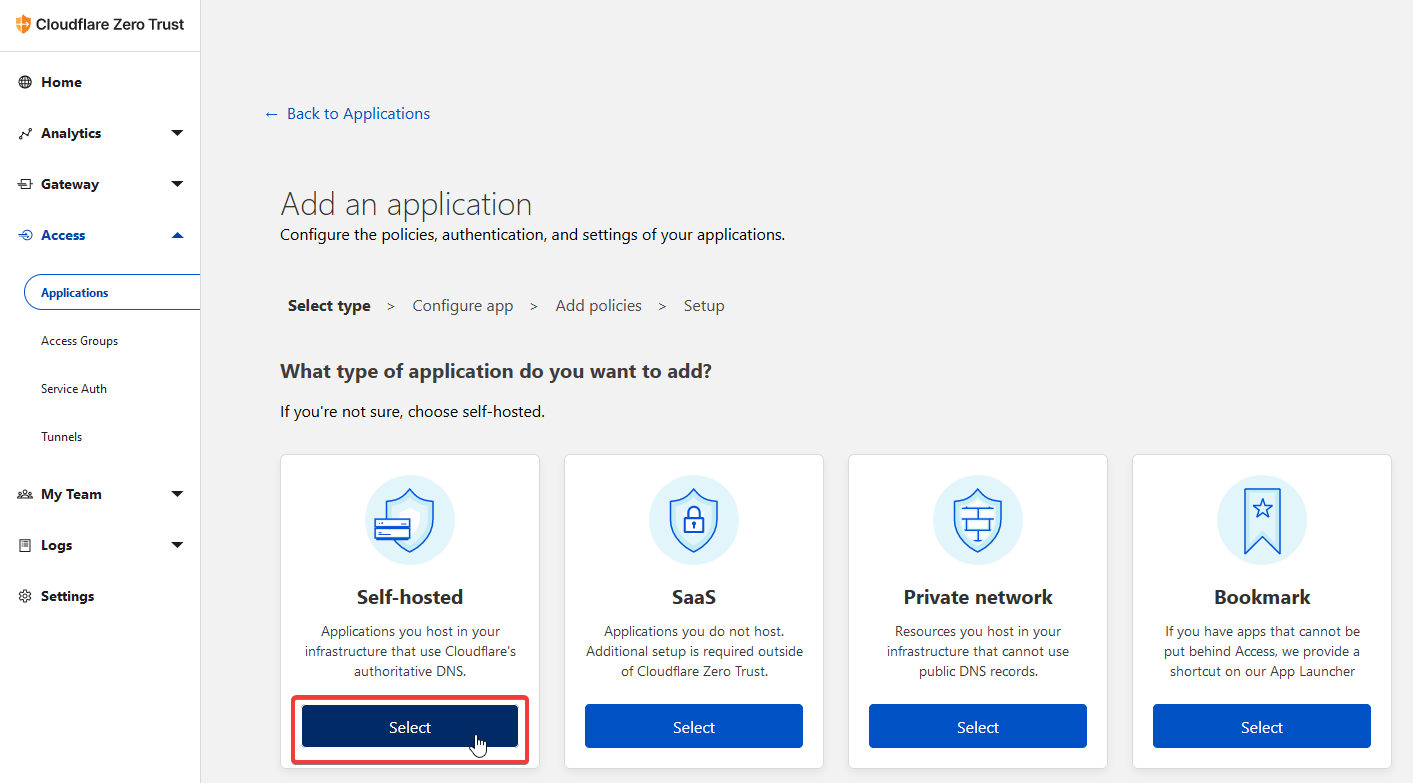
Click the Self-hosted option and continue.
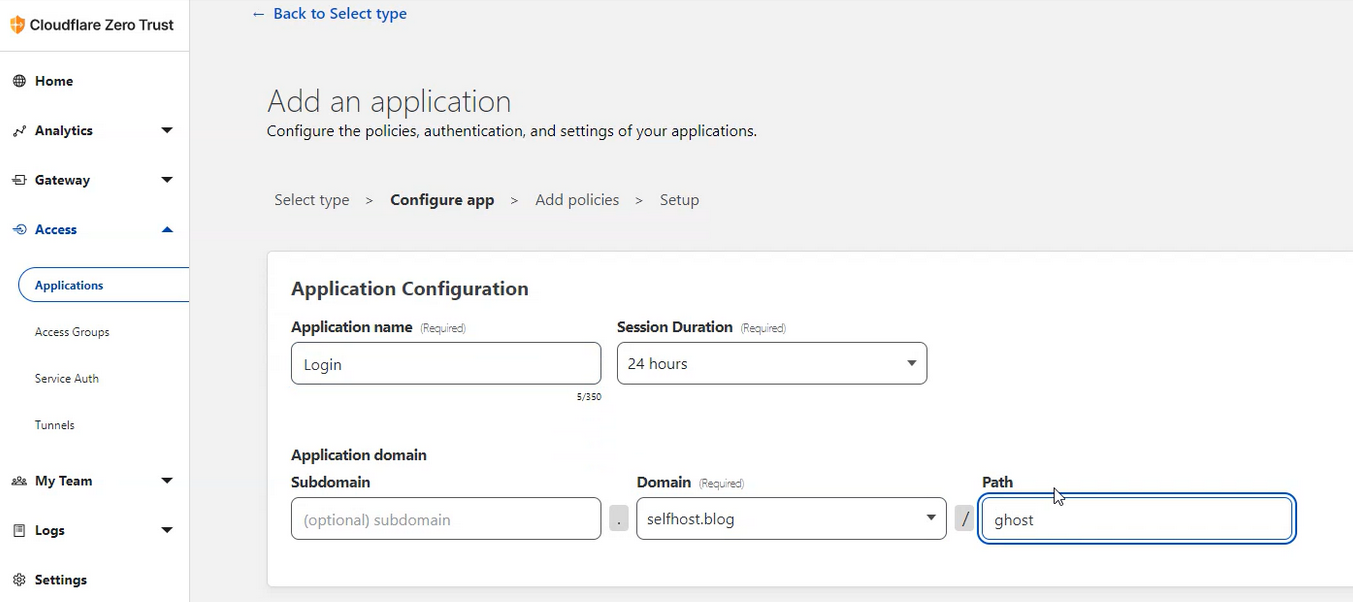
Give the application a name. Since this is for my Ghost blog login page I just named mine "Login".
Under Application domain, choose your domain name and then the path you want blocked. For Ghost, the admin page is /ghost, so we will be adding the access application to that specific page.
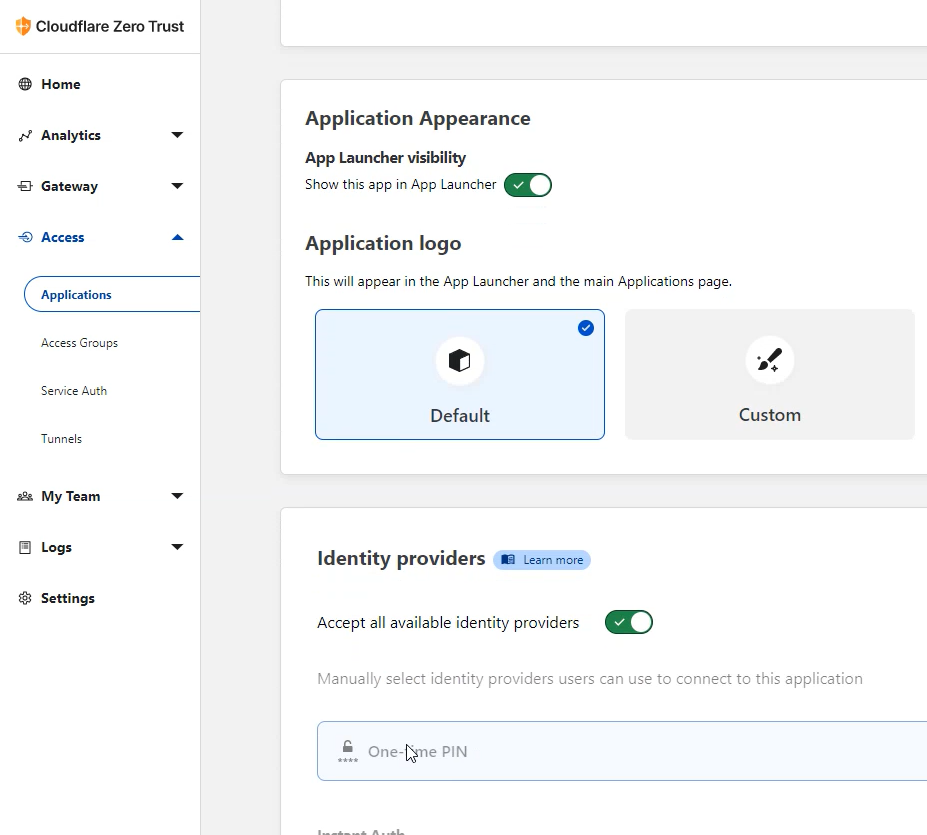
Now at the bottom under Identity providers you can see the One-Time PIN option there. We can leave everything else how it is for now and click "next" at the top.
Give the policy a name. I named mine Login again. Action can stay as Allow.
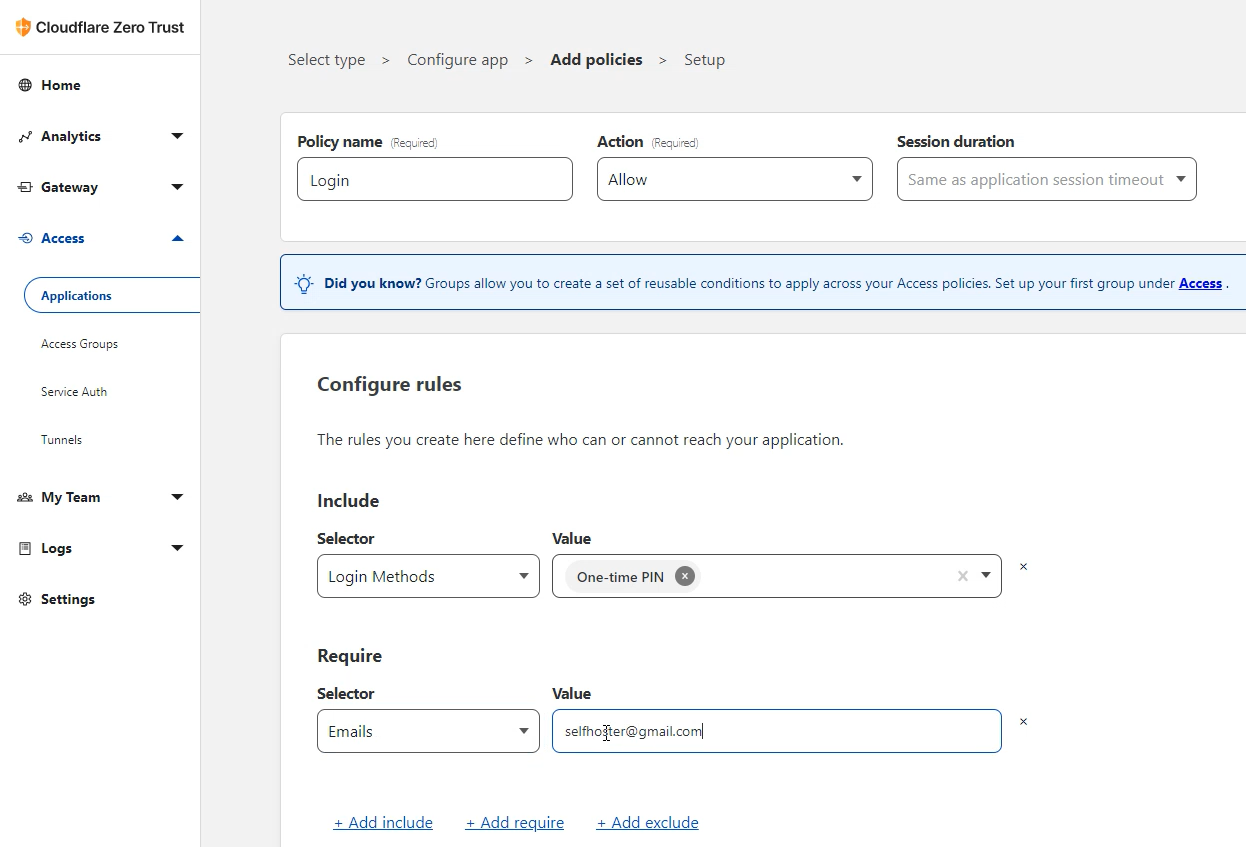
Configure the rules by adding the Login method then choose One-Time PIN as the value.
Click +Add require, choose Email, then type your email address in the value field.
Click next and then next on the top right then click the Add application button.
Now under applications you will see the application you just created.

Let's go over what we just did here. This means when you access your Ghost admin and see the form to send the email to, only your email will be sent a One-Time PIN. Anyone can enter their email but only yours will be sent the code. 🚀
Visit your Ghost admin page and try it out!
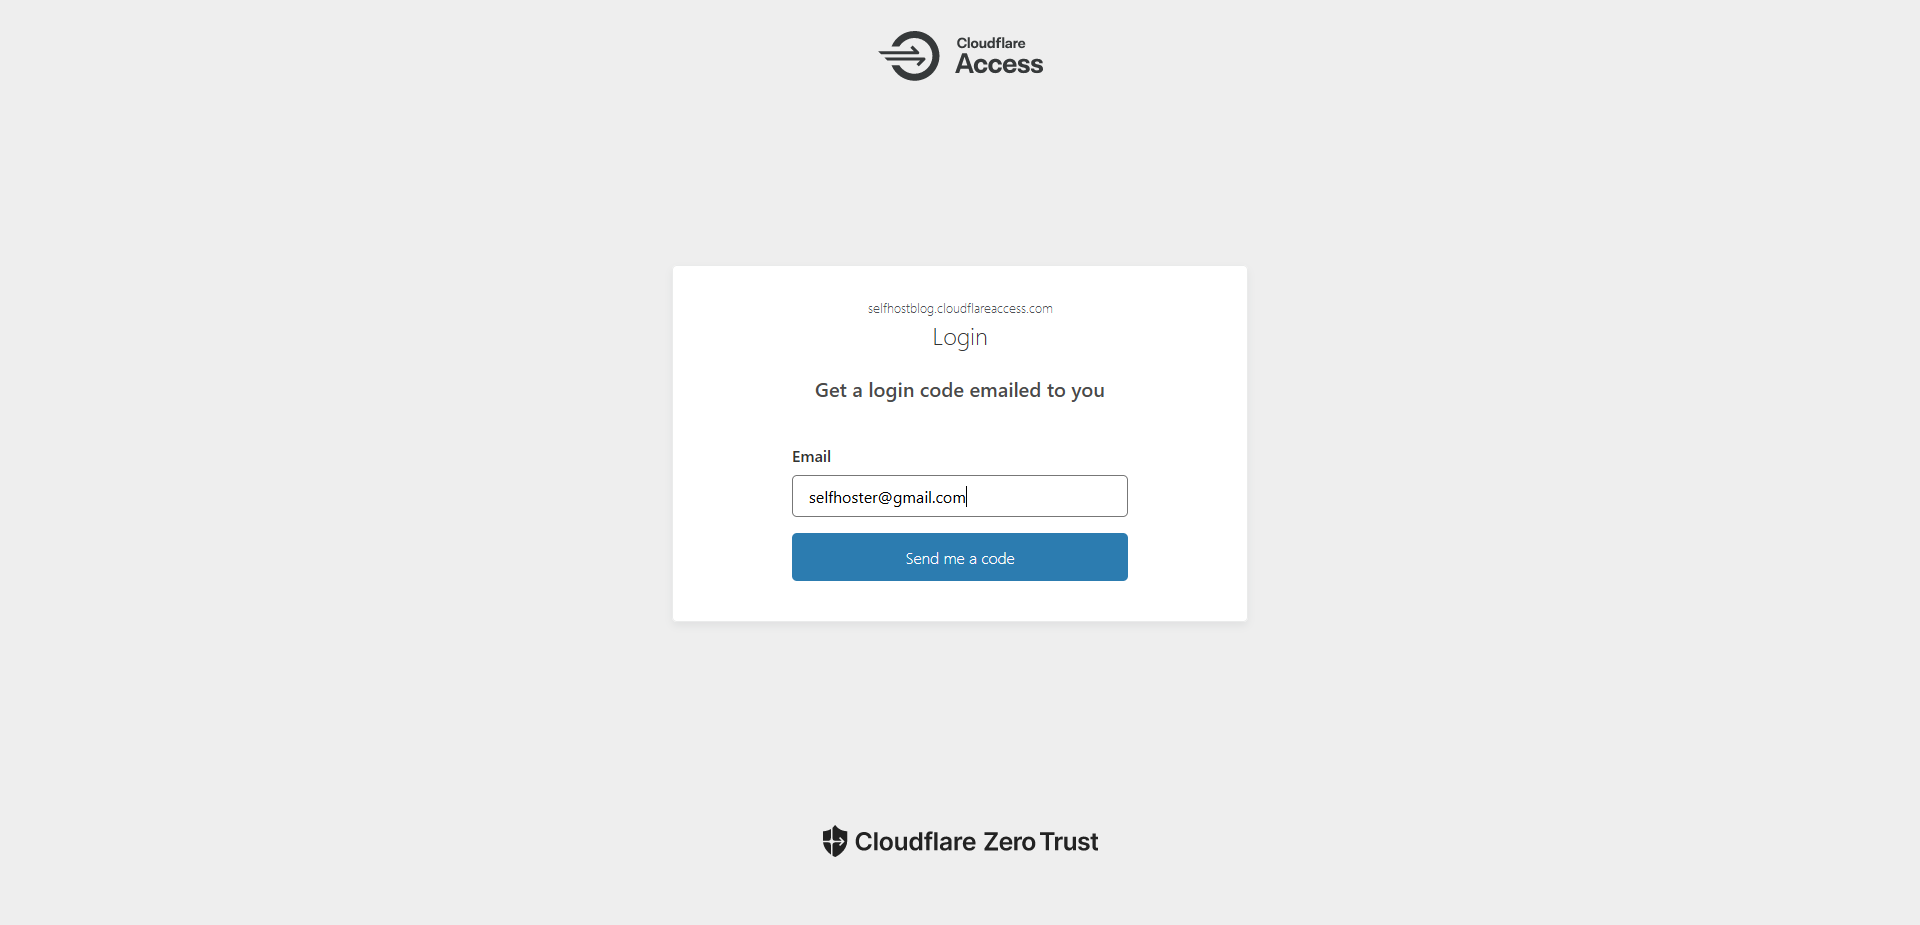
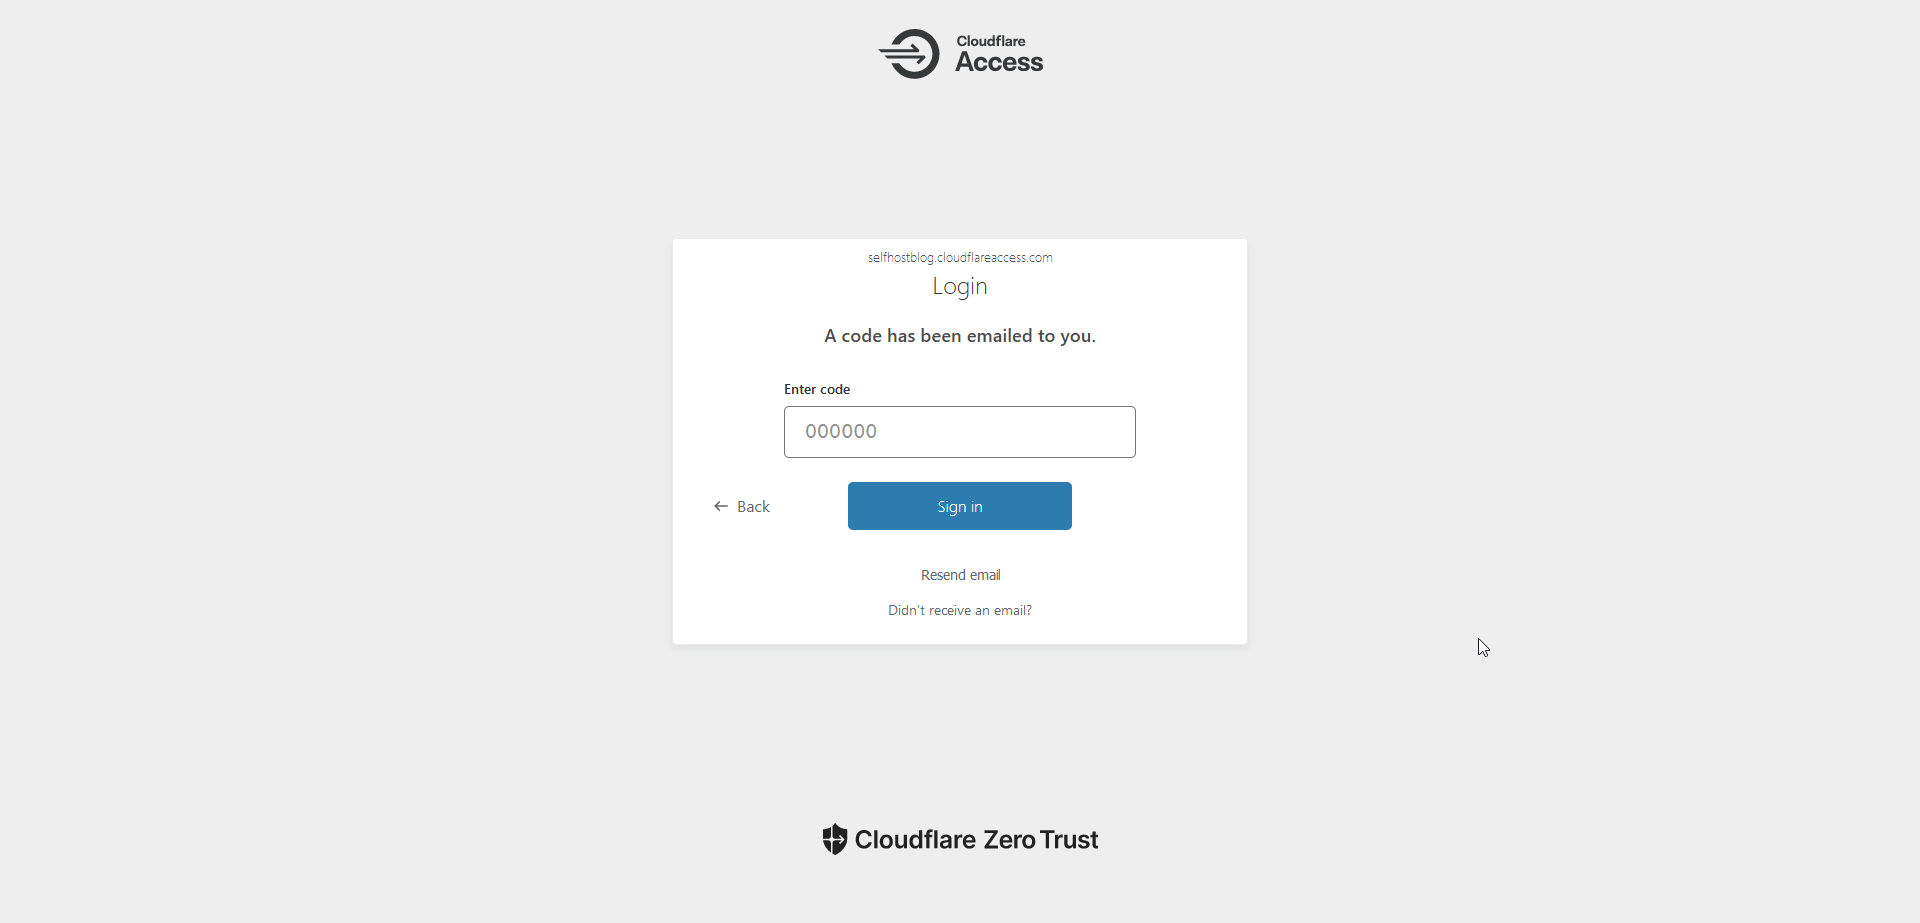
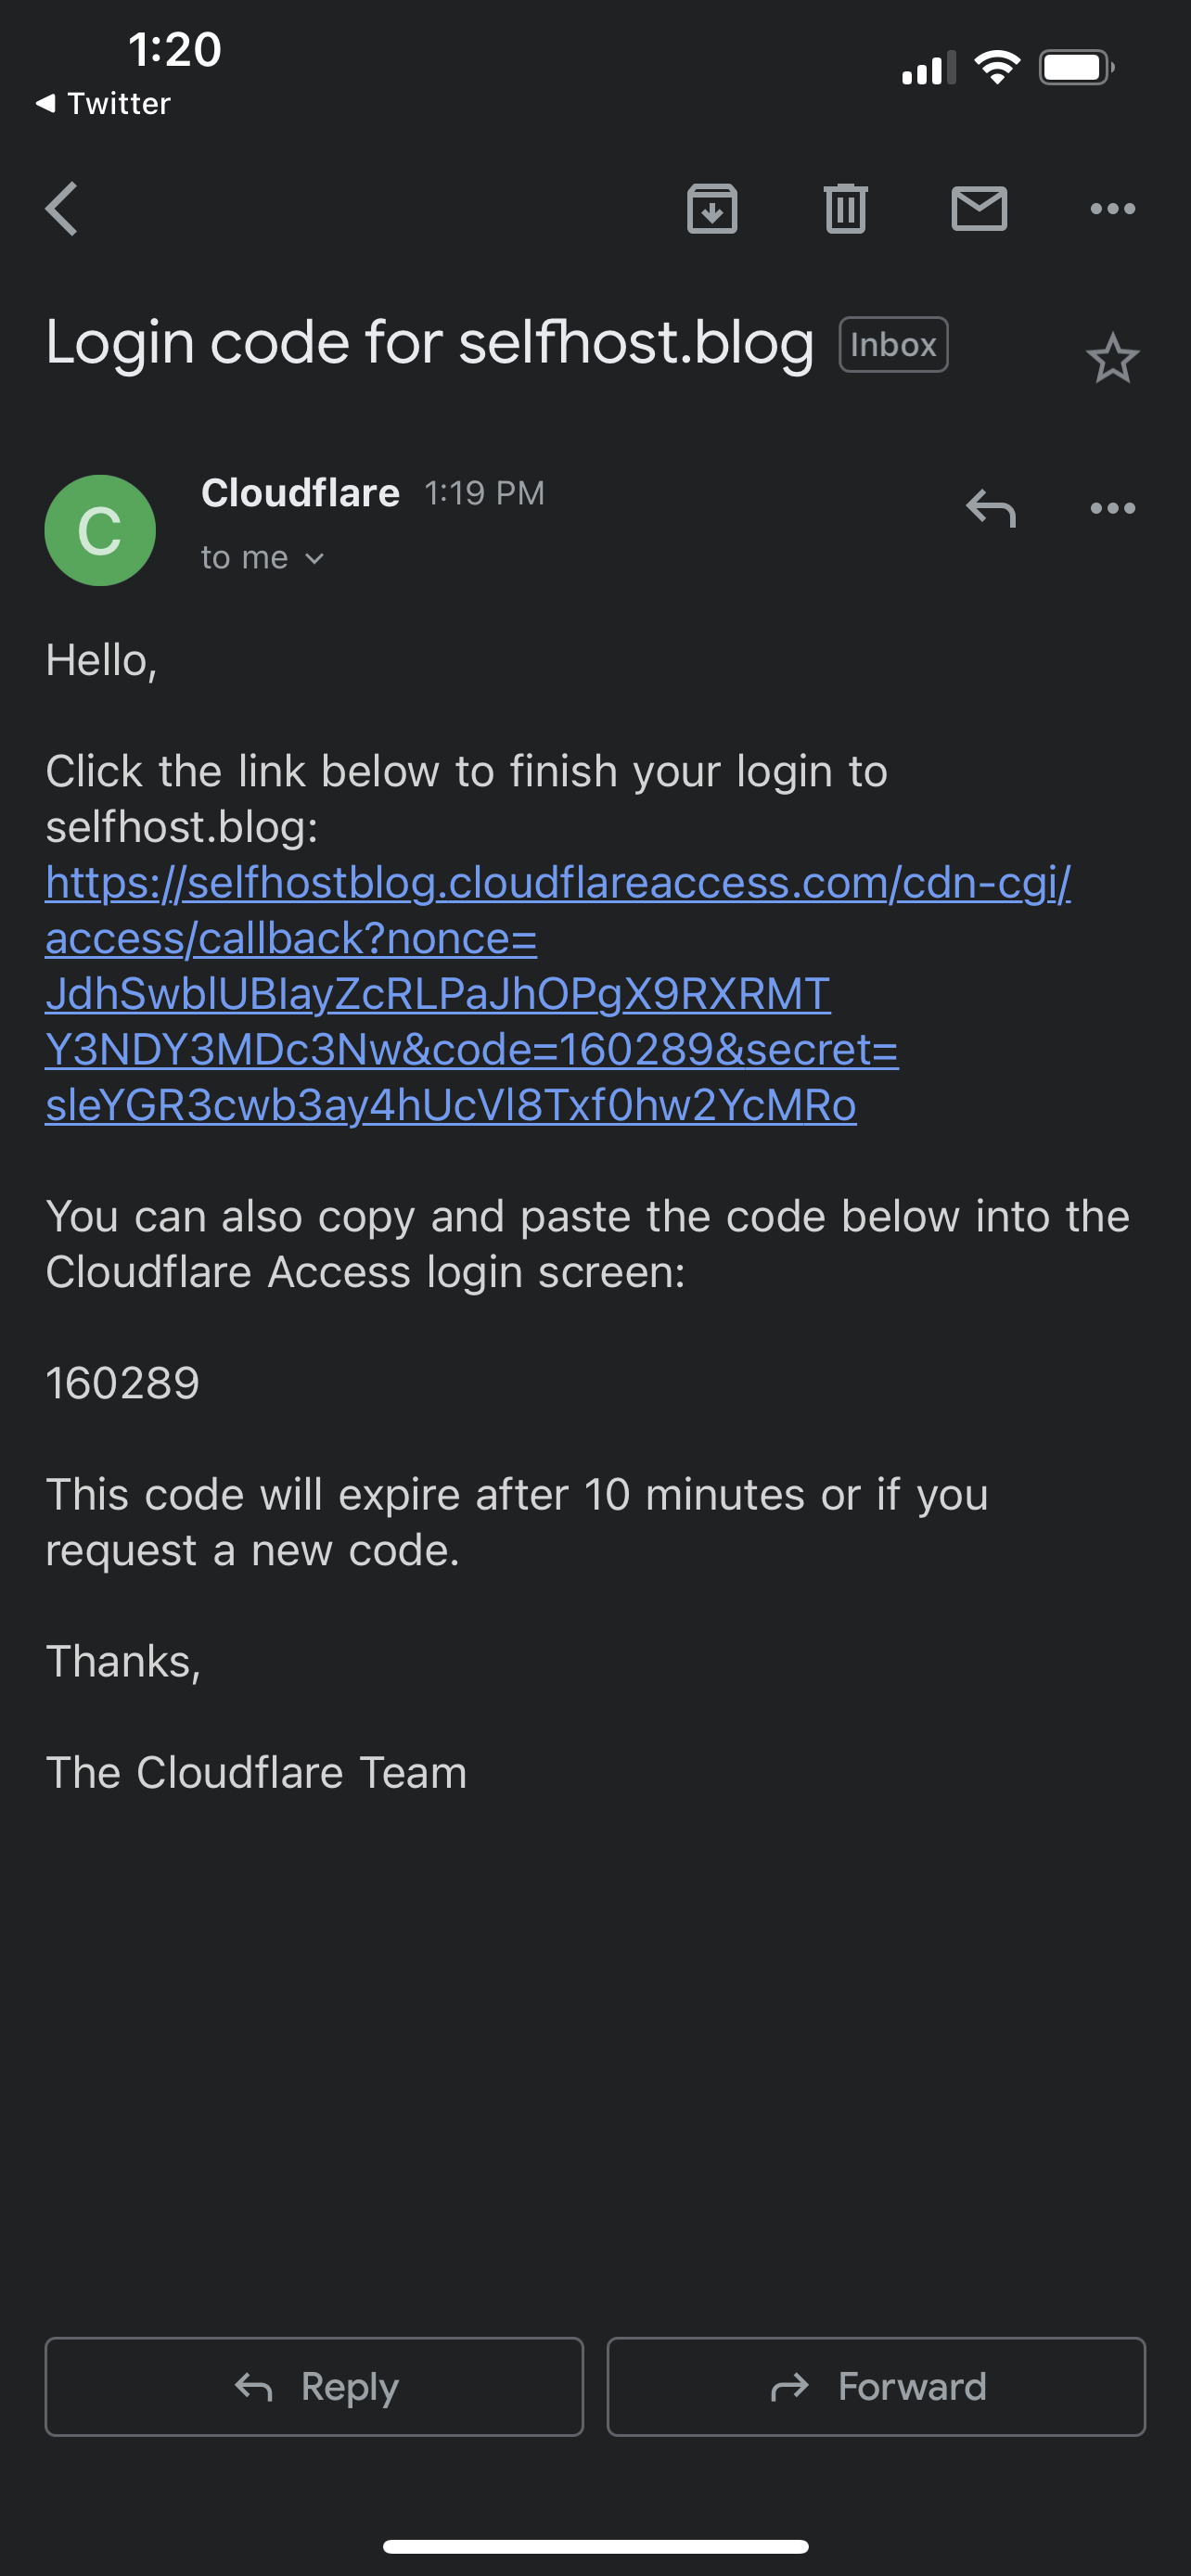
I get the emails usually almost instantly but never have to wait more than a few seconds.
Final Notes and Thoughts
The One-Time PIN access application is a great way to add another layer of security in front of you public facing applications. This can be used in a verity of ways. There are multiple authentication methods you can choose from but I find the One-Time PIN to be the best option for my use cases.


