

Imagine having a clear overview of all your files and their storage usage. With Diskover, you can instantly see which files are using the most space and then search for them with ease. Today we will cover the basic features Diskover offers for free and see if it's a good solution for your needs.
What is Diskover?
Diskover offers a quick, at-a-glance analysis of file sizes. It leverages the power of Elasticsearch to index and search your files, allowing for rapid data retrieval.
Diskover offers way more than that but most of the core features are behind a paywall labeled as either "Essential" or "Pro". We will discuss more later in the article. This will cover the Diskover Community Edition features.

What are the Diskover Community Features?
- Crawl and index data sets or "Indices"
- Search entire indice with with multiple search filters and granular search options
- File sorting by size, date, owner, user, group, number of files, number of folders
- Diskover-web CE (Community Edition) is limited to selecting and searching one index.
Installing Diskover using Docker Compose
I'll be using the Linux Server Diskover Docker image provided on their website.
version: '2'
services:
  diskover:
    image: lscr.io/linuxserver/diskover
    container_name: diskover
    environment:
      - PUID=1000
      - PGID=1000
      - TZ=America/New_York
      - ES_HOST=elasticsearch
      - ES_PORT=9200
    volumes:
      - /docker/diskover/config:/config
      - /mnt/media:/media
    ports:
      - 8015:80
    mem_limit: 4096m
    restart: unless-stopped
    depends_on:
      - elasticsearch
  elasticsearch:
    container_name: elasticsearch
    image: docker.elastic.co/elasticsearch/elasticsearch:7.17.22
    environment:
      - discovery.type=single-node
      - xpack.security.enabled=false
      - bootstrap.memory_lock=true
      - "ES_JAVA_OPTS=-Xms1g -Xmx1g"
    ulimits:
      memlock:
        soft: -1
        hard: -1
    volumes:
      - /docker/diskover/esdata:/usr/share/elasticsearch/data
    ports:
      - 9200:9200
    depends_on:
      - elasticsearch-helper
    restart: unless-stopped
  elasticsearch-helper:
    image: alpine
    command: sh -c "sysctl -w vm.max_map_count=262144"
    privileged: true
Elasticsearch will need to be able to write to the /usr/share/elasticsearch/data directory mounted as a volume within the stack above so be sure to give that folder proper permissions.
Mount the Volume to be Crawled by Diskover (Elasticsearch)
Notice the volume I mapped /mnt/media:/media? This is the data that will be crawled and analyzed. You can create one for the directory you want to analyze. The directory on the left is where it is on the server and on the right side of the colon is within the container. Later we will use the container directory as our crawl location in the command we use. It will all make sense soon, I promise!
Since I used port 8015 as the Diskover web interface, I'll go there to view the page. You will be presented with a page that looks like this.

You can log in using username: diskover and password: darkdata as the default credentials. It will prompt you to change the password right away. Then you will see a page that looks like this.

If you see a red error about Elasticsearch for port 9200 then you forgot to give write permissions to the folder I mentioned earlier. Do that then restart the containers and visit the IP of your server on port 8015. If you just refresh the page, it will continue to show the same error because it uses a redirect.
Scan the directory using the Diskover Command
Now before proceeding forward we need to run a crawl command in the server terminal where you installed Diskover. This will setup an "indice" in order to view your files.
docker exec -it diskover python3 /app/diskover/diskover.py -i diskover-all-media /media -fThis command will run the crawler inside the container where diskover-all-media is the name of the indice and /media is the directory being crawled. This is the directory we mapped in the Compose stack earlier.
Please note: You have to use "diskover" as a prefix in the indice name or it will not work. So it will have to be diskover-comics or diskover-files or diskover-data or diskover-media for example.
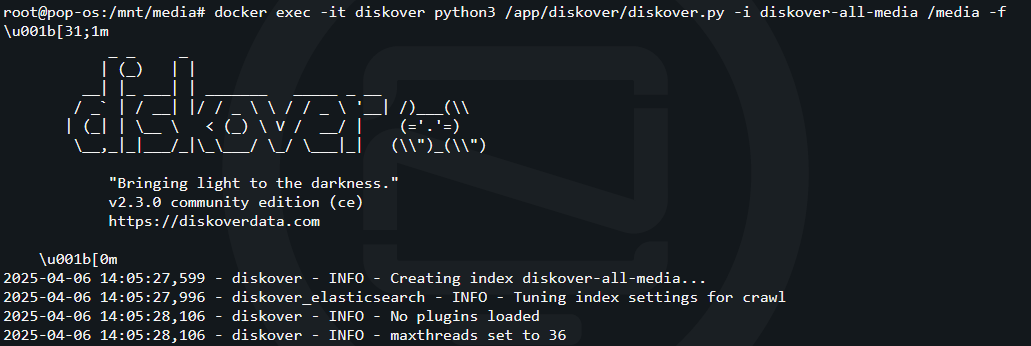
The -f flag on the end of the command tells Diskover to force the crawl even if the indice already exists. This is something I had to do in order to setup an automated cronjob. I was getting an error telling me that the indice already exists and learned I had to use the -f at the end of the command in the cronjob.
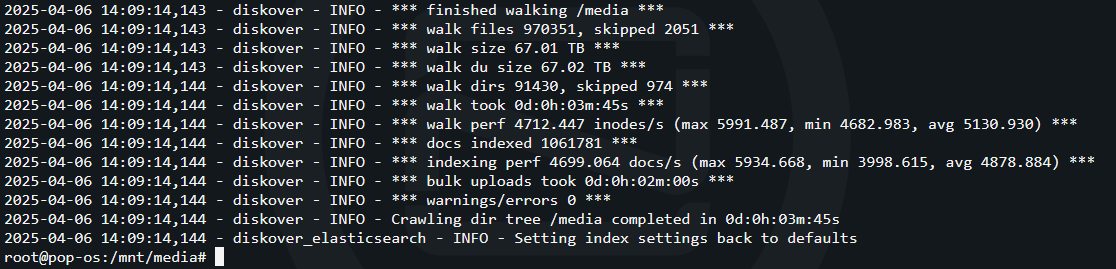
Here we can see the crawl is complete. It took 3 minutes and 45 seconds to crawl and index 970,351 files on the server. Not bad!
Enable the Indice and view the Results
Now that the crawl is completed, go back to the Diskover webui and click on "Reload index page". You should see a page like this.

After selecting the indice you created using the command, click the ‘Save Selection’ button. This will take you to the dashboard, where you can view the analysis of the files within that index. The dashboard provides basic information, including the number of files and directories, and the largest files in the dataset.

Clicking on the folder icon at the top will give you a folder view of the files in that indice where you can sort by size, date, etc. Here you can browse the folder structure and view details about folders and the files within.

Searching for Files in Diskover
I thought this needed it's own section because of how awesome the search feature is in Diskover. Harnessing the power of Elasticsearch, you can search your files using a simple quick search, or further refine the search using the built in search filters.
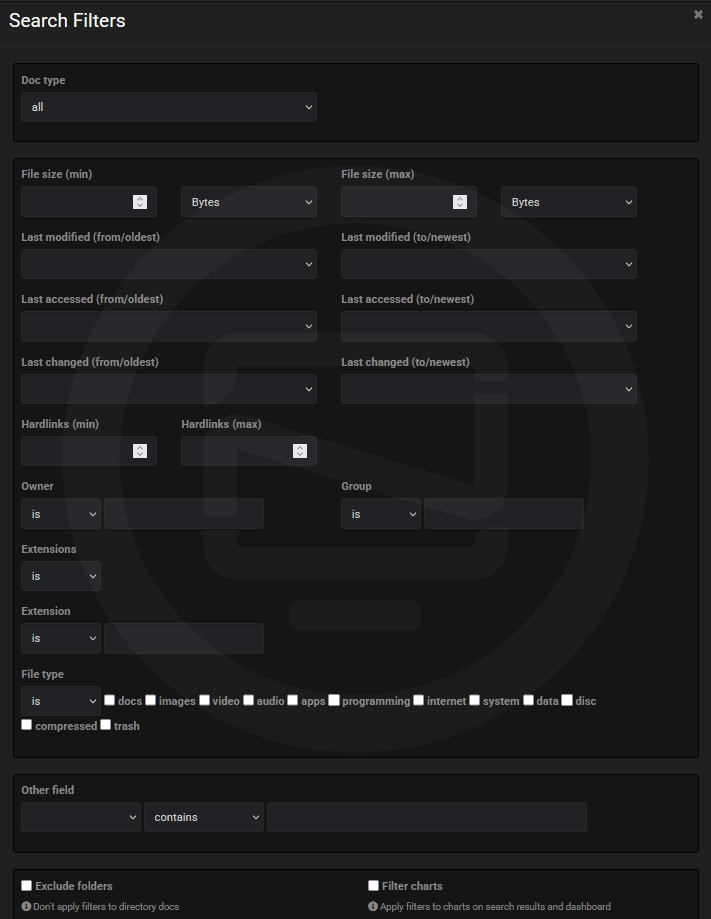
And using the "Quick" search filters by size and date.
It’s disappointing to see that the ‘Duplicate files’ option is paywalled, and it seems that any substantial feature is locked behind a paywall. However, the search filters alone are a genuinely useful tool.
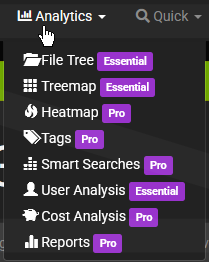
“Clicking the ‘Analytics’ link at the top leads to paid features. Unfortunately, these features are not displayed with pricing, and you’ll need to contact the company directly for a quote.
Also worth mentioning, is the Task Panel is also a paid feature. So you will have to do all of the automated scans via cronjob or manually.
Final Notes and Thoughts
I really appreciate the free features Diskover Community Edition offers. The ability to quickly see file sizes and search within my own server is more than enough to make Diskover a useful tool. The built-in Elastisearch search functionality allows for quick identification and retrieval of specific files. While the interface is simple, it’s worth considering if its basic features meet your needs for file management.
I did send an inquiry for Essential and Pro features a few days ago and have yet to get a response from Diskover.
UPDATE: Almost immediately following publication, a response arrived.
Thank you for being passionate about Diskover. Just to clarify a few things: Diskover is designed as an enterprise-grade solution, and pricing for the licensed editions varies depending on the size of the environment, scale, and specific use cases — which is why, like all other data management solutions out there, we don’t list fixed prices publicly.That said, the Community Edition was created specifically with home users in mind. It’s completely free to use, with no expiration, and includes core indexing and search capabilities. We appreciate your interest in exploring more advanced features, however, the licensed editions are tailored for organizations with complex data environments. Let me know if you’d like someone from sales to contact you to discuss this further. Have a great week.
Following a discussion with a Diskover team member on Slack regarding pricing, I now understand the rationale behind this structure. While I appreciate the explanation, I still have concerns about why file-related features are also paywalled, alongside the entire sub set of analytic features.


Discussion